Thursday, September 23, 2021

Anatomic breastplate for Caj (Gustav's horse) glamour shots

 In February when I had to sign on the ship, the Covid 19 restrictions required that I had to go to Norway and sit for 10 days in a quarantine hotel before flying with the rest of the crew down to Tenerife to meet the ship.  As you might remember, I made a breastplate of leather instead of sitting idle all the time.

When I came back, Gustav tested it and found that a few of the pieces were a bit too long. This time while at home I found the time to fix those small things, and I snapped a couple of glamour shots of the breastplate mounted on Caj.

For some reason my inadequate camera skills have made it look like Caj is a small horse. That is not the case! He measures 1.72 m above the shoulders (17 hands).


Gustav and Caj

Anatomic breastplate 


Could I come outside please?


Wednesday, September 15, 2021

New gable on the barn completed

After a long period with fantastic weather, I decided that I'd better pull my act together and complete the gable before I would have to do it in rain and wind. 
I am not sure why I didn't really feel so excited about this job since normally I like to do carpentry jobs such as this one. 

Nevertheless I got the last boards installed, and managed to make a decent closure of the upper part of the gable too. That one had to be a bit different due to some of the original framing of the barn extending farther out than the rest. 

I applied some zinc drip edges on top of the doors and on top of the lower part of the opening for the sawmill, to prevent water from entering the end grain of the wood.

Since the boards were planed and not just rough sawn as they would have been if I had milled them myself, I found some oil based paint in the standard Swedish red colour. Painting didn't take much time, and it all suddenly looked a whole lot better. I have to admit that it could use a second coat, but I can do that some other time.

I still need to install some plywood on the inside, as Gustav and I had decided when we started the project. The idea is that we can each paint our logo on the plywood, and that should hopefully look good.


Completed gable at the North end of the barn


Thursday, September 9, 2021

Stitching horse completed

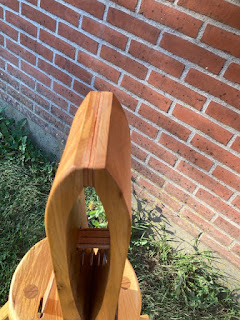
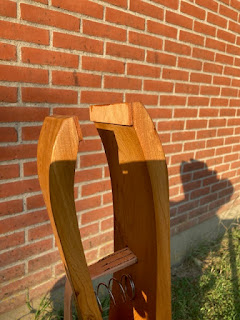
 After completing the much too large and complicated glue up, I made a jig so I could mark out the legs in the correct length so the seat height would be 24" instead of 30 something. 

I turned a foot operated lever out of some sycamore that was left over from an earlier chair building extravaganza, and though the plans suggest a plain square piece of wood, I thought that it would look nice with a turned lever. 

Last time on board, I had made some hardware just in case that I would find the time to build this very project, Making the hardware itself was not a big deal. I think that realistic I used maybe one and a half hours in total on making a set consisting of a toothed part, a catch to engage the toothed part and finally a U shaped piece to hold the end of the lever.

I used a chisel and a spokeshave to chamfer all the legs and stretchers, and finally it was sanded to grit 180. Before applying a finish, I stamped my Newf & Gambrel logo onto the underside of the seat, and chiselled MMXXI which felt nice to be able to do after not having made anything for so long.

The instructions suggest that you give the stitching horse a coat of shellac, so that's what I did. Actually I gave it two coats. Between the coats and after the final coat, I rubbed the surface with steel wool. As a final touch I gave it all a coating of Mel's Wax made by Don Williams. This stuff is really excellent!

Now I just need to find a leatherwork project that will benefit from me having my own stitching horse (or I could try to sell it).


Completed stitching horse

Marking jig for length of legs


Mel's wax, packing, product and clear instructions!


Hardware.


Monday, September 6, 2021

Stitching horse part 2

 I completed all the mortises and tenons for the frame of the stitching horse, and I even made a test assembly. Given that the legs are splaying, the frame and the seat will all have to come together at the same time, so that is going to be a bit of a challenge, especially since I don't like complicated glue ups. The legs are left overly long. My idea is that if anything warps a bit during the glue up, I can still fix it if the legs are not yet cut to length.

All the individual parts have been drawbored, and I have made some 5 mm dowels using my Blum dowel plate that Alex from Austria gave to me some years ago. 

The instructions show a bit of extra shaping of the seat, so that your legs will not rest on any sharp edges, so that was another extra bit of work. 

I can feel that I haven't made much fine woodwork the last two years, so everything is going a bit slow compared to how I used to work, but I am also deliberately trying to take my time and enjoying making a project that I have thought of for a long time. 

For the clamp part, I found some elm, and the bandsaw made it easy to cut the curved shape. Instead of bolting the two parts together, I used some glue. I am pretty sure that it will be plenty strong enough, but if it isn't, then adding a couple of wagon bolts later on won't be a big deal.

The hinges for the clamp were some old black steel hinges that I found among some of the stuff that came from my parents summerhouse in Sweden. They look just right for the project and have almost no slack in them which is a huge bonus for this application. I couldn't bear to just mount them without letting them into the wood. It just looks so much better in my opinion.
I wanted to find some straight slotted steel screws for attaching the hinges, and that gave me an option to take a picture of my new inventory cabinets.  Those were made using parts from the old windows of my parents house, and I also used boards that came from my dads giant stock of wood to make the cabinets themselves. I still need to make some more shelves to fill in half of the cabinets, but that will have to wait for another day. 
My thought was that I'll make a stores room in the room next to the workshop, (where the big metal lathe is placed), then I can keep the workshop as a workshop instead of a combined store/shop. The big glass doors and a bunch of shelves also makes it easy to find different types of screws etc.

Dry assembly.

Test assembly upright.

Hinges ready for marking up

My inventory cabinets

Part of my inventory of old screws.


Thursday, September 2, 2021

Stitching horse

I have started doing a bit more leatherwork lately, and once in a while it would be nice to have some decent work holding for hand sewing.
Some years ago I made a clamp that you could hold between your legs, and while it worked, I never really liked to use it. 

So to get back into the woodworking mode and actually start using my tools and my shop again after a long period of essentially not doing any woodwork, I have started making a stitching horse. I found a plan for a really nice traditionally looking stitching horse in a pdf file of a book called "Farm woodwork". There are a bunch of nice projects in the book, some more useful than others, but an interesting little book nevertheless.

Gustav has been practising milling with the mulesaw, and he milled an old beech trunk, that I had left on the saw almost two years ago, and never gotten around to milling. Beech if not milled will very quickly develop black streaks inside a trunk. I don't mind it since it ads a bit of visual interest to an otherwise fairly boring looking wood (in my opinion). Anyway, one of those boards that were milled wasn't even in thickness along its length, and I decided to use it to make the seat of the stitching horse. 
I marked up the wood according to the plans, and sawed the curvaceous shape out on the bandsaw. A slanting mortise was chopped and I drilled 4 holes for the legs. 

The legs were made from some ash that I had milled several years ago and never found a use for. I'll turn a round tenon on the ends of the legs that will go through the seat. But this was about as far as I got today.

Double pear shape

Seat and legs + stretchers