Showing posts with label Carpentry. Show all posts

Saturday, August 2, 2025

Windows for the leather workshop

 Two years ago, I started rebuilding our old greenhouse into what will eventually become the new leather workshop. 
We haven't used the greenhouse for a couple of years, and it had started to look kind of shabby. By rebuilding it, I could make something that looked nice, and I would end up with a dedicated workshop for my leather sewing and horse blanket repair tasks. It will give me a place to put my leather sewing machines, and thus free up some space in the regular workshop. And frankly sewing machines are better kept in places that are not filled with sawdust.

Back when I built the greenhouse, I overbuilt the rafters (and pretty much everything else), but that meant that it was just a matter of removing the glass from the roof, and install laths and clay tiles. The tiles are those old ones from our house that I still had some left of.

The windows that I am making at the moment will replace the original ones in the brick wall. Originally the house was built as a retirement home in 1948. It was converted to a machinery shed sometime in the late 50'ies or early 60'ies. I incorporated the northern wall in the greenhouse, and now in the leather workshop.

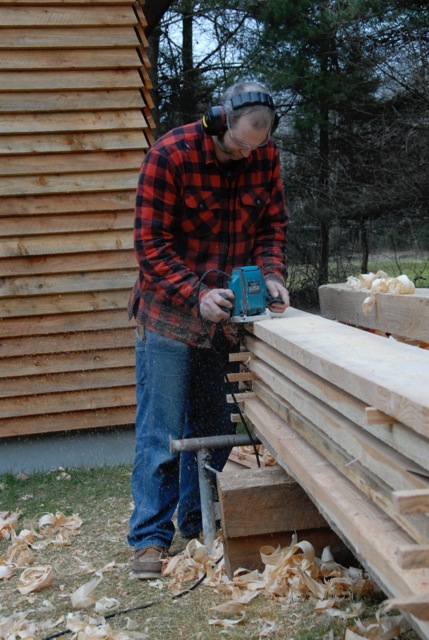
I am making the windows as a mixture of traditional and modern. The traditional part is that I am dovetailing the corners, and the modern part is that I install the glass using wooden strips and modern sealer tape instead of glaziers putty. 

When I make large dovetails, I use the (for Denmark) traditional rule of 1:6 slope in softwood. That gives a visually pleasing dovetail that works well even in 2" thick material. If I had used the 14 degree version, the dovetails look weird due to the thickness of the wood.

The first window is roughly 48" x 40", the second window is 48" x 64". 
64" is difficult for me to make dovetails on the ends of. So I had to make a small step up, just to get me a bit higher up, but still sawing in a weird position isn't super easy. 
Anyway, it ended up looking pretty good, and it is for a window that will be installed, so the next person to see the outside of the frame will be the one who removes it sometime in the future, and I doubt that it will be me :-)

Traditionally the reveal around a window frame was filled with regular mortar like what you would use for laying bricks. In order to maintain tradition in that point, I also made a V groove all around the frame. This is so the mortar will have something extra to adhere to, and also to prevent a draft of cold air to seep by if the window frame shrinks in very dry winters.

The small window completed.

Dovetails and the V groove is visible

The big window. (The piece of Fermacell drywall will be removed)

First side of the dovetails, I leave the ends so they will support the wood, when I chop from the other side.

From the other side, I remove the wood like this.

Less than ideal working conditions. Small step up in front of the workbench.

The basic frame for the big window is glued up. (I dislike large glue ups..)


Thursday, August 8, 2024

Journeyman's certificate as a carpenter

 About a year ago, Gustav completed his exam as a carpenter and got his journeyman's certificate.

Needless to say, I was as proud as a peacock. If I remember correctly, they had 2 days to complete their building assignment and then one day where they had an oral exam.

The building assignments are drawn by lots, and each holds to focus points. There are off course measurements that has to be observed and adhered to, and beside that they also need to make an assessment of the delivered materials and make remarks if they would have sent some of it back in real life if it is twisted or otherwise damaged. 
Gustav had to make an inside corner with a roof that has to be prepared for clay tiles, and the construction of a wall and an opening for a window.

For the oral exam, I think they also drew a lot and had to talk about that subject. Gustav got a question about moisture based problems in wooden constructions.

The building part is made as a small portion of a building to save materials. They have to show how the things are constructed, so they deliberately leave part of the wall and roof uncovered so the censors can see that they know how to place the sub roof and the wind breaker and insulation etc.

When all the projects have been examined, the tradition calls for that the families and the colleagues from the various companies including the masters meet at the school to congratulate and to have a look at the completed building assignments. 

Finally the next day, the school hosts an arrangement for the parents and the masters where the actual certificate is given to the new journeymen.

For someone like me who has got a bit of interest in history and traditions, it was awe inspiring to participate in the ceremony where the certificates were handed over. the certificate itself hasn't changed the last 100 years I think, and the feeling that this ceremony has been going on continuously for the last 500 years or more was just so amazing. The recognition of the fact that this small certificate means the same now as it did back then, and that it is recognized from Australia to Zimbabwe that a carpenter is someone who can build a house or a structure out of wood is just amazing.

Pedder from two lawyers toolworks gave Gustav an ebony handled dovetail saw with a German silver back. That was almost enough to make me want to be a carpenter!

In Denmark if you get straight A's at a journeman's exam, you will get a silver medal. The idea behind that it is not a gold medal is that no handcraft can be perfect, because perfection is divine. And even the most skilled carpenter can't see inside a piece of timber if there is a small defect hidden inside. and that is why silver is awarded as the highest recognition. (Gustav got a silver medal)

Gustav right after the oral exam
Two Lawyers Toolworks dovetail saw ready!!

Gustav and Martin Vester (the master carpenter)

Gustav and his building assignment.

Gustav with his new dovetail saw


Tuesday, July 30, 2024

Making a staircase

 Given my lack of blogging the last couple of years, I often forgot to take pictures of whatever little or large thing I have been making. And contrary to my earlier blogging where I tried to take logical pictures of the process, all I have at the moment is a bunch of pictures on my phone that shows a bit of the progress on various projects.

The company that Gustav and I have together invested in a house. The house hadn't seen much maintenance or modernizing in the last 30 years or so. 

One of the interesting details was a really narrow staircase going to the basement. The staircase was hidden inside a cabinet in the kitchen, so it looked kind of an entrance to the Bat Cave.
The problem with this layout was that the staircase was incredibly narrow. I think it was only around 18" wide. 
When we discussed the plans for our rebuilding, we agreed that we still needed a staircase to go to the basement. But it had to be a bit wider so that someone could carry a hamper with clothes to and from the washing room which we planned to put in the basement. 
Technically there is also a door and a staircase outside that leads to the basement, but I know that I wouldn't want to go outside just to go down the basement and then go back inside again. So that entrance is mainly for when you get home in the winter time covered in mud or soaking wet from the rain.

The limitations were the height of the ceiling in the basement and the spacing of the joists. The spacing meant that placing the new staircase in the other end of the kitchen would give us a width of some 36" (as far as I remember). We still had to make the staircase fairly steep in order for it to work without using too much floor space for the descending hole. Still it is not as steep as the original one.

I sawed some spruce for the sides and the steps and milled it all in the planer. 
The positions for the individual steps were marked, and I clamped on a batten and sawed to the intended depth. A chisel and a router plane made quick work of getting a dado that the steps could be seated in. Given that it is sort of a secondary room staircase, I felt that it was most appropriate to not go overboard in ornamentation and fancywork. So each step just received a nice little chamfer on all sides and then a couple of saw cuts  were made that would allow the front of the step to pass over the sides.

When all the steps were made and I had checked that each of them would fit, I transported the pieces to the house. I had figured out that if I'd assembled the staircase at home, I would most likely not be able to get it into the basement.

I swept the floor carefully where I was going to work, in order to avoid marring the sides of the stairs while working on it, and then I assembled it. Each step was glued and nailed in place using two large nails for each step. 
Technically screws would be easier and perhaps even hold better, but I think that large nails look the part on a staircase, and would have been the traditional way to do it in a house of that age anyway.

Once the staircase was completed and I had ushered it into place, the protruding ends of the steps were sawed off in something like a 30 degree angle. 

Test fitting in the workshop

The front of the staircase.

Assembling in the basement.

View form the backside of the staircase.

MMXXIII (2023)

The installed staircase.


Wednesday, September 15, 2021

New gable on the barn completed

After a long period with fantastic weather, I decided that I'd better pull my act together and complete the gable before I would have to do it in rain and wind. 
I am not sure why I didn't really feel so excited about this job since normally I like to do carpentry jobs such as this one. 

Nevertheless I got the last boards installed, and managed to make a decent closure of the upper part of the gable too. That one had to be a bit different due to some of the original framing of the barn extending farther out than the rest. 

I applied some zinc drip edges on top of the doors and on top of the lower part of the opening for the sawmill, to prevent water from entering the end grain of the wood.

Since the boards were planed and not just rough sawn as they would have been if I had milled them myself, I found some oil based paint in the standard Swedish red colour. Painting didn't take much time, and it all suddenly looked a whole lot better. I have to admit that it could use a second coat, but I can do that some other time.

I still need to install some plywood on the inside, as Gustav and I had decided when we started the project. The idea is that we can each paint our logo on the plywood, and that should hopefully look good.


Completed gable at the North end of the barn


Friday, August 20, 2021

New gable on the barn

 When I returned home from sea this Monday, Gustav suggested that we did some work on the northern gable of the barn.

The barn was originally designed so that you could drive straight through it, and unload all the grain in the middle where there was a pit and a grain elevator. Being of this design meant that both ends had large barn doors.

The southern one I replaced probably 10 years ago, but since the northern part ends in the paddock for the horses, making a new gable hasn't been high up on my list.

Gustav suggested a rather elaborate design where the inside would be covered in some thin plywood, so we would have a place to put our logos, and I couldn't really argue about that. Instead of the old one piece door, we are making it like a wall with a regular door and a double hatch to allow logs to be loaded onto the sawmill. It will be a major improvement over the old system, where I had to squeeze myself through the same hole as the logs, and I couldn't close up that hole, meaning that there was a lot of draft through the barn.


Thursday, January 3, 2019

Ash log Roubo project 1, preparing stock.

As you might remember, I bought an ash log just at the termination of the DCBE. I didn't have any specific plans for it, but I had to get it processed, since I have a beech log waiting in line for being milled, and since beech is not very rot resistant, I thought that I'd better get moving.

I have plenty of 2.25" slabs, so I thought that the best way of getting the log reduced to some useful stuff was to make a 6" slab and start a workbench build.

Ash isn't the most classic workbench material, but I still think that it will hold up just fine for regular use. If not I can always glue and tack a piece of plywood on top of it..

With my usual luck, the sawblade for the mulesaw suddenly detonated in the middle of the milling operation. I found my spare blade, and got back in business in fairly short time. I am going to weld the regular blade again, and I have even considered perhaps buying a new blade for the saw. But I am still not sure about that.

The trunk was Y-shaped, and there was quite a bit of tension in one side which became visible as the saw blade slowly progressed through the log.
Once the slab was milled, I trimmed the ends with a chainsaw, and it became apparent that there was a bit of rot where the crotch of the tree was. So I ended up getting a slab that was a little shorter than I had hoped for.

The benchtop slab was edge sawn on the mulesaw as well, since it was too wide to balance on the circular saw. The rest of the 6" thick piece was milled to legs and stretchers on the circular sawmill. It is so much faster than the mulesaw after all.

I started out making the legs 6x6", but they looked really clumsy, so I studied Roubo's book, and the text suggests that the legs are made 6x3 or 6x4" which I thought was kind of funny since all the images of workbenches had square legs. Anyway, I decided to go for 3.5 x 6" legs and I still think that they'll be up to the task of holding the top.

The material was still wet, but I started working on the top nevertheless.
First task was to rout a recess where there was ingrown bark from the two parts of the upper trunk. This was done on both sides of the slab, and a piece of dry whitebeam was glued in.
Next up was to install some butterfly keys to reduce any chance of splitting, and also to practice making those. So 4 butterflies went on each side of the slab.

I flattened the underside of the slab and then the two sides, and the lesson learned was that it really is a lot easier to plane if the height of the workpiece is correct.

The legs and the stretchers were squared up and brought to size using my jointer/planer.

Once I get back from the sea, I hope to be able to get the frame completed and install the top on it.

Slowly a slab emerges.

6" x 20" x 80" ash slab.

Recess milled and trimmed.

Butterfly practice.

Flattening the underside.

Planing the side (too low a working position).

Friday, June 29, 2018

Staircase for the porch.

As some of you might remember, I built  porch a couple of years ago.
Mette wanted it to have a wide set of stairs gently sloping into the garden. The kind of stairs that you could sit on and have a cup of tea.
I milled some wood and told her that the wood needed to dry a bit before I would make such a complicated project as a staircase out of it.

The following year she asked me what the progress was on the staircase, and I could truthfully tell her that the wood was still drying inside the barn. And that the thickest pieces were 3", so as a rule of thumb, they should dry for at least two more years.

Last year she didn't ask about the staircase, but casually mentioned that she was looking forward to getting one someday.

This home period she told me after a day or two that: the weather had been so nice, that now was the time for getting the staircase project started, and besides according to her calculations the wood had been drying the prescribed 3 years! So I couldn't use that as an excuse anymore!

I was pretty much speechless (which happens very seldom to me). I guess that is the "problem" with having a wife that is smarter than you  :-)

In a situation like that there is just one thing to do: Start building the project.

The wood for the stringers was jointed and planed, and the wood for the steps themselves was merely planed on one side.
The old temporary set of stairs had actually worked pretty well in terms of rise/run of the individual steps, so I stayed pretty close to that. I ended up using something like a 6"11/16 rise over a run of 11"5/8 (16.9 cm rise and 29.5 cm run)

Originally I had envisioned making a complicated project with Japanese joints etc. But I forgot how I had actually planned to execute that - so instead I tried to make it a simple but well functioning project instead.
To do that I cut some triangular blocks out and screwed them onto the stringers. That way I kept the full strength and could hope that there would be very little sagging once complete.
The triangles were aligned by help of a piece of string of which the outermost layers were "mysteriously" chewed into short sections. I can't say for sure who did it, but there were some impressive bite marks that "might"? correspond to the set of teeth in Bertha's mouth. That could also explain why the roll of string was suddenly found beneath the apple tree and no longer on the porch itself.

With the triangles in place it was all downhill from there, mounting the steps and later wrapping it all up in some thinner boards. I made a hatch on the corner, so that it will be possible to get below the porch at some point, if someone drops their keys etc. and they will fall through the spaces in the decking.

The final part of the project was to treat it all with some wood preservative and give it a coat of wood protection. (It is what the rest of the porch has been treated with). It will all go grey after a year or so in the sun anyway.

The best thing about the project is that it is now complete, and I have gotten rid of the stack of lumber sitting next to the mulesaw for three years.
The staircase is rock solid, and I asked Mette if she would be OK with me testing the strength by driving a Volvo Valp up the stairs and onto the porch? She said no.. Because now it looked nice and she didn't want the surface to be covered in tire tracks. I am still convinced that it would stand up to it and it would make a cool little video.

The stringers rest on a small tile (approx 5.5" x 5.5") 

Project completed (and no tire tracks)

Saturday, November 25, 2017

Podgers or framing pins, a blog about timber framing and a place for handmade tools.

First of all, thank you to Sylvain for providing me with a link to a blog where you could see a drawbore pin for timber framing in use (a podger).

Second, I am sorry for the long headline, but I couldn't really sum up all this information in a shorter sentence.

Now back to some meaningful writing:

The link that Sylvain kindly found for me is for a blog of a company called Castle Ring Oak Frame. In one of their posts they had pictures where you could see the large drawbore pins that they call podgers. I instantly got exited and wanted to get some of those so I can start a new timber frame project at home.
Before going all wild in searching for those podgers, I thought that I'd take some time and browse through the blog.
I often find that when a company has got a blog it is mostly advertising in a poorly written form. This blog was completely different though. It is written in a cheerful way and to me it feels a lot more like someone who are so proud of their job that they would like to say: I might not be a self-made millionaire or a sports star, but I make timber frames that can last for hundreds of years - and I am having a great time doing it.
Oh - and they are using Roman numerals to mark the joints :-)

I doubt that I will be using their services to erect a timber frame, because I would like to do that myself, but I am pretty sure that I will read their blog and continue to be inspired by someone making timber frames for a living.

The name podger was new to me, and given that all the podgers used by the timber framing company looked the same, I thought that maybe they were available from new somewhere.
A quick search on Google, and I landed on another dangerous site.
Not the kind of site that will get you in trouble with the police mind you, but one of those sites that could potentially be the source of birthday and Christmas presents for years to come.

There I discovered the podgers (or framing pins) I was looking for, offset prickers, froes axes etc. all handmade.
The offset prickers I can make myself on the lathe, but I think that I will order a couple of podgers for Christmas.

For sake of good order, I am not affiliated with any of the companies, they don't know me and I don't know them, so I don't get any discounts or free stuff etc from them for this blog post.
But I like a well written blog as much as the next person, and I would think that there might be a person or two reading this blog that are willing to admit that they don't mind looking at a homepage with nice tools on it.


Thursday, November 9, 2017

A small barn for the summer house 16, staircase installed.

After preparing all the individual steps of the staircase, I hand planed them front and back plus the upside before mounting them in the stringers.
I had to keep reminding myself that it is for a barn, so I shouldn't go all wild in trying to achieve some show surface on the underside.
Mounting the steps was straight forward. But as I discovered, doing this on top of the workbench wasn't a smart idea.
I had to apply a couple of clamps to keep everything together so I could lift it down to the ground where I would be able to hammer in some nails.
A little bit of forward thinking would have been nice here.. (but that is not my strongest card).

I hammered in one nail per step, and then turned the assembly over so I could square it up before pounding in the nails from the other side.
When I had bashed in all the nails on that side I again flipped it over and hammered in the last set of nails on the first side. My idea was that if I had put in both nails in the first side straight away, it might have been more difficult to square it up.

The individual steps were sawed flush to the side that will be facing the wall, and sawed at an angle to the side facing the room. This is something I have seen on most old stairs, and I like the subtle elegance of this ornamentation.

The completed staircase was loaded into my trailer and I drove it to the summerhouse.
While maneuvering the assembly out of the shop I became aware that it wasn't very easy to move around single handed. But I managed in the end.

At the small barn, I mounted the assembly by means of a bit of ingenuity, a cargo securing strap and a couple of clamps.

As per Mettes suggestion, I have wrapped up the barn project for this time, since I'll be heading back to work in a weeks time.


The installed staircase.

Mounting the steps in a stringer.

This would have been smarter to do at the floor.

Flipping over the assembly.

The only decorative elements of the staircase.


Progress on the attic.

Monday, October 30, 2017

A small barn for the summer house 13, internal boards.

I have been making some progress on the internal boards for the small barn.
Those were the boards that I had to shift inside as I was called to work a week earlier than anticipated.
So the first task was to shift all of them out again. I decided that I could work around the table that was inside, but I still needed to move the chairs and a bit of other stuff outside before starting the actual work.

The boards are the same type as those that were put on the sub roof. It is not a typical type of boards to use for internal paneling/boards, but it is of a much better quality than the regular type used. In Denmark the usual boards to be used would be something called "rustic boards". They are made out of the surplus Christmas trees that grew to fast so they were too large to sell. The distance between the growth rings is typical 3/8" or thereabouts, so the wood is of an exceptionally poor quality. The shape is like a tongue and groove board with the tongue something like 1/2" too long. So once the boards are mounted, there is a trench between each board. They are available in various widths and either nature, or artificially whitened, smooth or rough sawn.
But that aside - I chose the other type because I think they look better in a classic barn, and they were actually cheaper per square meter (or square foot if you like).

I mount the boards using regular nails. I know that a pneumatic nail gun is faster, but I actually like to hammer in nails, so I go for the slow and old fashioned way.

Once all the boards are mounted, I plan on putting some strips of wood in the corners and around the window sills, to cover the gaps.


Internal boards mounted.

The "famous" stack..


Wednesday, October 25, 2017

Haffner KKF 15 chain mortiser

Ever since I borrowed Olav's portable chain mortiser, I have been eager to get one myself. I discovered during the initial phases of the small barn build, that I really enjoy timber framing.
There aren't many used portable chain mortisers offered for sale in Denmark, and the idea of forking out $2400 for a new Festool or $4000 for  a new Mafell is out of the question. Even I have to be realistic once in a while.

I have regularly checked the various classified home pages in Denmark, and one day while looking, I spotted something on a stationary mortiser that made me take a closer look.
In addition to the lever type handle, this chain mortiser also had two smaller handles. Now those would only make sense if the machine could be used as a portable unit.
I enlarged the pictures and could see that part of it looked like aluminium castings and not cast iron. I also managed to decipher the designation of the machine which is cast into the front cover: KKF 15

A quick search and I found a page from an old catalogue that listed the features of the machine. To me the most interesting thing was that it could be used as either a wall mounted or a portable machine.

Whenever I find a machine that I would like, chances are that it is situated far from where I live, but this machine was being sold just 20 miles from our place. So I arranged with the boys that we would drive down and get it, Gustav had to be picked up at the train station after a trip to Copenhagen with his class, so first I picked him up, and then went for the machine

Originally I had intended to do a bit of haggling just as a principle, and my argument for a lower price would be that there was only one chain , and it even needed sharpening. It turned out that the chain mounted on the mortiser was in excellent condition, and besides there were two brand new chains to go along with it as well. Knowing that a new chain can easily reach 200$ on its own it seemed pointless to haggle, so I paid the guy the  $200 he was asking for the machine and he helped me load it in the back of the car.

Once home, I checked the machine, and it was in much better condition than I could have hoped for. I tested it on some pieces of scrap, and it is a joy to use.
The only problem is that even though it can be used as a portable chain mortiser, it is designed to work like that in another way than the one that I borrowed from Olav.

Olavs chain mortiser is a 100% portable machine. It is designed to work with the chain running along the grain, and it has got a clamping fixture that is perfect. Once the machine is clamped, you can slide the sword lengthwise, and make a nice long mortise that is only the thickness of the chain wide.

My machine is heavier and works across the grain when used as a hand held mortiser. That means that the width of my mortises are limited by the width of the sword and chain combined. The good thing is that You don't have to clamp the machine to the work piece. The action of the chain will ensure that it packs the fence close to the work piece all the time.
Now if I only made one size of tenons that would be OK, but I would like to be able to use the machine on different sizes of timber, so I have to figure out a way to make a clamping fixture so my machine can also work like Olavs.
A good thing about the current set up is that it is perfect for making mortises in e.g. work bench tops. Because it only requires one flat face to register to in order to make a mortise. So I don't have to invent a longer clamping fixture to span across the width of a work bench top just to make the mortises for the legs.

I guess I should make a workbench just to use the new machine..

Haffner KKF chain mortiser mounted on a stand.

Chain mechanism.

Plunged into an imaginary piece of wood.


Wednesday, March 29, 2017

A small barn for the summer house 11, windows installed.

In the previous week, I went to the summerhouse for completing the floor. I had gotten the hang of it, and I really wanted to proceed with installing the windows as soon as the last board was nailed down.

When I brought the windows with me, I had only one floor board left to install. I had made some wooden shims to be used for the window installation, and I looked forward to doing it.
After completing the floor and celebrating this with a cup of tea, I discovered that I had left all the shims at home..
So no window installations that day after all.

I test fitted a window, and could see that I needed some slightly thinner shims, so I made those when I got home, and put them in the car straight away. I also made three boards with and angled cut on one side to mount over the window frames once these were installed.

The installation itself went really smooth. The outside of the window frame is installed flush with the outside of the exterior cladding of the barn. 
Some boards were then installed as trim, and on the very top is the board with the angled cut, now functioning like a very small overhang roof.

Since I haven't installed the floor for the attic yet, I didn't install the windows for the gable. My plan is to push the floor boards through the hole before installing a window, and thus avoiding to scratch the painted frame. A floor will also give me something to stand on while I install the window, making it a safer operation than balancing on a ladder or tip toeing on the rafters.

Gustav and I worked a few hours out there Saturday and Sunday too. Gustav downed a couple of trees with a chainsaw, and I cleared up a lot of the debris left behind from the floor installation, and swept the floor inside.

I also started on installing the corners and the trim for covering where the cladding meets the underside of the roof. 

There is still a lot that needs to be done before the barn is complete, but I am enjoying every minute of the project. In no particular order are: A new door including a frame. A floor for the attic, a staircase for the attic, insulate the walls. Install boards for the walls and ceiling. Install the remaining windows. Finish the outside trim. Paint the barn. Install the roof tiles. Etc.


Window installed and left corner covered.

The completed corner.

View through the door.

Thursday, March 16, 2017

A small barn for the summer house 10, laying the floor.

After I had painted the windows, I have been busy trying to get some work done on the floor of the small barn. My goal is to get the windows installed and thereby freeing some space in the workshop that will then be used for making some obstacle holders for horse jumping. But that is a bit into the future.
I sawed some 1/2" thick boards on the saw mill that I installed between the joists. These boards are only there to hold the insulation, so they won't carry a lot of weight.
The insulation was added (6"), and a plastic membrane was mounted on top. I am not quite sure that it is needed since there will not be much human activity in the barn to breathe out humidity, and besides it also shields the insulation a bit while I am working on the floor itself.

The floor boards are 1 3/4" thick and are joined by means of a loose tongue.
I have finally gotten around to using my Veritas BU jointer that I bought some years ago at a great price. I use it to joint the edges of the boards before I make the groove for the tongue.

The upper corner is planed off with two swipes of the block plane, so it is just a tiny bevel that will keep splintering to a minimum.

The groove is made with an electric router. A year ago I finally had it with my old router and forked out some real cash and got myself a more professional Makita router. That thing is so much better than the old one, it is easier to hold, it can actually retain the cutter in the desired position and it does a quick job of making a groove.

Due to the width of the boards I am installing them with nails through the top instead of using hidden nails or screws.
I would have liked to use headless nails like I used for the porch, but those are not available in 5.5" so that is why I am using regular nails. They look a bit crude, but it is a barn after all.
They are mounted 5/4" form the sides of each board, and if the board is very wide I also put a nail in the middle as well. To keep the heads aligned, I am using a piece of string to mark out the position.

Olav stopped by today and gave me a hand, and also took some pictures. So all the pictures of today are by the courtesy of Olav.

Hammering.

Hammering. 

Floor boards on the right, Merlin half way hidden.

Veritas BU jointer with fence, now in use!

The board is clamped to a 5x5 to be able to stand on an edge.
 
Beveling the edges of the groove. 

Larch floor board prior to grooving.

Cross cutting. 

Grooving with the Makita.

A router is noisy and dusty but fast.

Merlin is supervising the project.

A finished board with grooves.