Showing posts with label Table. Show all posts

Monday, July 7, 2025

Barnsley hayrake table for my sister in law

 Mettes sister turned 50 this year, and her husband asked me some time ago if I could make a table for her birthday. 

They have recently bought a summer house and wanted a slab table of sorts. 

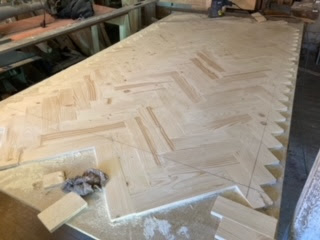
I showed him some pictures of the tabletop I made a couple of years ago, and some pictures of the Barnsley hayrake tables that I have made. and he confirmed that it was something along those lines that he would like to give her. 

We settled on a family price, and I got the joy of being able to make a complete table this time. Not just the tabletop. 

I wanted to blog about it during the build, but given that it was a birthday gift I couldn't out of fear that the surprise was blown. 


All the wood comes from the blood beech that I milled a couple of years ago, save for the pegs that I used for the drawbores that are made of ash, and the butterflies that are made of elm. 

I had forgotten how much work there is in flattening a massive slab using hand planes, and at one point I considered if I should try to make a flattening jig for a router. But I decided that it wasn't worth the while for just one slab.  

A thing I remembered from last time was that it was important to make the breadboard ends before putting too much energy into the flattening. Simply to keep the split parts of the crotch in place. So that is where I started. 
As soon as the breadboard ends were in place, a regular workout using a jointer plane with a scrub blade in it was the next task. I switched a little with a regular jointer and going either diagonally or traversing the grain. 
The slab had twisted a bit during drying, so one small area in the top end of the crotch kept being about 1/4" lower than the rest of the surface. I decided that it would be a waste of time, wood and energy to remove that much wood from the rest of the slab, just to get everything flat. After all it was an area about half the size of my palm, and I felt that it gave a bit of character to the table. 

I made a bunch of butterflies in progressively larger sizes out of elm, just to give a bit of contrast to the beech. The butterflies serve both to stabilize the split crotch area and to fill up the void so you don't accidentally push a dinner plate through the large hole. 

Once the butterflies were glued in place, they were dressed down to the surface of the tabletop, and I sanded starting with grit 40 on a belt sander and ending with grit 240 on a random orbit sander.

The undercarriage for the table was interesting to make due to the tabletop not being rectangular. I decided that it would look the best if the legs were sort of the same distance from the edges of the table. To avoid any hiccups, I made some full size drawings of each end, so I had something to work from. 
I mounted the two traverse pieces with a tenon through the center, and the traverse piece itself set into the top of the leg (I am a bit uncertain what the technical name of that type of joint is).

After chopping in MMXXV in the lower stretcher, the table got a couple of coats of a wipe on finish (linseed oil, spar varnish and turpentine) And it was moved inside the house to be ready for pick up (and to make a bit of space int he shop again).

As always a challenging and satisfying project. The biggest issues were that he top was heavy and unwieldy, and that it takes up a lot of space during the build. 

I clocked my hours, and all in all there is 60 hours of work in the table.


Sunday, July 7, 2024

Table extensions for a Barnsley Hayrake table

 10 years ago I made a Barnsley Hayrake table to a friend of mine. The table ended up looking a bit weird since the legs were to close to the ends and the sides, and they were also too large compared to the size of the tabletop, giving it a bit of a clumsy look. 

The problem back then was that I had first been given a size that the table should end up being, and I started constructing the lower part of the table according to that. When I was done with the legs and stretchers and all assembled, my friend suddenly called me and asked how small I could make the table..

She had forgotten to take into account that in order for a table to work, it is fairly important that there is sufficient room for someone to pull out a chair to sit in.

Anyway, about half a year ago, she called me and asked if I could make some extensions for the table. 
I was curious to see how it looked, and I loved the idea of having a chance to make it look a bit more harmonic.
I drove up to see her and took some measurements of the table. the top had shrunk a bit unevenly, so one side was 3/4" narrower than the other end. But all in all the table still looked great.
As luck would have it, I still had a bit of larch left in dimensions that could be used for the extensions.

In order to avoid having to make an extra leg or some swing type support, I chose to make a frame and panel type extension. That way it could be held by just a couple of long sliding sticks underneath the tabletop. Also this meant that the extensions could be removed and there wouldn't be anything to interfere with the knees of the people sitting at the ends of the basic table.

I didn't do any finishing, but she said that she planned on giving it some soap just like the rest of the table had been treated with. 

Trimming of tenons.

Proof to Brian Eve that I still use his old plane :-)

Barnsley Hayrake table with extensions.

Frame and two panels.

Marking up for the holding sticks.

Working on the underside.

All completed.


Monday, March 15, 2021

Herringbone parquet table

Two weeks ago, Gustav sent me a mail asking if I had some wood that he could use to make a herringbone parquet table of.

I replied with a suggestion of using some roof laths, since I was a bit uncertain if I had enough ash for him to make a table. I tried to write to him later on the hear about the table since I was very curious, but since I didn't get any response I figured that he had given up on the project. (I hadn't received an answer as to whether the table was a commission, an experiment or something for himself either.)

When we got close to Norway some days ago, I called just to chat with the family, and Gustav suddenly asked if I had any shellac? I told him that I did, and asked what he was going to use it for. He replied that naturally it was for the herringbone table. 

He had become so immersed in the project that he hadn't thought about informing me at all, but all in all, he had almost completed a tabletop. And he even sent me some pictures to prove it.
We talked a bit about the different ways to make an undercarriage for a table, but I am not sure which type he will make. I guess I'll just have to see when I get back home.


Herringbone parquet tabletop.


Saturday, February 13, 2021

Making a tabletop from a slab of beech

A couple of years ago I was asked by a friend to go and see one of his neighbours who had a tree cut down in their front yard. 
It was a massive blood beech and he asked me if I could use the tree for the sawmill. I really wanted to, but there was no way that I could move it if I bought it, so I respectfully declined, telling him my reasons to do so. Instead he offered if we could make a trade. He would get the trunk of the tree moved to my place and then I should make a table out of it for him, and I could keep the rest of the wood.

I agreed knowing that it would not be a lucrative deal, but what the heck,  I like making tables, and it was some serious wood to get delivered to my door. 

So a week or so later he had a truck with a crane coming and picking it up and dropping it of at my place.
I milled the largest part of the trunk and stacked it. I had informed him that it would take around 2 years for it to dry enough for me to start making anything out of it, and he was cool with that.

Last fall well before my dad got ill, I decided that I might as well get to it and build a Barnsley hayrake table for him. He had told me that I could make a table that I would seem fit and the material was just perfect for that.

Before starting out, Mette (smarter than me) suggested that it might be a good idea to call and ask them again if they had any requests in the size of the table. I thought it was a stupid idea but did as she suggested, and the guy and his wife were really happy to hear from me and were really interested.

I showed them the slab and the discussion started. It is always interesting when people suddenly realize that they can decide on height length finish etc. 
They asked if I could make the slab wider which I told them would be a shame since it would be impossible to hide, a bit more discussion and they agreed to think about the length of the table.
 A few days later they called back and the man said that his wife and the kids wanted a metal undercarriage, and he was the only one that wanted a hayrake system, so since he was outnumbered they just wanted me to make the slab ready for a tabletop. 
I was glad that they didn't try to make me feel obliged to make a set of metal lags since I normally dislike those on slabs. A lot of people seem to think that a table is just the tabletop, and then it doesn't matter what kind of legs or undercarriage is on it. I see it a bit differently.
The good thing was that it removed at least half of the work that I needed to do.

I started flattening the back first, using a jointer with a scrub iron. Then the slab was flipped over, and I did a little bit of work on the top.

It was Friday, and Gustav had invited a couple of friends over to have a couple of beers which was ok with us since they were going to sit in the man cave and wouldn't be disturbing us.
I told them that they could go through the workshop instead of waking up the horses constantly, but I kind of got to regret that part. 
Someone who I guess had a little bit too much to drink obviously wanted to show one of his friends that he knew what different tools were for. (Gustav did not witness it, other wise he would have stopped it all)
So the next morning when I wanted to start flattening the top a bit more I noticed a couple of holes, and surprisingly next to the holes were my awl.. He had first hacked it straight in probably 3/8" and then he had done the same plus wiggled it around to make the hole larger. Needles to say I got furious.
I tried to put some water on the marks and see if they would close a bit, but the problem was that they were in a low spot of the tabletop already. 
I calmed down a bit for probably 20 seconds (the time it took me to plane a couple of strokes more).
Then I could see that the same kid had wanted to try Gustav's batterypowered circular saw!
And he had chosen to do that with a 1.5" deep cut sort of 1.25" into the side of the tabletop. I was speechless at that point. I called Gustav and he was of course as sorry as he could be, and I tried not to blame him, but I was angry. But I knew that I could cover it up so it wouldn't be a deal breaker, just a pain in the neck.

As soon as everything was relatively flat, I installed breadboard ends. That was especially important in the wide end since it was a Y shaped trunk, and there wasn't much point in flattening it if those pieces could move independently from each other.

A lot more of flattening, and it was time to install some butterflies too, those were made out of elm since it is what they had wanted.
There were a few places where there were rotten knots and those places received a piece of elm too, as did the circular saw mishap.

Some sanding and I treated the oil with a linseed oil/varnish blend thinned a bit with some turpentine.

The slab ended up looking really good, so I might have to make one for myself at some point.


106" long, about 40" down to 28" wide, 2" thick


The dark spot on the edge left in the picture is where the saw cut was made.

Before finishing.

Using my recently acquired Ohio 08 jointer

Removing the bulk of the material with a router.

live edges and a breadboard end

Still a bit of work left.


Installing butterflies

Sunday, May 6, 2018

A Barnsley hayrake table 4, final assembly.

The breadboard ends were sawed flush to the side of the tabletop, and the top was then flipped over so I could smooth the underside first.
Planing such a large glued up top of larch was something I attempted last time I build the table, and the results were not good at all. So this time I decided to start with what I knew would work: A portable belt sander and some 40 grit bands.

Once the underside was smooth and flat, I sanded the sides and ends and chamfered all the edges on that side with my small Japanese chamfer plane. I flipped the top over again, and the I made some buttons out of elm to attach the table top to the base with.

The tabletop was then mounted in the correct position, and I sanded the top side with grit 40, 60 and finally 80.
The edges on this side were chamfered too, and that as they say - was that.

I tried taking some glamour shots of the completed table, but my photographic skills are as you know not the best. Furthermore the table is so large that it is difficult for me to get a proper distance for taking good pictures without any disturbing things in the picture.

I have logged all the time that I have used on the table, and I was a bit surprised, that it took me longer to build than the first hayrake table a couple of years back. I think that the difference is that I made breadboard ends on this one, and also the classic way to attach the upper cross stretcher.
The time totaled at 49 hours and 10 minutes, efficient work time that is. If I had to go see why Bertha was barking, or to get a cup of tea, the clock was stopped.

Personally I think that this table looks a lot better than the first one, especially since the size of the top fits better to the base. And I also really like the look of the breadboard ends.

While it isn't of great importance how long time it takes to build something, I like to monitor it due to my own bad memory.
In case someone sees the table and thinks that it looks nice, and asks me if I could make one more, then I would like to remember just exactly how long time it took me, so I don't accidentally say that oh, I can make one of those in a long weekend in the shop.


Barnsley hayrake table, 10' x 4'

Longitudinal stretcher to crosspiece in hayrake.

Crosspiece to arms of hayrake.

Hayrake to legs.

Japanese edge nicer (chamfer plane)

2018 (plus sack of garbage behind stretcher)

Breadboard end.


Saturday, May 5, 2018

A Barnsley hayrake table 3, making the tabletop

With the frame of the table completed, I started making the tabletop.
The top was going to be fairly large, so I figured that it might be a good idea to use the frame as a base for the glue up.

I planed the individual boards to the same thickness and laid them out so that I could mark them according to one another and keep that reference as to when I was going to glue them together.
Last time I made a similar sized tabletop I had the idea that it was going to be easier/better to glue up all of it at the same time. It might have been a bit faster, but the results were far from what I had envisioned when I started doing it. So this time I decided to glue it up piece by piece instead.
The results was better this time, and the glue up was a lot less stressful. But it did take a bit longer time. I told myself to wait minimum one hour before removing the clamps and adding the next board. It worked brilliantly.
To avoid getting glue on the cross stretchers, I had placed some plastic garbage bags over them to so that any glue on the underside of the tabletop would be prevented from reaching the completed frame.

I had toyed with the idea of using loose splines between the individual boards, but I decided not to do it since the one board at the time approach would allow me to get a pretty flat surface from the start anyway.

When the top was glued up I sawed it to the correct width using a hand held circular saw.
I crosscut the ends taking into account how much the breadboard ends would add to the length once mounted.

I laid out the location of the mortises on the breadboard ends and made them using the chain mortiser. I then cleaned up the bottom of each mortise with a chisel. The groove for the stub tenon was made on the table saw. I made sure to allow ample of room for wood movement on the outer mortises, and less for the mortises nearer the center of the breadboard end. The center mortise was made to the "correct" size.

On the table top itself I used a router to remove all the required wood so I ended up with two giant full width tenons - one on each end.
I then marked up from the breadboard end where each of the 7 tenons should be.
The waste between the tenons was removed using a coping saw, and I used a shoulder plane and a jack plane to adjust the final thickness so that I had an appropriate fit.

Holes for the pegs were drilled in the breadboard ends, they were then dry mounted, and the location of holes transferred to the tenons.
Offset holes were drilled, and I made sure to make elongated holes for the outer tenons, so that they would be able to move when the table dries up. The single benefit of working with wood that is usually wetter than a house is that wood movement is always going to be in form of shrinking, so I normally only have one direction of wood movement to worry about.

The center tenon got a bit of glue, and the breadboard ends were attached using some pegs made out of elm.
The top of the peg also received a bit of glue, but only the part that would end up in the breadboard end. Just to make sure that it would't pop out (I don't know how it should do that anyway though..)

Almost there.

Gluing on he final board. I have only two clamps that will span 48"

Routing out for the giant tenon (testing router methods)

Trimming the fit.

Breadboard end in place.


Friday, May 4, 2018

A Barnsley hayrake table 2, completing the frame

Just because I haven't blogged lately doesn't mean that I haven't made any progress on the table. Actually on the contrary.
I really dislike sitting at a computer while at home, so I decided to take a new approach and instead just take some pictures of the project as it went along, and then I could blog about it while out at sea.

After completing the mortises and tenons in the center stretcher and the four diagonal pieces, I lined it all up, and marked the positions of the joints for the end cross pieces.

The mortises on the end cross pieces were made using the chain mortising machine but the angled mortises were made using a chisel after having drilled out a large part of the waste using a spade bit.

Once all the joints were ready, they were all tested, including the joints for the legs. I figured that it might be a smart thing to do because it would be easier to tune the fit now compared to when the stretcher was completely glued up.
The surface of all parts were cleaned up with a smooth plane, since it would be difficult to get access to all parts after assembly.

I drilled some holes for the drawbore pegs, dry assembled the construction, and marked out for the tenon part of the drawbore hole. After disassembling the stretcher and drilling the remaining holes, I made some pegs using my dowel plates. The pegs were made out of ash. I tried to split them at first, but in the end I had more success with sawing them on the table saw following the grain. I made sure to make a couple of extras just in case I would break any of them during installation.
I also sawed out some small wedges of ash for the tenons. 
Finally I sawed a couple of thin kerfs in the ends of the tenons and I was ready for the glue up.

Making a Barnsley Hayrake table is fairly straight forward work except for the glue up part of the frame. That part ranges as a complicated glue up in my world. It is very difficult to attach a clamp to help negotiate a joint in place, so all parts have to fit from the start. 
A good preparation with wedges and pegs ready helps, but I still find it a stressful part of the build.

Once the hayrake stretcher was glued up, I stopped for the day to let the glue dry.

The next day I slid on the legs to be able to determine the exact size of the upper cross stretcher.
When I had made those complete with mortises, I marked out the position of them directly on top of the legs. The legs were then removed and the joints were made. 

I then chamfered the hayrake stretcher and did something unusual: I marked the piece with Roman numerals despite the project not being complete! My reason for this was that I guessed that it was a lot easier to do this when I could turn the parts as I wanted them and keep it on the bench. But it still felt like a criminal act to do it prior to completion..

Next I glued on the legs. I had decided to use elm for the wedges instead of ash, to get a bit more contrast on the wedging part. But apart from that it was straight forward. I again chose to saw a thin kerf to have a starting point for the wedges.

Once the glue had dried, the upper cross stretchers were sawed to length, chamfered and glued in place too.

Finally all the remaining protruding parts of tenons, wedges and pegs were sawed off flush to the surface and cleaned up with a plane.


Gluing up the hayrake stretcher.

The legs temporarily mounted.

Legs ready to be glued onto the stretcher assembly

Making pegs using a dowel plate.


Monday, April 16, 2018

A Barnsley hayrake table 1, stock preparation and the frame.

I have started making a Barnsley hayrake table for a friend of mine.
He needed a large table, and I am more than happy to build another table like this. For some reason large tables are pretty popular over here, and my friend said that he would like the top to be 118" x 48". So I am once again ending up with a hefty tabletop that will be difficult to move around. But I am also given the opportunity to make a nice sturdy base to go along with it.

A thing that bothered me a bit about the last hayrake table that I made, was that it didn't have breadboard ends. So this time I am going to make some of those.
Another thing was the fact that suddenly the size requirements for that table changed, so the legs are way too close to the edges of the table - but now I get a second chance for making it look right.

I milled some larch about half a year ago, and while it isn't furniture grade dry, it will be dry enough for me to make a table out of. I can't get the moisture content down to furniture grade anyway, so I'll just be prepared for a bit of wood movement.
It might even ad some character to the finished table.

The stock for the frame was jointed and planed to thickness on the thickness planer. The legs started out as 6x6" timber, and the hayrake part was a 3x5". I removed approximately 5/8" from the legs, and a bit less from the stretcher stock.

I started making the mortises in the center stretcher by drilling and chiseling out the waste. The result was really good. I then decided that it might be fun to test the chain mortiser on the leg mortises. To avoid tear out on the front side of the legs, I didn't plunge the machine all the way through, but stopped maybe 1/8" from going through.
I had marked out the location of the mortise on both sides, but I was curious to see if the machine was going straight in - or if it worked at an angle once loaded. So the first few taps with the mallet on a chisel were really interesting. Much to my surprise, the hole was dead accurate. I know for sure that I could never make such a good looking almost 6" deep mortise by hand.
So already now the machine has earned its keep.

Apart from making a lot of mortises, the stretcher also needs a lot of tenons. I am gradually becoming better and better at making those, though I still find the angled tenons to be a bit difficult to execute.

There is still quite a bit of way to go, but I am enjoying every minute of the building time.
Some parts of the stretcher.

Planing a 6x6

This chain mortiser is amazing!