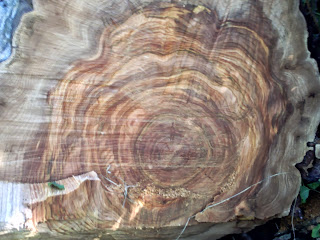
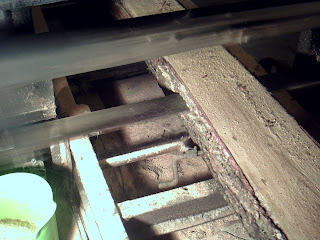
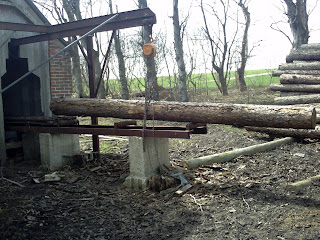
Showing posts with label Saw mill. Show all posts

Wednesday, June 26, 2024

Installing a new sawmill

 My old sawmill, which I installed in 2007 has always had a little bit of problems with the feed mechanism. I fixed it so that it was able to go in reverse something that it was unable to when I bought it, but the change of forward speed never worked really well. It was technically worn out, and I didn't want to invest the time in rebuilding it completely when it worked OK for my use.

About two years ago, my old friend Gert (who had sold me the sawmill) called me and told me that he had bought himself a Woodmizer, since he was getting a bit older he felt that he wanted something that could automatically wrestle the logs instead of having to do it manually on the circular sawmill. 

So he wanted to ask me if I wanted to buy his circular sawmill that he had bought back when he sold me the old one.

I immediately confirmed that I would love to buy it, and we agreed that I should find a time to come and test it and see it in action. 
That new saw was somewhat bigger than the old sawmill, and it has got a different feed mechanism that works flawless. 
My wife got diagnosed with breast cancer (she is all well now) so I told him that I couldn't come and get it as quickly as I had hoped for, but he was completely cool with that, and last autumn I found the time to go down and dismount the sawmill and transport it home. I think it took about 5 trips with the car and the boogie trailer, but I was able to get it all home on my own. Luckily the saw could be divided into manageable sections, and that was a huge bonus compared to my old sawmill.

The sawmill sat in the machinery shed for the winter and the spring, and at a point Asger our youngest son asked me if he should help me sell the old saw on Facebook marketplace. 
I doubted that anyone would want to buy it, but it wouldn't cost much energy to try and sell it. Within the first week, we had 4 potential buyers, and one of them even offered more than the asking price and was willing to come and get it fairly quickly. So suddenly the sawmill was dismantled and out of the barn.

After a weeks hard labour removing the old concrete pillars, we started mounting the new sawmill. Asger suggested that we painted it as soon as we installed it, since he reasoned that I would never get around to doing it later on. 
So I settled on a nice blue colour, and the entire thing received a coat.

The individual sections were moved into the barn and lined up, after which I dug out underneath the mounting frames and cast some concrete with threaded rod to hold it to the floor. The reason for digging out after moving it into the barn was so that I could use some pieces of pie as rollers to move the sections on the concrete floor, something which would have been much more difficult if there were a lot of holes in the floor.

The new sawmill utilizes the electric motor as a flywheel, and since I don't have enough amperage to run the electric motor (it needs 60 A fuses on a 400 V 3 phase grid), I am going to do the same as with the old sawmill which is to run it off the PTO of the tractor. 
I just need to make an adapter so I can mount a PTO spline shaft on the rear end of the electric motor where the cooling fan normally sits. This is something I still need to do.

 So the sawmill isn't fully operational at the moment, but it is close. So next time I get home I might be able to fix the spline shaft adapter, the extraction fan and join the two table parts. That's all that needs to be done for me to have a functioning sawmill again.

Beginning the installation, 3 section out of 5 are in the barn at this point.

The first 4 sections are assembled and roughly aligned.

The electric motor is installed and painted. The blade is a 40" blade, so it is a bit bigger than the blade of the old saw (36"). That coupled with a lower table means that there it much more of the blade above the table so I can split bigger logs now :-)


Thursday, January 3, 2019

Ash log Roubo project 1, preparing stock.

As you might remember, I bought an ash log just at the termination of the DCBE. I didn't have any specific plans for it, but I had to get it processed, since I have a beech log waiting in line for being milled, and since beech is not very rot resistant, I thought that I'd better get moving.

I have plenty of 2.25" slabs, so I thought that the best way of getting the log reduced to some useful stuff was to make a 6" slab and start a workbench build.

Ash isn't the most classic workbench material, but I still think that it will hold up just fine for regular use. If not I can always glue and tack a piece of plywood on top of it..

With my usual luck, the sawblade for the mulesaw suddenly detonated in the middle of the milling operation. I found my spare blade, and got back in business in fairly short time. I am going to weld the regular blade again, and I have even considered perhaps buying a new blade for the saw. But I am still not sure about that.

The trunk was Y-shaped, and there was quite a bit of tension in one side which became visible as the saw blade slowly progressed through the log.
Once the slab was milled, I trimmed the ends with a chainsaw, and it became apparent that there was a bit of rot where the crotch of the tree was. So I ended up getting a slab that was a little shorter than I had hoped for.

The benchtop slab was edge sawn on the mulesaw as well, since it was too wide to balance on the circular saw. The rest of the 6" thick piece was milled to legs and stretchers on the circular sawmill. It is so much faster than the mulesaw after all.

I started out making the legs 6x6", but they looked really clumsy, so I studied Roubo's book, and the text suggests that the legs are made 6x3 or 6x4" which I thought was kind of funny since all the images of workbenches had square legs. Anyway, I decided to go for 3.5 x 6" legs and I still think that they'll be up to the task of holding the top.

The material was still wet, but I started working on the top nevertheless.
First task was to rout a recess where there was ingrown bark from the two parts of the upper trunk. This was done on both sides of the slab, and a piece of dry whitebeam was glued in.
Next up was to install some butterfly keys to reduce any chance of splitting, and also to practice making those. So 4 butterflies went on each side of the slab.

I flattened the underside of the slab and then the two sides, and the lesson learned was that it really is a lot easier to plane if the height of the workpiece is correct.

The legs and the stretchers were squared up and brought to size using my jointer/planer.

Once I get back from the sea, I hope to be able to get the frame completed and install the top on it.

Slowly a slab emerges.

6" x 20" x 80" ash slab.

Recess milled and trimmed.

Butterfly practice.

Flattening the underside.

Planing the side (too low a working position).

Saturday, October 20, 2018

Ash log for the mulesaw (now with videos!!)

One of my neighbours had downed a large ash tree a couple of months ago. He never knew that I had a sawmill, but after he found out, he told me about this log that he still had lying on his property, and asked if I was interested in buying it. 
We agreed on a price of around 70$ including transportation!
And he assured me that he was happy with the price, he just wanted the log out of the way, and preferred that it would go somewhere where it would be put to good use.

As far as I remember, Claus delivered the log on Saturday afternoon, and Brian took a bunch of pictures of it all, so all pictures in this post are the courtesy of Toolerable 

I haven't got a dedicated plan for the log, but I will probably make some more seat blanks and perhaps a slab for a workbench.
It also depends on how well the mulesaw will behave. But making thin boards will just take way too much time.
The top speed in material like this is 3" per minute, and that is provided that everything goes smooth. If the blade starts to heat up I have to back down a bit and then it will be much slower. Or the surface will be as wavy as the North Sea in wintertime.

After a bit of nudging from Brian Eve, I reluctantly added two videos to this post. 
This does not mean that i am slowly becoming modern!!


Claus shifting the log from the wagon parked in front of the house.

18' long it will just pass between the barn and the machinery shed.
I have removed one of the doors to the barn to pull out the wagon of the mulesaw.

Placing the log on the wagon.

Trimming a bit to make sure the log can pass the pillars of the mulesaw.
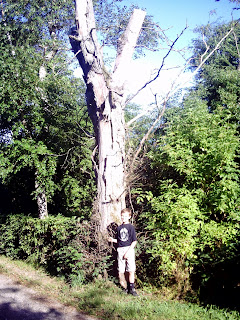
Down to 16.5' but still an nice piece of wood.

Discussing the possibilities of the log.


Forklift in action.


Video showing me jumping over the log

Sunday, April 3, 2016

Saw handle blanks from mirabelle prune wood.

Tomorrow Asger and I will take the train to Munich to visit Brian Eve of Toolerable. I wold have liked to bring a suitable slab for a table, but I doubt that the trains stewards will find it amusing if I show up with one. Plus it might make it difficult to navigate the various platforms when we need to change trains.

So instead I decided to make some saw handle blanks for him.
Last time I was home I trimmed a mirabelle prune tree, and the lowest part was large enough to yield a couple of blanks.

This morning I sliced it with the saw mill in 5/4" thickness.
There was a bit of rot in part of the trunk, which was partly the reason for the trimming, but there is enough for some saw handles.

I have read that apple tree was once common for saw handles, and it should be steamed while the wood is still green.
I have some apple wood, but it has been downed years ago, so it is close to bone dry. And the pieces are not sufficiently large to make a saw handle from the heart wood alone.
So the prune was still my choice.

The slicing was pretty fast, so in order to stretch the experience a bit, Asger and I rigged my small deep fat fryer up to make a steam chest that could be used for steaming the blanks.
It was a low tech solution consisting of two plastic buckets mounted on top of the deep fat fryer that was filled with water.

The wood steamed for about one and a half hour, and then we stopped to go in for some lunch.
I'll let Brian Eve take a picture of them once they are dry to see if the colour has changed at all.

Mirabelle prune, fresh from the saw mill.

The steam set up.


The outer bucket helps to keep the temperature high and the steam inside.


Sunday, April 26, 2015

Mending a saw blade

After breaking the saw blade for the mulesaw, I tried using one of the other blades that I have.
Two blades have a different tooth configuration, and it became obvious, that this configuration is not perfect for wide hardwood trunks.
I decided that I might as well try to see if I could repair the blade, since I don't know where I can buy a new one. And if the repair job didn't work out, It would be sort of a Life of Brian thing: You come from nothing and you're going back to nothing - what have you lost? Nothing. (Except a bit of time and a few welding electrodes).

At first I straightened out the broken pieces since they were a bit bowed on the ends.

Next I ground the broken edges to prepare a groove when they were fixed in their correct position.

To make sure the blade was properly aligned, I clamped the pieces to a piece of wood with a straight piece along the back of the blade.

I found my old portable electrode welding machine (ESAB Caddy) and some welding electrodes.
My go to electrodes for this type of repair job is ESAB OK 53.05 There might be some more correct types out there, but I always have some of the aforementioned electrodes on hand, as they are really versatile.

The welding could have looked better, but welding thin steel with an electrode welder is not easy. At least not when you have an electrode of 2.5 mm in diameter which is better suited for thicker material.

After welding the blade I used an angle grinder to clean up and level things out on the blade.

I tested the blade, and it went OK for about 8", then it snapped again, but I could see that my welding wasn't very good at that spot, so I just welded it again, and then it held.

So all in all the project was a success.

The blade on the workbench.

Broken edges ground to form a groove.

Holding the blade in position.

Welding complete.

Welding ground with an angle grinder.

The mounting system of the blade.

Blade inset in the tightening/holding device on the saw frame.

A whitebeam plank sawed with the mended blade.
Saw is shown to give and idea of the size of the plank.

Friday, April 17, 2015

I managed to break a saw blade.

Yesterday I was working with the mulesaw, trying to finish the sawing of the sycamore trunk.
At some point I must have gotten a bit too eager, because suddenly I heard a loud snap followed by some clonk noises.
I immediately stopped the feed mechanism and rushed back to stop the electric motor powering the sawing mechanism.

After the flywheel had come to a halt, I could inspect the damage: The blade was broken into two pieces.

I found another blade with a different tooth pattern and finished the trunk.
The new tooth pattern works, but the surface has got a lot of texture as opposed to the old pattern that left a very smooth surface.
I guess part of the problem is that 40" is a bit too large for the saw after all.
The stroke of the saw is not so large that it can get rid of all the sawdust from the centre of the trunk, so the blade tends to bind. Unless I make a very aggressive set on the blade, but that in turn gives a less than perfect surface.

I have made most of the slabs 2.25" thick, so even with some planing, it should be possible to make a stout table.

After clearing up most of the sawdust, I stacked the slabs in the barn, so they can air dry slowly.
It is the first time I have sawed a complete trunk and stacked it this way. I think it looks fine which is good, as it will need approximately 2 years of drying time. This is based on the rule of thumb that one year will dry approximately 1" of thickness.

Asger showing the broken blade.


The stack, broken blade in front.

Asger posing with the broken saw blade on top of the stack.

Motorheads!


Sunday, March 8, 2015

My parents' old sycamore tree

As long as I can remember, My parents have had a large sycamore tree in the front yard.
They have talked about having it downed, and about a week ago they had someone to do the actual felling of it.

I had told them that I would like to have the trunk and one of the main branches (it was a Y shaped tree). My plan is to convert the tree into a table, and thereby still having preserved some of it for the future. It will probably yield material for several tables, but that is also OK with me.

Last Monday, I drove down to my parents to pick up part of the tree. It is so heavy that I could only take the Y shaped 6 feet trunk in my trailer. Any more would have caused me to drive with overload which is something the police in Denmark takes pretty seriously.
My dad, their neighbour and I managed to get the trunk onto the trailer by means of a chain block, and a bit of ingenuity.

I guess the weight of the trunk is around 800 kg, because my front loader on he tractor is just too weak to lift it. Luckily there is a well functioning non return valve in the hydraulic system, so I could use a chain block in connection with the front loader and get it lifted of the trailer.

A bit more (a lot actually) of fiddling and the thing was positioned in place on the wagon of the mulesaw.

I have sawed a couple of 5/4" boards and for the entire width I have made one which is 2.25" thick. Right now I am having problems because the width is so great that the blade can not eject the sawdust from each stroke, so the blade gets hot and tends to jam up. The sawing of something this wide (32"+) takes an incredible amount of time. I think my mean speed at the moment is 3/8" per minute.
It is a good thing that I don't have to make a living out of it. If the width is reduced to approx. 24", I can go with a speed of 4-6" per minute depending on how hard the wood is to saw.

Gustav and the trunk.

The trunk will just pass the frame of the mulesaw.

As a service to wives of readers from Pennsylvania, here is a picture of me after a visit to the hairdresser and also with a recent shave :-)  

Friday, March 6, 2015

Sawing whitebeam logs with the mulesaw (now with pictures).

I got so eager with all the sawing, that I forgot to have a video taken during the process.
Instead Gustav took some pictures of the planks.

The width of the upper planks are around 25", the thickness is 2.25"

Until now I have processed two logs. I still have three more to go, but I think I'll save those for my next home period.

After a bit more research yesterday, I found a place where it was stated that whitebeam was not very prone to cupping and twisting etc. during the drying of the planks. I hope it is true, because that would make a nice change compared to elm.


Trailer loaded with whitebeam planks.

The 2 planks on the left side of the stack is from the upper log too.

Thursday, March 5, 2015

Sawing whitebeam logs with the mulesaw.

As usual, I have been fairly busy during my time at home, and I haven't had the time in the workshop that I had hoped and expected.
Instead I have been busy sawing larch logs into planks to be used for our porch project some time in the future.

A friend of mine had downed some whitebeam trees on his property, and asked if I could saw them into planks on the mulesaw.

I have been sawing yesterday and today, and the wood looks really nice.

The interesting thing is that I can't find the species mentioned on the wooddatabase.

In Danish it is called: seljerøn, the Latin name is Sorbus Intermedia.

As far as I have been able to find out, it is mostly used for wood turning and carving, At a German Internet page I could see that it had been used for making pins for the German version of bowling (Kegeln).
 Previously it was used for cogs on gear wheels in wind mills. So it must be fairly hard.

If anyone knows of any other uses it would be interesting to hear about them.

I'll see if I can get Gustav to shoot a video of me sawing them tomorrow.

Thursday, July 24, 2014

Stock preparation for chairbuilding extravaganza

The summer holiday is upon us with all that it means = not too much time for woodworking. Next time I get home from the ship the plan is to have a chairbuilding extracaganza meeting, where a couple of woodworkers will try to make a Welsh stick chair.
The meeting is going to be held at my place, and I am going to supply the elm for the seat blanks.

This means that for once I actually have a purpose for sawing with the mulesaw.

going through 24" of old elm isn't easy, so one plank takes more than 1 hour to saw. Yesterday I had to rearrange the motor for the mulesaw, because the flat belts kept slipping. Now I have made the setup, so there is no clutch between the electric motor and the saw, but still it is not a fast saw.
The good thing is, that the surface looks nice, and the board is flat.

Compare the size of the log to the standard barrel next to it.

Close up of the saw blade.

A look from the outfeed side.


Sunday, August 4, 2013

A future Welsh stick chair (hopefully)

We managed to chop down the trunks of elm and transport it home. The crane on the truck was even able to lift the trunk onto the wagon of the mule saw.
So now there is no excuse for not getting started.. except finishing the roof etc.

The owner of the horse training centre didn't want any money for the trunks, but he would like me to help chop down some other old elms that were leaning over their house.
Those elms weren't as big and some of them were partly rotted. So I helped him and said that he could keep the wood for fire wood. He was really pleased, and so am I.

So without any further delay here is a small graphic description of a nice day.

Gustav next to one of the trunks.

Starting the cut.

The tree next to the trusty Volvo Valp.

Timber..

One of the branches was rotten inside.

The bottom of the trunk.

Getting the log onto the mule saw.

Wednesday, May 29, 2013

Sawing with the mule saw

50% of the future hide glue does not always want to enter the trailer. A friend of my wife spent a couple of hours one Sunday afternoon, trying to persuade it to go in. This friend also has got hide glue in the rough and a small riding court. My wife asked if I could make bench for her to place at her riding court as an appreciation of her time spent with the pony.

I have settled for a shaker like design which I have always wanted to try anyway.

This also presented an opportunity to try and use the mule saw for something useful. The top of the bench will be made out of a single board of larch (what a surprise), and the rest of the bench will also be made out of larch. This is actually a good choice since the bench will be positioned outside permanently.

I have been testing the mule saw the last week, and it is working better and better. I can still improve on my sharpening of the blade, but all in all it is working as it should. I made some nice boards out of elm that were 16" wide. At that width and the current shape of the teeth of the blade, I need to go really slow. The lowest speed is about 4" per minute, so the saw is not fast at all. But on the other hand, the boards look very nice after sawing, and I don't have to make a living out of it. So being slow is OK.

The mule saw in action on a trunk of larch.

Thursday, April 25, 2013

Milling wood

Gustav have finished the holders for the obstacles for the horses to jump over. And I promised him that we could make some new booms as well.
The old booms were some 1x2" strips that I had, but they were soft and flexed when mounted on the holders.
I decided that the new booms will be 3x3", and the plan is to make an attachment that will allow me to make them octagonal using the sawmill.

The following is a description of how I mill wood, to use for my various projects.

The sawmill is powered by my old Volvo BM 400 tractor (diesel), the PTO shaft is connected to an angle gearbox from an old grass cutter (for making grass for silage).

The sawmill itself is a BMR 900, and old Danish sawmill with a circular blade of 900 mm diameter (36"). The sawmill can handle wood of up to 8.5 m (roughly 28 feet), and a it has a maximum riving capacity of approximately 12". So the wood can be of a diameter of up to about 16", since normally you don't split it right down the middle anyway.

The log is hoisted onto the sawmill by means of a
manually operated chain block and a home made
crane beam.                                                            

The log is positioned on the moving table and is
secured by means of some small wooden wedges.

The first cut is made near the edge of the log.
Note that the fence is retracted all the way.   

This is how the log looks like after the first cut.
The log is then rotated 1/4 of a turn, so the flat 
side is facing down. Then another cut similar to
this one is made, so the log has got two flat sides
meeting in a 90 degree angle.                               
 

Now the fence is set to the desired thickness of the
finished board which is 3" in this case. The log is   
positioned so it is resting on a flat side, and the other
flat side is against the fence.                                       
 

Now the narrow board is 3" thick, and
it will be parked on the table beside the
saw while another one like it is being    
made                                                      

Now the board which is 3" thick is    
placed flat on the saw mill. The fence
is once again set to 3" to make the boom.
 

If the off cuts are a little wide, I will usually rip them
in order to make them more suited as firewood (then 
they need no splitting). In addition to this it produces 
some more sawdust which is used in the stalls for the 
horses. If the size of the off cuts permit it, I normally 
try to make a board e.g. 1x4" out of it.                         
 
If it is hardwood (elm), which I would like to use for
making furniture, then there is a small pause in the    
process (2-3 years) to allow the wood to dry.