Showing posts with label Sea chest. Show all posts

Monday, November 23, 2015

Treasure chest with curved lid part 9, The finished chest.

I asked my wife what finish she would like to see on the Shaker cabinet, and her answer was Danish oil (what a surprise..)
I had hoped for a paint finish, but since it will probably be given away for someone as a Christmas present, I chose to stick to what she wanted.

But there were no restrictions to the treasure chest with curved lid that I made some time ago. That thing has just been sitting idle under a table to be out of the way.
I asked Asger if he would like to paint it, and he was really exited about it. I decided to give up most of the control and told him that he could choose the colour.
We looked at the paint shelf, and I tried my best to advocate for a green, blue or red coat of paint. But Asger was not convinced that it was the right path. Finally he made up his mind and settled for Massey Ferguson light grey, a classic tractor colour.

He rolled on a coat of paint that quickly got absorbed by the wood. So we agreed that was a primer, the next day he rolled on another coat, and that helped a lot.

Finally I added the last layer using a brush instead of the roller, because our cheap roller more or less dissolved in the oil based paint.

I had made some hardware on the ship while I made the chest itself. An escutcheon and parts for some lifts. 
The lift handles themselves are old handles from some metal pails that comes with various chemicals and soap.

Since I made a treasure chest, I opted for some fantasy inspired hardware. something that could spark an interest in a child. So I made a dragon/vampire bat as a theme. 
It turned out better than I had hoped for. But I think they would have stood out more if the chest had been in a different colour.

The finished treasure chest.

Asger sanding

Asger painting

Painting

Dragon escutcheon

Dragon lift

Sunday, July 19, 2015

Treasure chest with curved lid part 8, assembly

After I had glued up the lid, I cut the ends of so they were level with the sides. Then I started rounding over the outside of the lid using a plane.

This was when I realized yet another drawback of this design. Work holding for such a shape is difficult to say the least. It reminded me of trying to hold a fresh seed from a water melon. Not the most efficient shape if you want to retain full control over the situation.

I took a break from the free hand planing, and decided to glue up the lower part of the chest. This went conspicuously smooth. Even the diagonal measurements were spot on.

More planing and I was satisfied with the shape of the lid. I sanded the surface with some grit 60 to make it a bit more smooth.

I planed the lower part of the chest  to remove any protruding pins or tails. My solution with the floating bottom that has a lip made it impossible for me to plane the lowest part of the chest. So I had to use a chisel, and later I will follow up with some sandpaper.

The lock was mounted after making a mortise. I had to bend the upper plate just a bit, since the upper edge of the front board is not square to the front, another disadvantage of making slanted sides.

I  more or less try to follow the advice given in "The joiner and cabinet maker" from Lost Art Press, when it comes to mounting a lock. The most important thing is to keep everything centered around the pin for the key. Since all locks I have ever been able to find are full mortise locks, my biggest challenge is to not break through the sides of the board. If I succeed in making the mortise, the rest usually goes pretty smooth.

Next task was to fit a striking plate in the lid. I marked out the position from the lock, and I even remembered to make the mortise below the striking plate wider that the square hole itself so the lock would actually work.

The hinges were mounted their own width from the ends, which is pretty common.
I started mounting them on the lid, because I could use the lower case for holding the lid while I performed the job. This was for once in this project a nice work holding solution.

Since the lid did indeed end up being 1/4" too narrow, I decided to mount the hinges so this would be visible on the back of the chest. That way the front will look as nice as possible. I thought about removing about 1/8 from the front and the back, but discarded that idea, because it would make the lock visible from the front. Further more I was afraid that it would lead to that the mortise for the striking plate could penetrate the front of the lid effectively ruining the project.

I still need to make some feet and an escutcheon for the chest, and I am considering making some lifts for it as well.

View from the front.

Work holding of the lid.


An escutcheon will add to the look.

Interior of the chest.

Tuesday, July 14, 2015

Treasure chest with curved lid part 7, the lid

After the glue had dried I decided that it didn't look right if I'd led the inside stay as it was with flat boards forming the surface.
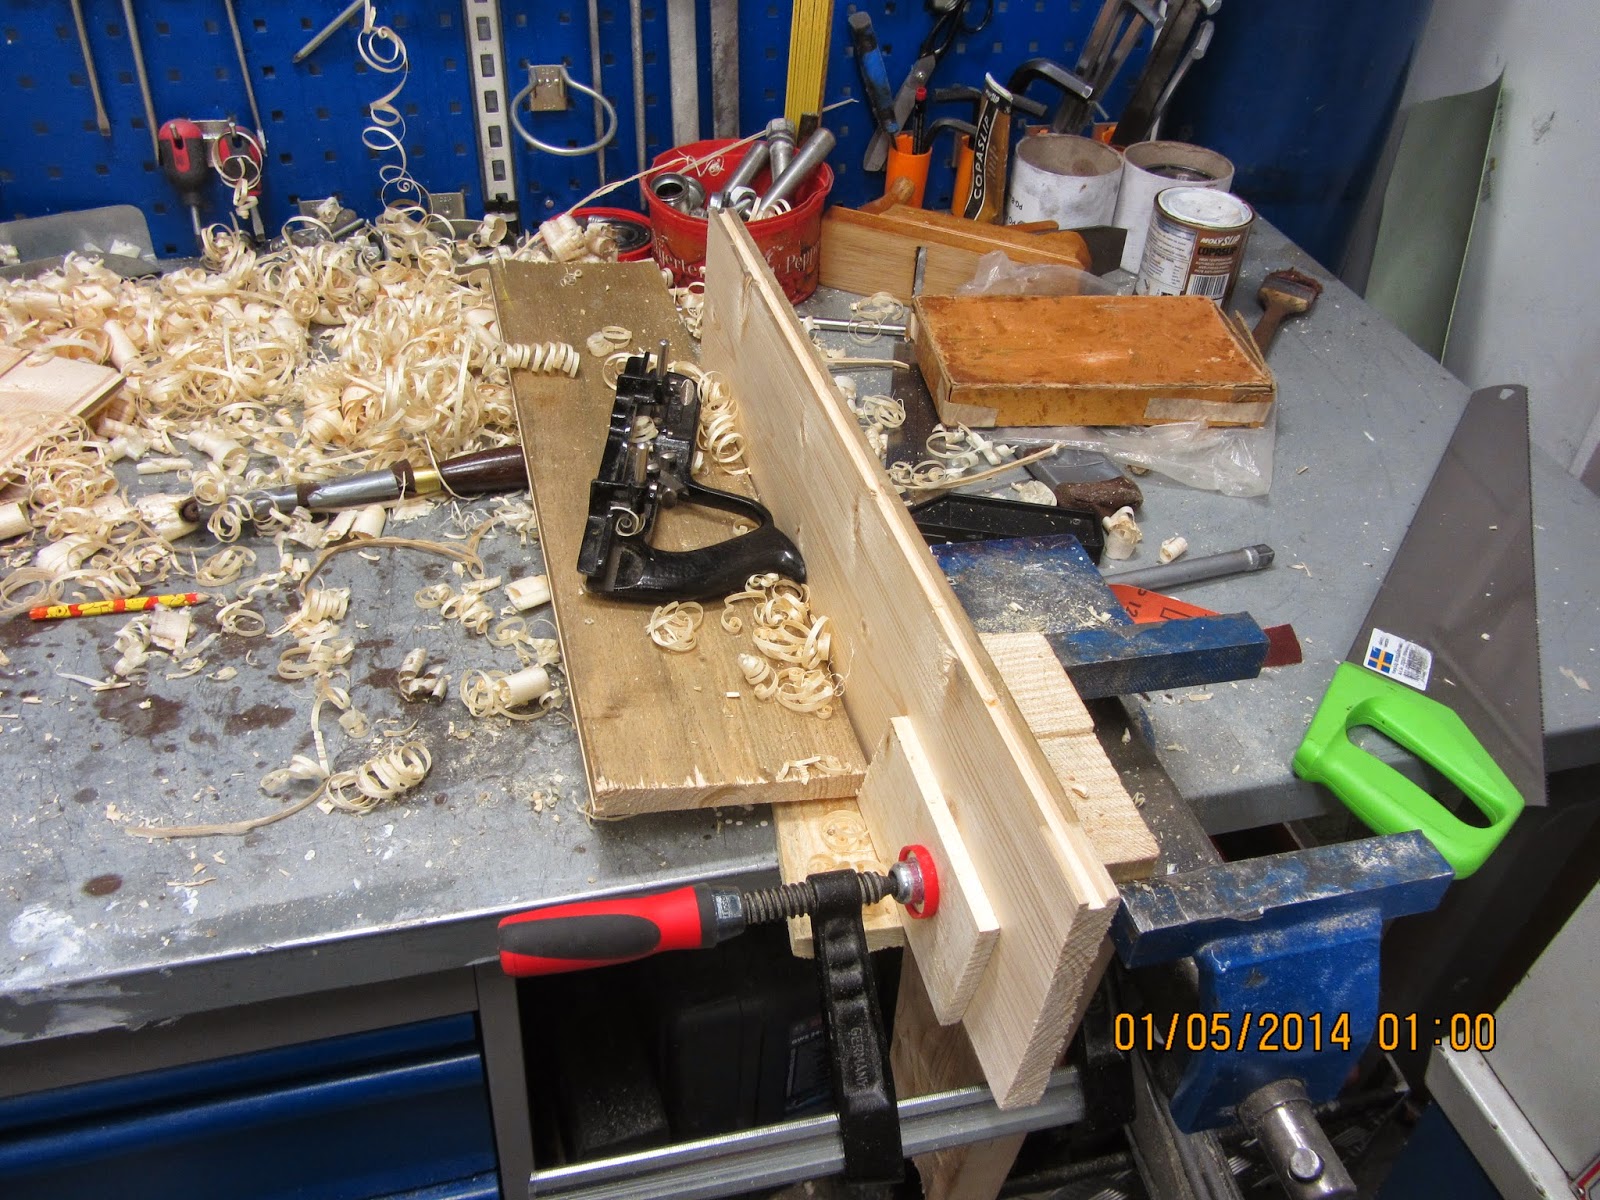
I adjusted the scrub iron in the plane, so it was able to take a bit of a cut even when only the sides of the plane were riding on high spots. It was far from ideal, but I managed to get the inside to form some sort of a curve instead.
There were a few places I wasn't able to reach, so I took the iron out of the plane and used it as a scraper. Again it is not an efficient trick that will make your friends gaze in awe, but it helped me git a bit closer to a decent shape.

The surface looked like crap after my exploits with the scrub plane and the scraping experiments, but I found some 60 grit sand paper in the deck workshop, and then I just started sanding away.

After quite some time I was satisfied with the way things were looking, and I was ready to move on to attaching the ends.

Originally my plan was to make the ends straight down, but for some reason I decided that it would probably be too easy, and that I should challenge myself a bit more.
Therefore I decided to make slanted ends.

I immediately sawed the ends of the lid so they were slanting. Then I "squared" things up the best I could using the smoothing iron in the plane.

I am getting used to making angled dovetail joints on flat boards, so I guessed that this wouldn't be
much different.
Guess I was wrong.
It really is a lot more difficult to make dovetails that will connect a semicircular flat board at an angle to a less than perfect half cylinder shaped object.

At first I marked out the tails on the end boards and cut them, I even made sure to take into account that the cut had to be deeper on one side than the other. It looked fine until I tried to put them on the lid itself for marking out the pins.
Even I could see that there were no way I would ever be able to make some pins that would allow that tail board to go on. The tails had to have different angles depending on if they were placed on the side part of the ends or on the top part of the ends. I realized that this slanted end challenge was going to be a lot more difficult than I had imagined.

I spent some time trying to figure out how I was supposed to mark out the dovetails, and ended up making the pins first.
I could use a compass to step them of, but since the reference side was curved I didn't have a system for marking out the angle of the pin. My solution was to cut a small dovetail marker that looked like a triangle, and then I placed it so it looked fair to me. At least I knew that the slopes would be the same.

Marking the depth of the tail was done using my marking gauge. Next came the problem concerning how to mark out the direction of what would be the sides of the pins. Normally I use a small square in form of a piece of cardboard. But a square is best if it has got some sort of reference edge that you can measure from.
I tried various ideas before settling on simply eye balling the lines. For that I used the back of the panel saw that we have on board. I positioned it at the pin markings and tried to make it follow the length of the lid as well as I could.

Once all the markings had been taken care of, I sawed and chiseled out the waste between the pins.
Normally I like to undercut my waste area, but I figured that it would end up showing when I get to the point where I can plane the outside of the lid to the final shape.
So the waste area was finally cleaned up using a coarse file (we haven't got any rasps out here).

I made a couple of new end boards instead of the ones with the faulty tails on them, and after a lot of fiddling I managed to mark out the tails and cut them too.
This involved some guessing regarding where to stop the cut on one side, and then just hoping that it was the correct place when I placed the chisel to remove the waste.

I dry tested the end boards, and they seemed nice and tight. When I tried to gently remove them to be able to add some glue, both top pieces broke off.
I simply glued the pieces back on and then trimmed the pins for those areas a bit more.

Finally I glued on the ends. And I pretty much immediately regretted not undercutting between the pins because there were gaps on the outside of the chest. I am afraid that these gaps will be more visible than any undercutting I could have dished up with.

The end with faulty dovetails.

Marking out for the slanted cut.

Sawing, the line from the bucket wasn't completely straight after all.
  
The glued up lid.


Thursday, July 9, 2015

Treasure chest with curved lid part 6, the lid

The lid is going to be almost semicircular from the front going to the back. Length wise it will be straight.

I started by drawing an arc that would correspond to my plans for the lid. 
On a board I marked a distance of 11" near one edge and a center between those. I then placed one leg of the compass something like 1.5" below the center and adjusted the other leg to touch the points 11" from each other.
Then I scribed the piece of a circle using that setting.

I measured the curved distance ( I know you can calculate it as well, but I don't remember how to since it is only a fraction of a circle).
I got the distance to be 16" (41 cm) more or less, so I made 6 boards with a width of 2.75" (7 cm). Each board was intentionally cut about 4" too long.
Using my scrub iron in the plane, I planed a bevel on each side of all the boards. I just eyeballed the angle.
The boards for the sides of the lid each got a bevel that was twice the angle of the inner ones. In hindsight it would have been smarter to wait with these two bevels, but I know that for the next time I am going to make such a lid.

I flattened what was going to be the inside of each board, and then I laid out all of the boards and numbered them. I had added an arrow showing the direction of the grain, so I didn't make it more difficult for myself than I had to.

Each pair of bevelled edges were then jointed together. Pretty much like how you do with any glue joint. The only difference is that here I had to turn one board the opposite direction, to get the bevels to match up. A few swipes with the smoothing iron in the plane, and the seam seemed tight enough.

When all the joints were completed, I again lined the pieces up. I added some blue masking tape to hold the pieces, and then carefully folded the lid. I placed the assembly on the scribed arc, to see if it looked fine.
It turned out that I had been a little too aggressive on the bevels, so I was about an inch short.
I made a seventh stick about an inch wide to rectify the width of the assembly.
This stick was made with out any bevels (at least that is what I tried to, but I didn't check it with a square).

The now seven pieces were lined up, taped and flipped over.
Now the bevels were open so I could add some hide glue to both sides of each joint. I used a small brush to get a nice layer of glue all over the surface.

Once all the glue was applied, I gently lifted the two sides of the lid and when the shape was obtained, I put the assembly upright on the work table.

I adjusted the individual boards so the inside edges of the joints lined up the best I could. I then added some more masking tape to help close the inside seams by putting some tension on the opening of the lid.

After the glue had started to set, I carried the piece out to a nice and warm spot so the glue can dry.
I then measured the width of the assembly and found that I am still about 1/2" short..

It doesn't matter much, because one of the joints of the centre stick is not very tight on the outside.
The plan for tomorrow is to remove the centre stick, and glue in another one which is maybe 3/4" wider. That would give me a bit of surplus wood that I can plane away to make the lid fit nicely.

The scribed arc that represents the ideal shape of the lid.


Initial testing of the bevels.

Flattened on the inside

Jointing the bevels

Ready for the first test.

Checking the shape of the assembly.

About an inch too narrow.

Now there are seven pieces in the lid.

Glued up, view from the inside.

Glued up, view from the outside.


Wednesday, July 8, 2015

Treasure chest with curved lid part 5, completing the bottom.

Today I managed to make the groove for the interlocking of the bottom. Actually it was a bit easier than I anticipated. Easy workability and a nice smell are definitely positive features of spruce.

I could ride the body of the grooving plane on the outer edge of the bottom, and then adjust the iron so it was protruding something like 5/16" (8mm). The finish of the groove isn't superb, but it doesn't have to be.

After making the groove I dry assembled my parts: Sides, ends and the bottom.
Inside it looks just like I had envisioned. But on the outside there is a bit of a gap. I still haven't made up my mind if I should add a small piece of wood to act as a moulding, or if I should just leave it the way it is.

My problem with adding some moulding is that it will disturb my design idea of the rounded outer edge of the bottom to look like a piece of moulding in itself.

I didn't plan for movement on purpose, but the bottom is able to move just a bit in the groove which is good news.
Wood movement is mostly limited to expansion after being worked out here, so being a little bit loose is not a problem.

My plan was to continue on the lid, but I had to make a slight alteration in those plans, as our refrigeration compressor started acting up.
It has been giving us problems for the last couple of years, and we haven't really been able to pinpoint the fault.

After fiddling with the compressor, I just managed to saw some stock for the lid, before it was time to make an evening round and stop for today.

Test assembly showing the small gap.

Close up of the interlocking parts. 

Inside view.


Monday, July 6, 2015

Treasure chest with curved lid part 4, working on the bottom and finding a couple of design flaws

The glue had dried and it did indeed still work even though I passed the "best before" date written on the container.

The panel was not flat, but I guess it comes pretty natural after glueing up to cupped boards. At first I traversed it with the scrub plane, and then when it was flattish I started going with the grain.
After a bit of workout, it was nice and flat.

I dry assembled the carcase of the chest, and after checking that it was square, I traced the outline of the bottom onto the bottom panel.

According to my sketch it will look good if the bottom is protruding on all sides, just something like 1/4". This could technically be achieved by adding a small piece of moulding, but I didn't bring any moulding planes with me, so I had to think of another way to make this small detail.

The plan was to make a groove near the bottom of the carcase, to house the bottom, That is pretty traditional.
In order for the lower part of the bottom to protrude I had to make a rabbet along all the sides of the bottom.
Then on the remaining full thickness part of the bottom I had to make a groove, so I would end up with a thin piece of bottom that would fit into the grooves of the carcase sides.
In my mind this worked very well.

Design flaw No 1
I normally stick to the grooving before dovetailing, but I didn't do it this time because my original idea was to simply make a rabbet and then nail the bottom on.
Due to my interlocking groove idea, I had to make a set of grooves without messing up the dovetails, so I wouldn't get a groove that would be visible from the outside of the chest.
On the sides it worked really well, since I just cleared the tails.
On the end boards I found myself needing to make a stopped groove - as in stopped in both ends. I tried using my grooving plane, but it pretty quickly became evident, that this tool was not intended for making that kind of grooves.
My solution was to use a utility knife for defining the sides of the groove. I adjusted the iron of the grooving plane so it protruded a little less than 1/4" (5 mm to be exact). That made it possible for me to use the grooving plane as sort of a router plane.
It took a bit more time than I had expected, but the grooves turned out well.

Design flaw No 2
If you need to make a groove on the side of your rabbet, be sure not to make the rabbet wider than your grooving plane can handle..
This flaw was discovered after I had finished planing the almost 3/4" wide rabbet all the way around the bottom.
I think that I might be able to tackle it sort of the same way I did with the stopped grooves. But I decided to call it a day and not risking to mess up things by keeping on working too late.

After imposing those additional challenges on myself, I would like to explain why I changed the design in the first place:
I wanted to make sure that there would be no crack between the sides and the bottom if it should move with the seasons. Therefore I got the idea of housing the bottom in a groove.
And making one bottom, and then glueing on a decorative bottom seemed like an idea that required too much work. Guess I was wrong about that.

Flattening the bottom.

A stopped groove.
Note the protrusion of the iron on the plane.

The bottom with rabbets.


Sunday, July 5, 2015

Treasure chest with curved lid part 3 dovetails and glueing up the bottom.

Today I chopped the dovetails of the four corners of the chest. A benefit of using spruce is that you can make the dovetails really tight since the wood compresses very well.
This time I made the tails first like at home, and I do find that I am able to make nicer dovetails that way compared to when I make them pins first.

Last year during the chairbuilding extravagnza, Brian Eve brought some liquid hide glue for us to use.
It stayed at my place, and I found out that it actually passed its "best before date" a little while ago.
For some reason, I have never tried using liquid hide glue for dovetails. Out here I am always stressed during glue ups because my normal white glue will dry very quickly because of the temperatures in the workshop especially during the summer months.

While at home, I decided to bring the liquid hide glue with me on board this time, so I could use it before it gets way too old.

My plan is to try using the liquid hide glue as the only glue on this project. I don't know why I feel all excited and insecure about that, since it is a pretty time tested glue type. The only thing is that it could be too old, but I kind of doubt that the "best before date" means that the glue will not stick to anything as soon as you pass it.

I found some more spruce that could be glued up to form a bottom.
First I jointed the mating sides, and then I discovered that there was a crack in the wide board.
I opened the crack by bending the board a bit, and squeezed some glue into it. I then applied hide glue to both surfaces and pressed the joint together with a couple of clamps.

Adding glue to both sides of a joint is a habit of mine from working with white glue. I have no idea if it is required or even encouraged when using hide glue, but I figured that it wouldn't hurt.

The joint went together as it should the first time, so I didn't have any reason to use the slow setting time to shift the joint around anyway.

After some time the glue had already dried, but I have still left the clamps on, because I won't be working on the bottom until tomorrow anyway.

Dry testing the dovetails.


Saturday, July 4, 2015

Treasure chest with curved lid part 2

Yesterday I found a set of pallet sides for half a Euro pallet.
It was a set that I had saved from some time ago, when we received some spare parts. the wood has been stored in the engine room, so it is bone dry.
Not surprisingly the quality is not furniture grade, but that has never stopped me from attempting to make something out of it anyway.

The wood is flat sawn spruce, so it is no wonder that it has cupped quite a bit. The two sides of the chest had cupped the least, so I managed to flatten them with out sacrificing too much of the thickness. The end boards were a different story. They ended up being roughly 1/8" thinner than the sides, but as long as they are uniform in thickness, I'll probably be able to make it look all right somehow.

After sketching a square sided chest with a curved look, I decided that it looked a bit dull. Next I tried to draw a canted chest with a smaller footprint than top, and that looked better.
When I added an exterior bottom and some feet it actually looked quite fine. So that is going to be my main plan for the time being.

I decided that the size of the chest on the upper part should be 16 x 11" (40 x 28 cm).
My idea is that the canted sides should not have too bold an angle, as this might make the chest a bit unstable. So I have just shortened the lower part of the sides and ends with 3/4" (2 cm) in each end.
It will give each end a ratio of approximately 10:1.
By looking at my sketch, it will look pretty good if I make the exterior bottom a bit wider than the bottom of the carcase, and the feet a bit wider yet. So the feet might actually end up being directly under the upper corners of the chest.

With the sides and ends flattened and jointed on the long edges, I sawed them all to the desired length.
I wanted to make use of my moving fillister plane, so contrary to my normal procedure at sea, I am going to make dovetails with the tails first.
So I planed a shallow rabbet for the back side of the tails. Next I used a set of dividers to lay out the tails and a small piece of cardboard to mark out the sides (just as usual).

I sawed the tails and decided that I didn't want to push my luck by starting to chisel out the waste tonight.
The parts were quickly taped together to give me an idea of the size and shape of the project.
It looked a bit too deep, but the depth will be reduced once I make the dovetails.

The lower part of the treasure chest.

Friday, July 3, 2015

Treasure chest with curved lid

I actually managed to make a functioning porch before going back to sea, although I didn't finish it completely.
But there is enough porch so the family at home can use it until I come home and can work on it again.
As usual, I was too busy building the thing to remember blogging about it and documenting it with some pictures, but I plan on taking some pictures once I am home again.

This time I have considered making a spice chest or a Milkmans' workbench.
The spice chest will probably just end up half way completed like the Gerstner inspired tool chest that is still waiting for me to complete it.
The workbench would require me to first make a tap and die set to be able to make wooden threads for the work holding.

The electrician on board was so kind as to bring a couple of chest locks with him from Buenos Aires in Argentina.
So my mind immediately started going down the slippery path of making a new chest of some sort.
I have made sea chests and tool chests before, but I have never made a treasure chest with a curved lid - So I guess that is going to be the project this time.

The first step will be to find some stock and start preparing it.


An Argentinian chest lock.


Tuesday, June 3, 2014

Tumblehome sea chest, the completion

Yesterday, I made a lower skirt for the tumblehome sea chest.
I like to change the orientation of the dovetails for the lower skirt, so it can better resist the outward thrust of the bottom, if it should expand at some time.

A great advantage of fitting skirts to a canted chest is that the further down you press the skirt, the tighter the fit will be.
I took a critical look at the surface of the chest itself, and it doesn't look very good. The spruce I have used was definitely not furniture grade, so I am convinced that I will paint the chest once it is done.

While waiting for the skirt to dry, I glued up a panel for the lid.
I figured that a small experiment wouldn't hurt, since the chest isn't designed for anything special. So Instead of my usual floating panel type lid, I decided to go for a flat panel with nailed on battens to prevent it from warping.
I dovetailed two battens to a piece of wood that will act as a front dust seal. After the glue had dried, I mounted the assembly on the lid.
I glued the front dust seal piece onto the lid, and then I reinforced it with some clenched nails just to keep on experimenting.
The two battens were attached with clenched nails, but no glue. My theory is that the front piece will stay put due to the glue and the nails, and the nails holding the battens will prevent the lid from warping, but still be flexible enough to accommodate seasonal movements.

The lid is secured with a leather strap which I took from an old bridle for the horses. I punched a couple of holes in it, and mounted it using some brass screws.

Before painting the chest, I decided where to put the lifts, and I made pilot holes using an awl.

I couldn't make myself use the milk paint which I bought two years ago in Germany. I haven't been able to locate a dealer in Denmark, and I didn't want to risk waste the paint on an experimental chest like this one made out of crappy wood.
I looked at my shelves and found some machine enamel in the RAL colour 6011 (Reseda green / Hannover Green). It is produced in Denmark by a company called Esbjerg Paints. and I figured that if it can stand up to agricultural machinery, then it will be OK for my chest.
The red colour is Swedish red wood protection from the same company. I used it for painting a door on the backside of the barn a year ago.

After letting the paint dry for a couple of hours I estimated the paint to be at least dry enough to allow for mounting of the lifts.
The mounting itself went suspiciously easy, so maybe I am having a lucky day.

All that is left is to present it to SWMBO and see if she would like it in the stable or inside the house.
I think it might end up in the stable, since we need a new box for curry combs, and this chest will be perfect for that. In addition it is very stable and can be used as a small platform for standing on, when the hair of the horses needs to be groomed and braided before going to a contest.


The finished chest.

View from the other end of the chest.

Clenched nails and holding strip.


Wednesday, April 30, 2014

Tumblehome sea chest 5, the bottom

We had some semi bad weather yesterday, so I was glad that I had decided to try tackling the bottom of the chest. That is a  little more coarse woodworking than dovetailing and making a complex glue up.

For those pallet wood builds, the following approach is working fine for me:

First; I'll flatten the boards on one flat side, and maybe touch up the sides as well if they need it. The back is left coarse, and the boards don't necessarily have the same thickness.

Second; is making either a rabbet for ship lapping or a tongue and groove. On this chest I made 2 tongues on the centre board and one groove in each of the other boards.
I use my Stanley grooving plane for making tongues and grooves (and rabbets if needed). It is surprisingly effective, When you have only got one flat side, this side will be the reference side to all work done. This is possible as long as you remember to start with the widest setting on the tool, that way there will still be some wood for the fence to touch when you need to make the groove closest to the reference side of the board.

For this particular chest, I just had enough wood left over from the initial board (6m in length) to make a complete bottom. 3 pieces covered the width and I had an additional 1 cm on each side.
Making the bottom a bit too large and then sawing of the excess is an easy way to do it with canted sides.

Third;  I attach the bottom to the chest. The bottom is mounted with the nice looking side (the reference side) on the inside of the chest. The rough side becomes the lower bottom of the chest.
I would prefer to use nails to stay a little classic, but we haven't got any on board, so I used some screws instead.
The wood is so soft that I didn't have any problems with setting the head of the screws about 1/8" below the surface. This low setting is crucial for the next step.

Fourth; with the bottom attached I use my scrub iron in the plane and level out the underside of the bottom. I usually work across the grain as it is easier to remove more material that way. Since the screws are set really deep in the wood, I can plane away without being afraid of nicking the iron.

Making a groove.

Bottom mounted.

Planing the bottom, note the cupping of the boards.


Monday, April 28, 2014

Tumblehome sea chest 4, glue up

After a fairly quiet day, I found myself in the workshop trying to get things ready for the glue up. The boards for the interior shelf and till were cross cut to length and each piece test fitted in the corresponding grooves.
The till and the "high edge" were glued and nailed together prior to installation, to minimize the number of loose boards that I had to incorporate in the glue up.

I had made some really nice dowel protrusions on the lid which I had positioned a little bit out of the way, so that I wouldn't accidentally knock it down while moving around with the rest of the parts, which is something that I have experienced on occasions. The board that falls down usually get some heavy bruising or break of some small delicate detail.
In that respect, putting the board to the side was a success.
What wasn't so successful - was that I managed to forget about it, and I therefore glued up the entire carcase without the lid..
The only good thing is that I had put it aside so early in the process, so I also forgot to drill the holes. Therefore if you don't know that the original design called for a lid, you won't know that it is missing.
Actually the lid wouldn't have fitted anyway, since I forgot to take into account that the sides were sloping, so the lid should be even narrower than I had made it.

Apart from the less than perfect lid business, the glue up went pretty smooth considering the canted sides.
I actually forgot to check if it was square, so I have just been down in the engine room again to check it. The diagonals are a bit off, but I can't do anything about it now anyway. It isn't a lot, so it will still be OK.

The wood that I have used for the carcase is far from perfect. It is flat sawn spruce that was a bit on the wet side when I started. The panels have started cupping quite a lot, and some of the ends have shrunk a bit too. This resulted in some cracks when I negotiated the pins and tails together. I still believe that the chest will end up looking OK, because the plan is to paint it once it is finished. The thing is that I have started to get the idea, that maybe once I should try to make a decent chest out of some wood that didn't come from a pallet or some other shipping aid.

The glue up

Interior view, till (without lid) and the "high edge".

Sunday, April 27, 2014

Tumblehome sea chest 3, Improved planing stop

For the interior parts of the chest, some 1 cm (3/8") thick boards were needed. I found some old pieces that could be sawn and planed to fit.
A total of 5 small boards are required for having a normal till with a lid, and the German narrow till (the "high edge").
For the "high edge" I was able to rip a board down the middle, and it gave me close to the dimensions that I had imagined while considering the build. The vertical part of it is 4 cm, and the horizontal part i.e. the bottom is 3 cm. This gives an interior of the "high edge" of 3 x 3 cm.

The front board of the normal till is 9 cm high, and the bottom board is 10.5 cm wide. The lid is 10 cm wide, and due to the canted ends, it protrudes approximately 1 cm over the vertical front. This is to make it easy to grip the lid with your fingers for opening.

The plan is to make two small dowel shaped protrusions on the back side of the lid, which shall fit into two corresponding holes in the sides of the chest. This way, the lid will be hinged by itself. I have seen this approach used on some old chests, and it is fairly simple to execute.

I have improved upon my planing stop. It used to be a loose piece of wood lying on the top of the workbench and touching the bulkhead. Occasionally it would fall down or move around which didn't make things easier.
I have tried to clamp the planing stop onto the bench, but then I risk hitting the clamp with either the plane or my hand. So I have moved away from this idea.
The latest fashion regarding planing stops is to tape them to the bench top and to the bulkhead. If you use yellow/black warning tape, you can give the whole set up a real quality look!
Look at the picture and judge for yourself, I am sure you will agree, that the same effect can not be had using blue masking tape or ordinary duct tape.
The next level will be to find a planing stop that is a little longer, to prevent my hand from hitting the bulkhead while planing. That would really take the set up to a higher level.

After planing all the boards needed, I tried to position them on one side of the chest, and it looked OK.
The next logical step is to cut the pieces to length and drill the holes for the hinged lid of the till. Then all should be ready for gluing up the carcase.

The improved (professional looking) planing stop.

Aerial view of the till and the "high edge"


Friday, April 25, 2014

Tumblehome sea chest 2

I decided to do a little research prior to building this chest, and this time I turned my attention to Germany to see if there were any differences compared to my earlier studies.
This is not phd grade research, so as soon as I find a serious looking page, I pretty much leave it at that.
German page on sea chests

One difference which is very visible, is the small shelf running along the back side of the sea chest. This is a feature I haven't seen anywhere else. According to the text it was also used in other chests as well.
It was used for savings, and according to the home page, it is the foundation for a well established phrase in German meaning that one has got some savings: "Etwas auf der hohen Kante". Literally meaning: Something on the high edge.

The open chest in the middle of the page has got the small shelf at the right side of the chest, indicating that the owner of the chest was a left hander.
The small shelf (hohen Kante) can be seen in this picture as well.

I cut the last set of dovetails for the chest itself, and I even remembered taking a picture of the sawing.
Using a hack saw is easy (for me at least), there is an appropriate weight to the tool, and the blade is equivalent to a rip filed saw. The toothing might be on the fine side for some, but you can get different blades so you can experiment. I am using a 24 ppi blade because that was just what I had in the workshop. The kerf is a little wider compared to a real dovetail saw, but not wider than the kerf you would get by using e.g. a bow saw.

I tested the assembly by pressing the dovetails together half way by hand, and they look decent. some glue and a little bit of planing and I think they might even look fair.

Due to a bunker operation, I couldn't get more than 20 minutes in the shop, but it was enough for me to cut the tails on the last board and do the test assembly. I have brought the pieces with me to the ECR (Engine control room), so I can mark out the position for the small shelf.
To be efficient, I try to do stuff like that whenever I have a spare moment where I have to stay put in the ECR anyway. That way I can use the precious workshop minutes on putting steel to the wood.

The dovetail sawing set up.

The test assembly (dovetails pressed half way).


Wednesday, April 23, 2014

Tumblehome sea chest

During the building of the small fairy tale bed, I found myself dreaming of making something real again. I know that a doll bed is for real, but somehow I found myself constantly drawing small tumblehome sea chests on every scrap piece of paper lying around.

The other day we received some stainless steel tubes that came strapped to a nice wide board, so suddenly I had 18' of a 6" x 1" spruce board at my hands..

The board was transformed into some 12" wide panels that could be used for the build.

I have decided to try to make as quick a build as possible, so there will be no secret compartments or fancy metal working involved.
One of the reasons is that it is not easy to plan some regular woodworking out here, the other is that I would like to finish the chest before going home.

The chest will be smaller than original sea chests to make it easier for me to transport it home, and because I find it easier to find use for smaller chests in the household compared to large chests. The chest should end up being around 24" x 16" with a height of 13-14" depending on how deep I make the skirt and how thick the lid will be.

Today I cut the panels to length and started on the dovetails. Normally I prefer dovetailing with tails first, but due to the lack of decent work holding out here, I do it pins first. For this build I have chosen to use a ratio of 1:6 for the angle of the pins/tails.
The design will be a tumblehome sea chest with canted sides and canted ends.


Chopping out the waste between the pins

Test assembly of the first corner


Monday, December 9, 2013

Seaborne chest part 10 (the end)

I finally pulled myself together and finished the sea chest.
After a lot of various obstacles such as a course north of the Polar circle, a heavy storm and 80 cubic meter of sea shells - today seemed like the right day to end the project.

The traditional way of attaching the beckets to the cleats is by means of an axle made out of rope. In order to make a nice diamond knot, you need at least some 4 stranded rope (or a higher number).
I don't have any rope of that kind lying about, and I don't want to purchase some just for making two small axles. So instead I decided to turn some axles instead.

I made the axles out of some old apple tree that I had once saved for turning purposes. Turning old fruit tree like apple, pear or plum etc. is a joy. The turning itself went conspicuously smooth, and that is rather strange since I don't do much turning. I turned two axles with a dome shaped end, and two loose domes that were drilled out afterwards - and then glued on to the axles (with the beckets installed)

I made the recesses of the cleats little deeper, to accommodate the domes, and then I simply screwed them onto the ends of the chest. I didn't use any glue in case someone will want to disassemble the arrangement in the future to renew the beckets when they are worn out.

For a finish I have thought about painting the chest, but I ended up deciding for a pure oil finish. I read on the can of Kamelia oil I have, that it can be used as a finish. Since the whole chest has been sort of an experiment, a new type of finish seemed just right. The oil penetrated the wood impressively easy, and I have now left the first coat to dry. I guess that I will add three coats in total.

What did I learn about this build:
The correct tools really do a difference. A scrub plane was probably the biggest difference from my previous sea chest build.
The nice looking Crown of Sheffield chisels that I had brought with me are nice looking and comfortable to use, but they can't hold the edge. They are so soft that I had to resharpen them way too often considering that the wood is soft pine. So I don't recommend anyone to buy that model of chisels. It is actually a shame since the tapers of the sides are nice and thin, and the name Sheffield used to be synonymous with high quality steel years ago.
Peer pressure got me into making beckets and cleats. Looking at the finished chest, I have decided that I think they look a little too extravagant. I have to admit that I am more into Shaker simplicity than fancy rope work. But I guess that I would never have found out if I hadn't tried.

All in all a nice little project that is possible to make even without a proper workbench.

Sea chest with beckets

Small sea chest with beckets

A blown out hole in the barn made by the heavy weather.