After considering the case for a few days, I had been able to pinpoint 3 things that I disliked about the lid stays:
The appearance or colour just didn't look good to me.
The way it folded into the chest would interfere with the planned tills.
I wasn't able to fit an interior dust seal.
Now that I had found enough reasons to not like the lid stays, it was so much easier to convince myself that I should dismount it and instead add an interior dust seal.
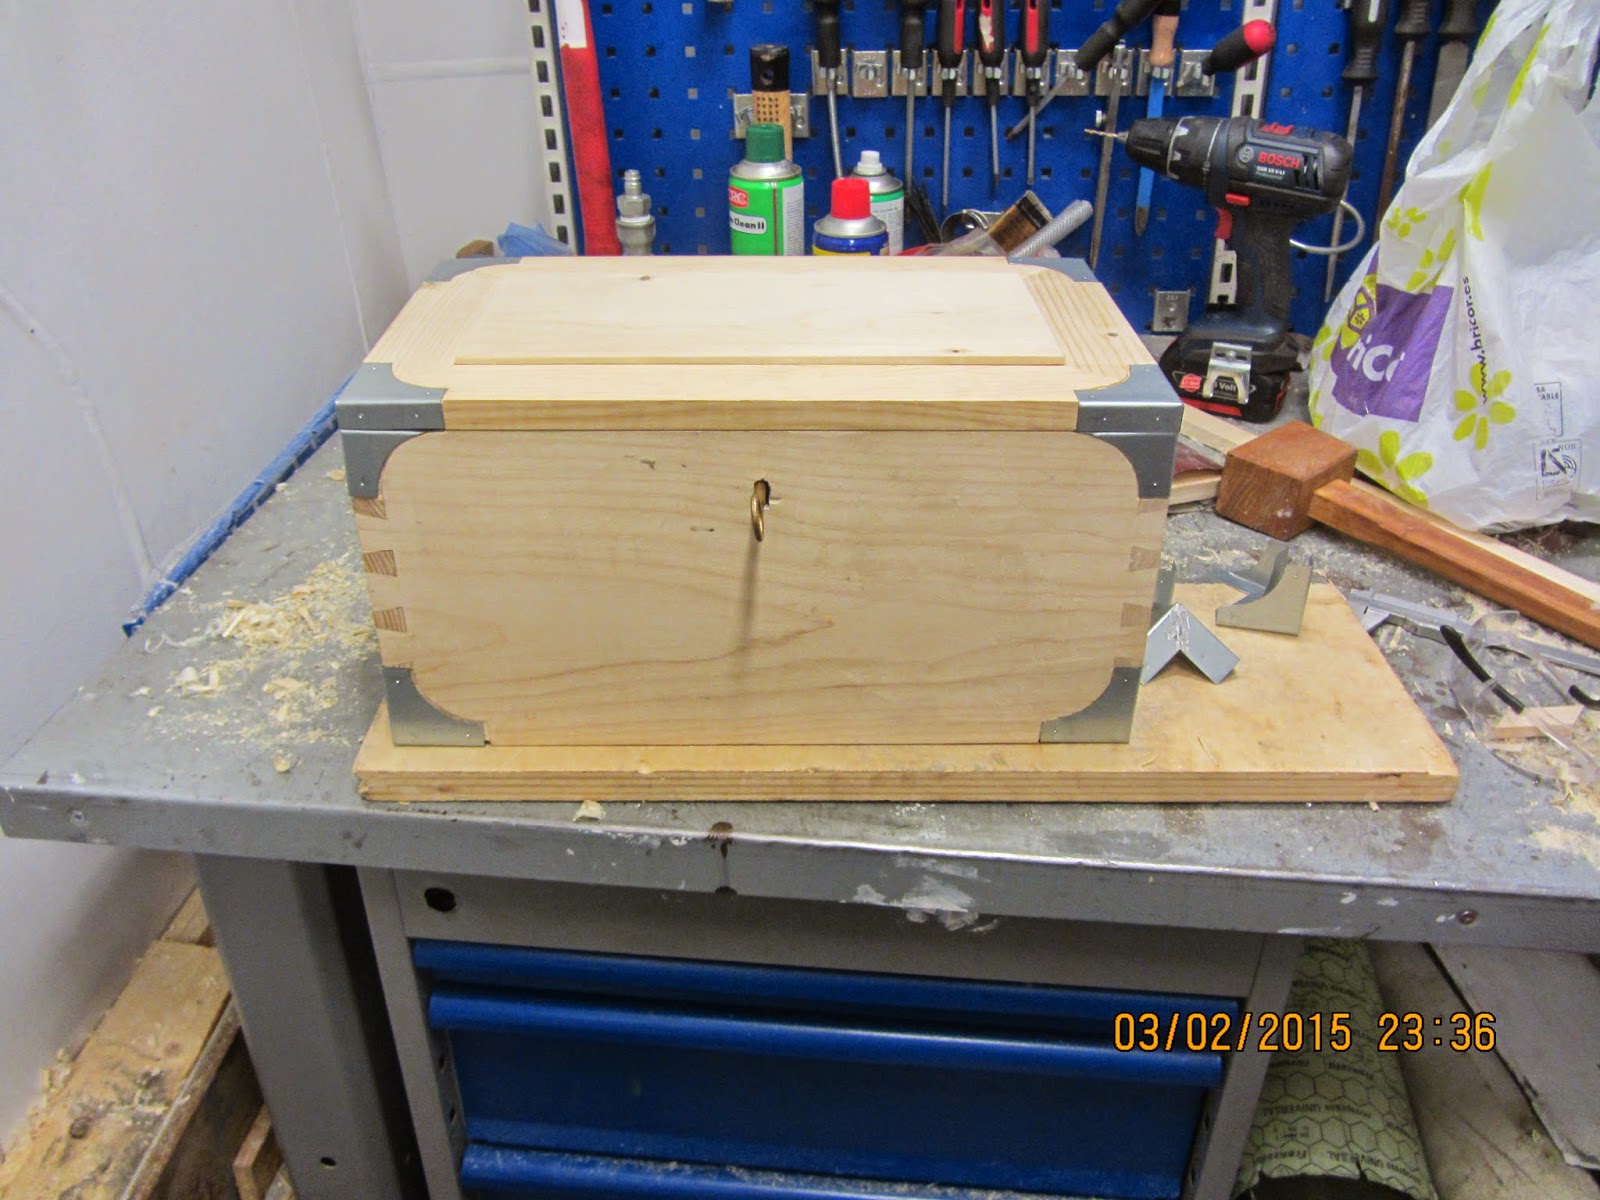
The dust seal is just screwed in place, because I wanted to make sure that I could adjust it if the lid should start to bind when wood movement sets in.
In an attempt to make the tool chest really sturdy, I have fabricated some corner reinforcements out of galvanized steel plate. It is 0.75 mm thick or approx. 1/32".
The idea is to screw these reinforcements on all corners of the chest once it is painted. Hopefully it will make it harder for the luggage handlers to break it.
The reinforcements are pretty easy to make, I would have liked to make them out of brass or zinc. We do have some brass on board, but it is too thin, and we don't have zinc. So there really wasn't much of a choice.
Such thin plate is easily cut using some metal scissors. We only had some straight ones, so I nibbled away the curved part and finished it with a file.
I tried to soft solder some of the pieces, but I had to give it up because we didn't have solder flux (grease) We also didn't have any hydro chloride acid that I could have used for making a flux with. I tried using sulphuric acid, but it didn't work. Maybe I'll try to solder them again when I get home.
After making the 12 reinforcements I marked their outline one by one and chiseled out a recess so they would be as close to flush with the surrounding wood as I could get them.
My plan was to paint the chest before attaching the corner brackets, that way I wouldn't have to worry about getting paint on the metal.
A trip to the paint locker today revealed that we didn't have any green paint after all. So I have postponed the paint job until I get home. That way I can also get a chance of trying out my milk paint.


A trip to the paint locker today revealed that we didn't have any green paint after all. So I have postponed the paint job until I get home. That way I can also get a chance of trying out my milk paint.
The lid stay (left side)
Chest with reinforcement corners temporarily mounted.
Interior dust seal and recess' for corners.
You continue to amaze me with what you do with what you have to work with. It is not the tools but the hands that manipulate them that are deserving of praise. Awesome chest.
ReplyDeleteHi Ralph.
DeleteThanks for the very nice comment :-)
I think that so far this build has been a success. I got a bit disappointed by finding out that we didn't have any green paint on board, but on the other hand it will give me a chance to try out the milk paint I purchased some years ago.
Brgds
Jonas
I hate the thought of giving something this nice to an airline as checked luggage. I have a large backpack that came with a reinforced duffel cover to protect it from baggage handlers. I wonder if you could find something similar.
ReplyDeleteHi Andy
DeleteThanks for your suggestion, but I don't check the tool chest in on its own. It is always inside by bag (kind of like a hockey gear bag). So that should protect in in theory.
My old chest got so beat up in one year of travelling that I had to make a new and sturdier one.
It is kind of funny that when I make something out here that won't fit in a suitcase on the way home, I put it in a cardboard box. Apparently the handlers know that cardboard boxes should not be thrown around, because those always manage the flight without a scratch.
Brgds
Jonas
Hi Jonas,
ReplyDeleteThe chest looks great even before the paint. I'm really impressed with your corner guards. They look great, and at the very least, they'll give those "gentle" luggage handlers a serious challenge. Congratulations on an awesome build.
Jeffrey
Hi Jeffrey
DeleteThanks for the nice comment. I tried to rectify the link to your blog earlier today, but I couldn't gain access to my own blog due to the Internet connection. I'll keep on trying, otherwise I'll have to correct it when I'm back home.
Brgds
Jonas
I agree with you that the lid stays look out of place. If I were making a blanket chest, or any chest that my daughter may find herself around, I would put stays on just so the heavy lid wouldn't close on her hand. Otherwise, I prefer rope or chain.
ReplyDeleteAs far as the corner reinforcements, I think they are a must, even if the chest were staying put for the most part. For whatever reason, it seems that tool boxes get dinged up at the corners. I like how you fit them in place, though I may have been too lazy to attempt it, that doesn't mean it's not a very good idea.
Thanks.
Bill
Hi Bill.
DeleteI don't quite know why I installed them in the first place, the lid is very small, and even if it is bent all the way back, it won't tear out the hinges because it is only 9.5" deep.
At a point I considered skipping the reinforcements, but the chest looked incredibly dull without them, I guess it is because I didn't make any skirt or outside dust seal. It is strange how much these things affect the look.
By the way, I have tried to visit your blog, but for some mysterious reason, some days our Internet connection won't allow me to visit any Wordpress sites.. So for the last couple of days I have been unable to leave a commetn on your blog and Gregg Merrits blog. I have absolutely no idea why.
I tried to post this entry yesterday, but after spending about an hour and still not having been able to upload any pictures I decided to quit for the day.
WOW, I suddenly had enough band width to visit your blog :-)
Thanks for commenting.
Brgds
Jonas (I'm off to make a comment to your and Greg before the connection disappears again).