Showing posts with label School box. Show all posts

Tuesday, October 11, 2016

North Sea school box 7, all done.

As I promised in the last post, I got Gustav to take some pictures of the school box.
It also turns out that he would like to have the box. So that made both him and me glad.

I have applied 6 coats of shellac. The first 3 coats were a 50:50 mixture of Komet and Superior (tones)
and the last 3 coats were just Komet which is a fairly yellow colour. Actually I think it looks kind of like the colour of a Spanish guitar.

Applying the shellac was simple, and it looked fine until I looked really close. At that point I could clearly see strokes from the brush and where I had overlapped.

Still I must admit that I think shellac has a future in my woodworking.


North Sea school box completed.

Houndstooth dovetail on skirt.

Houndstooth dovetail on skirt.


Secret compartment closed.

Secret compartment opened.

MMXVI (2016)


Sunday, October 9, 2016

North Sea school box 6, completion and finish.

Contrary to my normal practise, I decided to complete the school box build before starting on something else. Projects that come home from the ship have a grave risk of ending up in the "on hold" projects line. Prime examples are the Gerstner inspired tool chest that hasn't been touched for about two years.
It helped a lot that there wasn't much to do, in fact I just had to plane the lid a bit more, due to some more cupping of the panel, and then make a dust seal to go around it. Attach the lid and finish the box.

In a rush of self confidence I made a small set of houndstooth dovetails for the dust seal. In the same rush of self confidence I thought that it was smart to saw of the rear part of the dust seal in a 45 degrees angle. I am still a bit unsure why I considered it a good idea at that time. Because it looks strange and a square cut would have been a little less work and have looked a whole lot better.

The front of the dust seal was glued to the lid, and the side pieces attached with some lang headless brads. I home they are sturdy enough to help keep the lid in place. My idea is that they should sort of work as battens.

I planed some chamfers and sanded the box outside and that, as they say, was that.
The original book text describes how the lid is secured by means of some fabric tape/straps that will keep the lid from opening too far.
I found an old piece of leather strap that could do this trick too. I made some holes and attached it with two nickel plated brass screws.

Finishing is done with shellac. It is my first attempt of mixing my own, and I have tried to make a 2Lb cut mixture.
I have two tones of shellac: Komet and Superior. At first I mixed two small batches of each to see if there was much difference in the colour. It didn't seem that way, so in the end I mixed them both together because I think that will give me enough to cover the box a coupe of times.


North Sea school box with first coat of shellac.

North Sea school box prior to coating.

Monday, October 3, 2016

North Sea school box 5, houndstooth dovetails.

Since I am signing off the day after tomorrow, I settled on the fact that I won't be able to complete the school box build on board.
It is in no way a deal breaker, because I am still ahead of Brian Eve who is currently busy fixing a Roorkee, and by the way has to struggle with even more inadequate workholding than I have.

I suppose that I could have pushed on and completed the box according to the original plans, but given that I had already changed the till, I was already stranded with a non original school box.
The plans calls for a mitered skirt that is nailed on to the front and the sides. This is a noble approach and would surely look fine if a) I was able to produce a 45 degree miter, b) the dovetails all way around looked OK.
I suck at making miters. And one of the dovetails on the rear misses half the pin because of a knot and therefore looks a lot less than perfect.
On the other hand I think I am OK at making dovetails, and I manged to find enough wood to wrap around the entire box as a skirt.
So that's what I did.

While I attended the ATC class in 2011 at Dictum (which by the ways is the best class I have ever taken) I tried to make a set of houndstooth dovetails. They are actually not that much more complicated than normal dovetails, they just look that way.
The skirt for this school box had just the right size for that type to look OK.

I did the tails first approach on these because that would enable me to transfer the layout to the pins easily. The individual pieces were also resting against the sides of the box and on top of the workbench, so there were no issues with trying to balance some long thin sticks as would have been the case if I went the pins first route.
I worked from the baseline which was established directly form the box, and my very casual layout meant that all the dovetails ended up being around 1/4" proud - both the pins and the tails..

Once all the dovetails were cut I glued up the skirt and glued it to the chest at the same time.
Whenever I add a chest I usually go for strength before looks, so I orient my dovetails the other way as the dovetails on the box itself.

I let the glue dry all night, and today I sawed off the protruding parts of the dovetails.
The workshop has already been vacuum cleaned before the change of crews, so I didn't want to make a mess in there by planing the sides of the skirt.

All there is left is to wrap up the box and the lid which I have made, and get it into the bag and try to complete it at home.


The slightly dirty half completed North Sea school box.

The oversize lid.

Houndstooth dovetails.


Sunday, October 2, 2016

North Sea school box 4, glue up and bottom.

Yesterday I decided to keep the momentum going concerning the school box build. If only our Internet acces had the same momentum, I could have posted. But for some reason I couldn't upload any pictures. So all this actaully happened Saturday.
First I knocked the dry assembly apart and removed a bit of material that seemed to interfere with the fit of the till floors.
Next step was not surprisingly to add glue to the joints. I like to add glue to both sides of a joint, because it has given me good results so far. The sides weren't completely flat, so I used a couple of clamps to get things together nice and tight.
In fact the glue up went surprisingly well. I would like to have some glue with a slightly longer open time, but all I have out here is some pretty standard white glue.
Anyway, as long as the glue up isn't any more complicated that this, I am fine.

While the glue was drying, I started on the bottom.
The fist task was to find some appropriate wood, and due to my pack rat tendencies, we have once salvaged a spool for electric cable. There were some small pieces that could become a decent bottom for the school box.
I disassembled the spool with a crowbar and sawed the ends off where the nails had been.

The pieces were relatively flat, so first I just smoothed them on one side with the smoothing plane. Next I arranged the pieces and marked them so I would be able to put them back in the same order.

Originally the school box calls for a massive glued up bottom, but since the humidity of the engine room and workshop is less than it is at home, I figured that a solid bottom was like asking for trouble.
Based on this and also the fact that I have repaired the rabbet plane, I decided to make a shiplapped bottom.
I touched up the blade of the plane on the grinding machine, and followed this with a couple of strokes on my oil stone before mounting it back in the plane.

To my delight, the plane worked just as well as it did prior to the unfortunate incident of heavy seas combined with my forgetfulness.

I used my standard method of attaching a bottom like this which is to first plane the upper side, which is the side that can be seen inside the box.
Second, I put the pieces side byt side, and make sure that the joints next to each other are of the same height (also by use of a plane).
Third, I make the rabbets for the shiplapping.
Fourth, I nail on the individual boards, with a bit of extra space between them, in this case a piece of sandpaper. All the nails are set well below the surface.
Fifth, I plane the lower part of the bottom flat, this is why it is so important that the nails are well set below the surface.


The result of a fine day in the workshop.

Supposedly this can be made into a bottom.

Laying out shiplapping.

Testing the repaired rabbet plane.

Flattening the bottom.


Friday, September 30, 2016

North Sea school box build 3, secret compartment.

The original design calls for a movable partition (at least that's what it is called in the book).
I have never really understood the idea of it, and never liked it much either.

I figured that it has been a while since I have made any secret compartments, and this project can easily accommodate one.

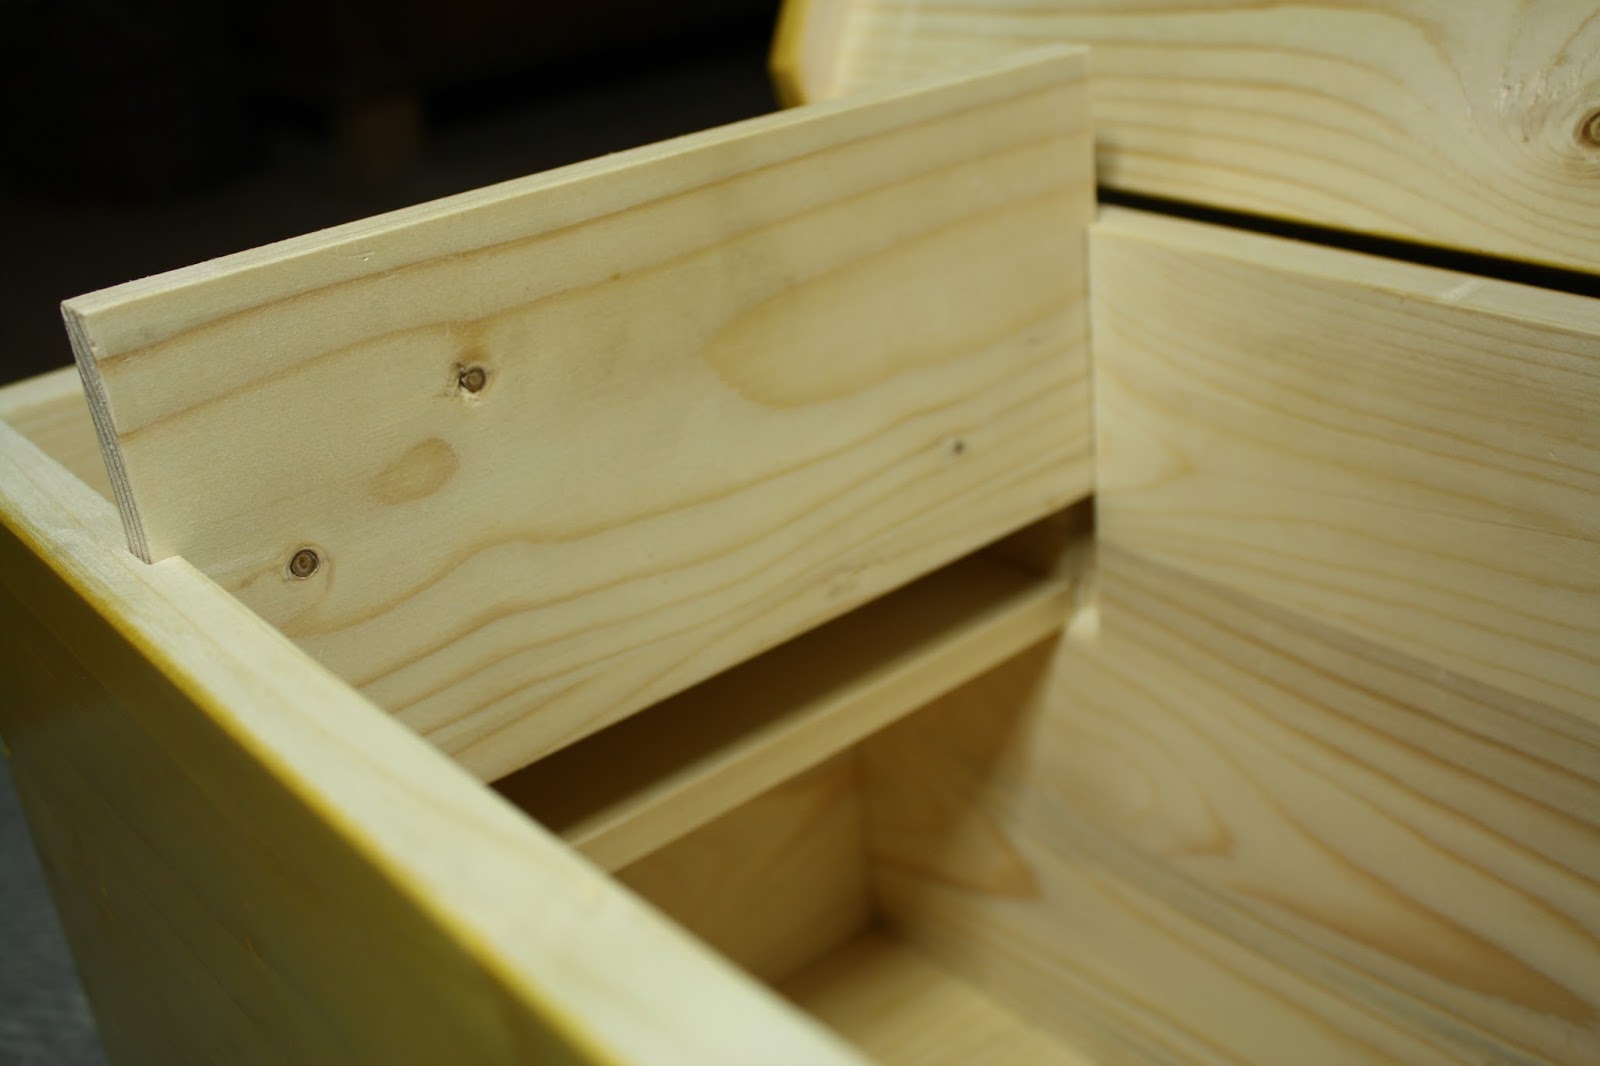
The design is similar to a secret compartment I saw in a blanket chest article some years ago. The idea is to make a small fixed interior till wit a secret compartment below it. To gain access, one will have to lift up the vertical part of the till.

I first laid out the positions of the parts of the till and the extra space below it. I then used a batten to help guide my Japanese saw when sawing out the sides of the grooves and dadoes.
The bulk of the waste was removed using a chisel, and my small homemade router next ensured a consistent depth.
To avoid the possibility to accidentally pulling out the front of the till, I made some deeper dadoes for the lower part of it. The front itself has got two small protrusions that will fit in there.

To determine the actual length of the till parts, I made a dry assembly of the box and took the measurements directly from it.

After processing those parts, I made another dry assembly to check if all worked as it should.
The system is OK, but I need to make a small chamfer at the ends of the till bottom and the secret compartment bottom.

When that is done I guess the next step is to sand the box lightly on the inside to remove some of the grime that almost inevitably comes from working in an engine room workshop, before gluing up the case.

Finding the correct length.

The layout of the secret compartment when closed.

The secret compartment opened.

The deeper dado and the protrusion on the front of the till.

Dry assembly closed.

Dry assembly opened.


Friday, September 23, 2016

North Sea school box build 2, dovetails.

We have been fairly busy, so I haven't made a lot of progress on the school box, but every little bit helps, however slow it may seem.

I flattened the glued up panels and ripped them to the correct height. Then I crosscut them to the correct length and planed them all at once to make sure they all got the same height.
Once that was done I use my shooting board to square up the ends.

I like to use the "rabbet on the tailboard trick" when I dovetail, because it helps to get a nice appearance on the inside of the joint.
After making the shallow rabbet, I used the remaining thickness as a guide for the marking gauge and marked out the length of the pins on the pin boards.

The pins were laid out using a divider, and I marked the angle using a small cardboard template. the slope is 1:6.

I clamped the pin board to my 5x5 work holding stick, and started sawing.
When I was done with the sawing and getting ready to chop out the waste between the pins, I noticed that the end boards had become rather dirty. Apparently someone has used the 5x5 for something that involved a mix of soot and grease.
The dirty spots are on the inside of the boards, so I hope that I will be able to remove them by sanding.
I might have to try to dress the 5x5 using my plane, to remove the dirty parts. That will be easier and better than messing up the rest of the build.

One of the pins were placed exactly on a knot. That meant that half the pin fell out as soon as I had sawed the sides of it. The good thing is that this is one of the lower pins, so I'll just make sure to make the skirt high enough to cover the inevitable hole resulting from half the pin missing.

Flattening an end board.

Planing all parts to the same height.

My shooting board set up.

Sawing out the pins. Notice the dirt on the 5x5.

Monday, September 12, 2016

North Sea school box build 1, stock preparation.

Toolerable informed me that there is an event going on at Reddit called the Popular Woodworking School box build.
The rules state that to participate you have to live in the US. Now I haven't got a Reddit account and I don't live in the US (though I would like to), but that shouldn't stop me from participating a bit on the side.
I considered enlisting in the build and offering any eventual prize to someone in USA, but I figured that it might add a lot of unnecessary clutter for the organizers, so I'll just build the school box for the fun of it.
If you happen to be eligible to participate in the build I strongly urge you to do so. It is only through participation that the organiser(s) will be able to attract support from sponsors.
It might also be the only sort of recognition he or she will get, signalling that all their efforts in organising an event is appreciated.

True to my tradition of North Sea builds, the materials are limited to whatever I can find on board i.e. pallet sides or regular pallet wood.
I have got some regular butt hinges in my small stock of materials, so I'll have to make the box without the original type strap hinges. Unless I make some myself.

Whenever I am out here, I normally bring a couple of books with me. One or two novels, and one or two books on woodworking. This time I have brought with me "The joiner and cabinetmaker", so I ought to be able to pull off a school box build.
As a side note, I have decided that I should try to read something written by Thomas Mann, so I have brought Buddenbrook and Felix Krüll with me. I have to confess that it takes a while to get used to his style of writing.

I have found a set of pallet sides that will do for stock. It is a new style that I haven't seen before, instead of one wide board of 7.5", it consists of two boards half the breadth. This means a bit more gluing, but the boards look straight and without any major knots in them.
First I removed the hinges and separated the boards. They have been held together using some large clamps similar to those used for making large cardboard boxes.

Due to my limited shop size, I can't do too long a glue up. So I made two pieces the length of one side and one end of the school box plus one glue up the length of the lid and the bottom.

Stock preparation might not be the most fun part of the build, but I feel fine that I have finally started building something out here again.

This might turn into a school box

Glued up panels.