Showing posts with label Display case. Show all posts

Monday, December 27, 2021

Keepsake box of birch

We had made a draft of who should give who Christmas presents on board. And my recipient had earlier on wished for a belt, so I made a nice wide belt that would fit in a set of jeans for her. I decided that I could make a keepsake box for her as well. That way it would also be easier to make a decent gift wrapping. :-)

I found a piece of birch that I had milled a couple of years ago, and I decided that it would be a fine material. I have never really worked birch before, other than for firewood, so I thought that it would be interesting to do a nice little project with it.

I settled on some measurements that looked fine to me and would enable me to make the panels for the lid and bottom without gluing anything up. 
the board was first crosscut into some manageable lengths and then planed to the desired thickness. 

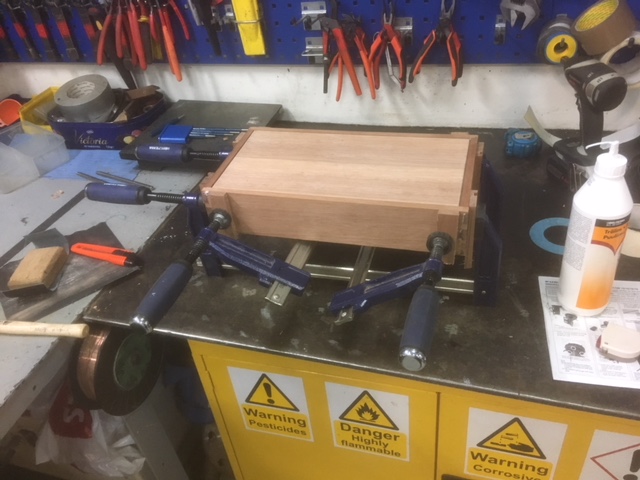
The sides were ripped to the correct width and I made a groove on for the lid and the bottom, so that I could assemble the box completely and later on divide it on the table saw. 

I laid out some dovetails and took into account that 1/8" would be removed from one of the sets when I reopened the box. I just made regular through dovetails, and after dry assembling the sides I measured for the lid and bottom and made those too. those received a rabbet going all the way around, so they could seat in the grooves of the sides once assembled. 

After the glue had dried, I planed the protruding parts of the dovetails flush with the rest, and sanded the box lightly. I adjusted the table saw to nearly the depth of the material, so that when I separated the box I would not risk any movement or binding. I could just as well have glued in some small blocks of wood on the inside prior to assembly, but I chose the other route this time. The final separation was done with a Japanese pull saw.

I made some dust seal strips that would be mounted inside the bottom of the box. These all received an angled cut near the upper part. The depth of the cut was close to 1/32", just the same as the thickness of the fabric that I would use to line the box with.

The dust seals were glued in place, and I installed some small brass hinges that I once got from my brother in japan. I decided that I didn't want to ad a lock to the box, so from that point on it was just downhill smooth sailing. (The Danish expression downhill apparently means something different in English :-) )

I gave the box three coats of shellac with a rubbing of steel wool in between each layer. After the final layer I lightly rubbed with steel wool again, and then gave the surface a coat of wax. 

Some years ago I ordered a length of baize from Hainsworth in England. This is the fabric that was originally used in gun cases and such. Due to various reasons I never have gotten around to test it before now, and I have to say that it is an incredibly nice material! 

It looks way better than any of my earlier attempts using hobby felt which is actually a synthetic instead of real wool. The baize has a beautiful dark holly colour and it is much more firm so it is easier to cut and position inside the box.

Based on information that I once read on the "pegs and tails blog", baize was traditionally glued using glue made from wheat flour. 
So armed with this information I found a recipe for wheat flour and started. the recipe called for 1 part of flour to 4 parts of cold water. The flour is mixed thoroughly with the cold water and the mixture is then brought to boil and left to boil while stirred until it thickens.
The glue worked a lot better than I had anticipated, and in a short time the keepsake box was complete. 

Assembled box

Almost separated

Just separated

The new puppy resting its tired little head on the soft cushion of our lovely Newfoundland dog

Getting ready to glue using wheat flour glue

Baize glue up in progress.

The keepsake box has been lined

Completed box ready for Christmas wrapping


Sunday, September 2, 2018

Small display cabinets for Asger

Asger collects matchbox cars, and he has gotten himself a nice little collection. In order for him to organize all the small cars, we decided to build a couple of small display cabinets.

The original idea was to not make the joinery complicated, so that he could help himself in nailing the cabinet together. The front frame is made with half lap joints which is then later glued and nailed to the carcase. The carcase itself is assembled using rabbets in the corners.

For once I did something unusual. I actually bought the wood for the project.
I purchased the best pine they had in the lumber yard, and I now realize how expensive it is to buy wood. But it is nice to work with something else than larch for a change, and pine smells so good when being worked.

The back boards received tongues and grooves by means of a hand plane. That was just the right project for a child.
The moulding on the back boards were also handplaned, Asger tried to plane one, but using the combination plane wasn't easy, so I finished the rest of them.

The cabinets were finished with some spar varnish, and in a very short time they were both filled to the brim.

Actually this project was completed a year ago, and it ended up in the "draft" section because I couldn't pull myself together to take a couple of pictures. Mind you, it was prior top me getting a smart phone!
So before heading to sea this time, I took a couple of pictures, but off course there are none that will show the progress in the shop.

Display cabinets made of pine.

Moulded backboards.

Door open showing bridle joint construction.


Moulding detail on the door.

The shelves are adjustable.

Old Britains vehicles and detail of backboards.

Glass retaining strips.

Rabbeted construction and half laps on face frame.

Thursday, June 28, 2018

Smith & Wesson 629 presentation case 9, glamour shot

While I was home this time, I received a picture of the Smith & Wesson revolver in its new presentation case.

I am happy to see that it did indeed fit because I only had some rough measurements to work out from.

I had imagined that the small compartment could have been used for a "quick loader" (or what the name is), but I don't know if my friend has got one of those, so for now he has stored some more ammunition in there.

I am kind of tempted to make another presentation case, because it was an interesting project. But I might try to order some baize next time to use for the lining instead of hobby felt.

Smith & Wesson 629 in presentation case.

Tuesday, May 22, 2018

Smith & Wesson 629 presentation case 8, project completed.

The remaining part of the felt lining was installed and after letting the glue dry for a day, I used a sharp and pointed knife to cut away the felt covering the 50 holes for the individual pieces of ammunition.

The hinges were mounted and so were the latches for keeping the box closed.

Finally I chiseled MMXVIII in the underside of the box marking the completion of the project.

After taking some pictures, I handed the box over to my friend, and he said that he would send me some pictures with the revolver and the ammunition loaded in the box. But off course this will only be after we sign off.


Thoughts about the build:

I like making small box like projects, and this one had a nice manageable size. It ended up being 8" x 16" x 3".
There isn't much wood in a project like this, and the size of the parts make it fairly easy to process out here.

At first I was a bit skeptical to the dovetail lay out, I was afraid that it might look weird. But I am glad that I went along with it, because I actually think that it looks fine. And I especially like the way I managed to split the lid and the base so that after trimming, the divided pin that is very close to the other pins in size.

My experimental finishing is probably the biggest success in this build. The surface feels very smooth, but it is not super shiny. And I really like the look of it.

Mounting the felt lining was a bit harder compared to other projects I have done, due to the partitions in the base of the box. Cutting the holes for the ammunition block felt luckily went as planned, though it took quite some time to carefully nibble away with a really sharp knife.

The latches worked and looked better than I had expected. They are not cast, but made out of some thin stamped brass that has been given a surface treatment to look old. Originally thought that they looked kind of flimsy, but I am glad that I chose those since I think they look very fitting.

I haven't timed the build, but an estimate is that I have roughly 25 hours in it. It isn't a very fast build, but the stock preparation takes a lot of time when you have to do the resawing by hand.

All in all I think this is one of my better builds, and I am even a bit envious that I can't bring the box home with me. I guess that is a fine indication that the project hasn't been a complete disaster.

Smith & Wesson 629 presentation case opened.

Two latches for closing.

Close up of front corner.

Ammunition block lower left corner.

Close up of felt termination in angled groove.

Box before cutting 50 holes and mounting hinges and latches.


Friday, May 18, 2018

Smith & Wesson 629 presentation case 7, felt lining.

Yesterday I gave the outside another coat of marine varnish, which I again applied using some steel wool.
I lightly wiped off the excess, and today the surface looked fine and dry.
The surface was not perfect, and I decided that I preferred a slightly more matte look.
So once again I smoothed the surface using the steel wool, and I really like the look of the surface after this treatment. There is still a bit of gloss in the pores of the wood, but the surface is as smooth as a nuns stomach (as my dad would say).

The felt lining is not especially complicated in theory. You measure and cut the size you need. But in real life it is a bit harder than that. suddenly the fabric stretches and when you try to carefully remove a bit, suddenly it was too much and you need to start over again. It can also be an advantage if you start out a fraction too short, then the stretch can save you.

I am using regular white glue for the fastening of the felt, because it is what I have, and it works OK.

The angled groove that I made after has shown to be a very effective way of terminating the felt lining. It gives a very clean look in my opinion, so I will definitely use that next time I am going to make a similar type of box.

Lined lid.

Glue smeared on the ammunition block.


Wednesday, May 16, 2018

Smith & Wesson 629 presentation case 6, ammunition block and surface treatment.

The ammunition block was ripped close to its final size, and then I planed one of the sides to act as a reference.
I crosscut it to the correct length, and planed the remaining side and the bottom and top of it, testing for a nice fit in the base.

I removed the block again and marked up the locations of the 50 holes for the individual rounds of ammunition.
The location of each of the holes received a small mark made by an awl before being drilled.
While my work holding and worktable etc aren't very good out here, the same thing can not be said about our drill press. It is a "Strands of Sweden", it is similar to Lie Nielsen in hand planes when it comes to drilling machines. It is really accurate and a joy to use. It is actually a stark contrast to the crappy drill press I have at home.

I drilled the 1/2" holes all the way through the block. The bottom of the base will work as a stop, so by doing it this way, I won't have to worry about getting all the holes to the same depth.
Two of the holes turned out less than perfect, the first one was because i didn't hold the piece firmly enough when retracting the drill, so it caught the side and made the hole oval.
The second hole was due to a heavy roll of the ship that caused everything to move. In retrospect I suppose that I should have waited with the drilling until some day with calm weather, but it was just a single time the ship moved that much.

After sanding the surfaces lightly, the ammunition block was finally glued in place.

While the glue dried, I took a cup of tea.

The dust seal wasn't completely level at all corners, so I gave it a few swipes with the plane and rounded the top again with some sandpaper.

At this point even I couldn't ignore the fact any loner, that the time for sanding the outside a bit more was getting awfully close.
I grabbed the sanding block and gave it a good workout on the outside using some grit 80 that we happened to have on board.
All the remaining pencil marks were removed and it started to look really nice. I found some fine emery cloth next. I think that it might be something like a grit 180 or 240, but I am not sure - it wa finer than the 80 which was the important thing.
Another round of that and the box looked downright fine.

The next step ought to be fitting the hardware, but since this is a ship and there is sometimes a lot of grime and oil etc in the workshop, I chose to give the box a coat of varnish instead. This will hopefully protect the surface a bit from grease stains etc.

I don't have any abrasive pads on this ship, but I found an old roll of steel wool. It isn't particularly fine, so I guess it is grade 0.
I poured a bit of varnish into a paper cup and dipped the steel wool into it. It rubbed the varnish into the surface using the steel wool, and once I was done, I grabbed a clean rag and wiped of the entire surface.
So far it looks good, but I am anxious to see what it looks like when the varnish has dried.


Interior of the box.

Bottom finished.

Top finished.


Tuesday, May 15, 2018

Smith & Wesson 629 presentation case 5, dividing the interior.

The remaining part of the dust seal was glue in place, and while the glue dried, I started on the divider for the interior of the box.

It was made of a similar strip as the dust seal, but it was reduced to 1.5" in height (38 mm), this was also the height of the angled groove above the bottom.

The divider had its top rounded, and I started measuring from my 1:1 scale drawing, to transfer the measurements to the box itself.

A fine thing about adding a layer of felt later on is that you don't have to worry about markings etc. And the interior finish can also be left a bit more coarse.
I chiseled a small dado where the divider would meet the dust seal, so that the end of the divider had some support.
Since the divider is fairly thin, sort of 1/4", I was not sure if it could stand up to the load if it was merely glued together with a butt joint. So I took the extra time and dovetailed the pieces together with a mitered top. I marked the dovetails out by hand and surprisingly they went along really fine. at least the two that were right angle joints did.
The angled joint wasn't very impressive, but it will still hold up better than a butt joint, and in the end it will all be covered with felt.

The completed divider was glued to the bottom of the case, and the ends were glued into the dadoes that I had made.

With that part out of the way, I started on gluing up a block of wood that will receive 50 holes for holding the ammunition to the revolver.


Divided interior, dust seal and lid

First part of the divider.

Eyeballed mitered dovetails.

Gluing the divider in its place.

Sunday, May 13, 2018

Smith & Wesson 629 presentation case 4, Splitting the box and making a dust seal.

With the box dry, I first planed the protruding parts of pins and tails and sanded lightly.
I then marked the division line on the remaining two sides. I had marked it out on the ends in connection with the initial marking of the tails.

I have designed the split so that I only needed to remove 3 mm of wood (1/8"). The saw kerf is not that wide, so I tried to saw between the lines and then used a plane for cleaning up the joint.

Once opened, I was pleasantly surprised to find that there was very little glue squeeze out on the inside. I used a chisel to remove the little there was.
I planed the mating surfaces of the lid and the base and followed up with a bit of sanding, I was curious if there were any internal stress in the boards, but everything stayed flat and square.

The next step was to make the interior fittings. These consists of some flat strips of wood that are going to be glued to the inside of the base in a way so that they will extend a bit into the lid, acting as a dust seal. There is also going to be some lower strips that will form the division that will create the space for the revolver. Finally there will be a piece of board that will hold 50 rounds of ammunition.

I have seen on a forum where someone discussed decorative presentation cases, that one method of making those dust seal strips includes an angled groove that will sort of conceal the end of the fabric used to line the box with. In my case green felt.

The first task was to plane the strips flat and to the same thickness. With that complete, I clamped them together and made them all the same width.
I marked the inside height of the base on the strips, and planed the top part of them at an angle, with a rounding at the top. That was to become the dust seal, and the reason for the angle is to make it possible to open and close the lid.

I marked out the position of the angled groove, so that it would be at the same height as the base itself without the dust seal. and made it using the combination plane. I just held it at an angle and took a couple of passes.

The strips were then sawed to the correct length aiming at a 45 degree miter in the corner. I suck at sawing miters, so there is a bit of a gap. My hope is that anyone who will look into the box will be so impressed with the revolver inside, that they won't notice those small gaps.
I glued on three of them before calling it a day (night actually).

Sawing the box in two.

The dust seal strips with the angled groove visible on the off cut.


Saturday, May 12, 2018

Smith & Wesson 629 presentation case 3, dovetails and assembly.

Laying out dovetails is normally fairly straight forward, but I had to think hard on this set, because of the plan to glue up all at once, and then split the box to form the lid and the base.

I had to incorporate two grooves, and I also wanted the split pin to be the correct size after splitting and planing.
In the end I managed to make a layout that suited me. I also need to take into account that my narrowest chisel is 1/4".
So I can't make those ultra thin pins even if they would look fine on a project like this.
I made a template for laying out the angles of the dovetails, and I settled on 1:8 sine it is hardwood.

Before dovetailing, I did something unusual (to me at least). I used by shooting board to trim the ends to the become square and the pieces to become the exact same length.
I felt that I had to use this approach, since the stock is thin, so I couldn't just plane away to remove inaccuracies later on as I normally do out here.

Since the pieces were comparatively small, I was able to do it tails first, which I prefer. The actual chopping out was done on a piece of wood held in the vice, and then with the work piece clamped on top of that.

Once all the dovetails were completed, and I had dry assembled the case, I made the rabbets on the lid and bottom, to make them fit in the grooves.
I have never had much success with the small nicker when going across the grain, so I tried instead to first score a line with a hobby knife.
Then after every two passes or so with the plane, I would score another line to keep the rabbet looking good. It took a bit longer than if I had just planed the rabbet, but it looked so much better, so it was definitely worth it.

The rabbet along the grain was a walk in the park. A sharp iron does the trick.

Based on Sylvains comment to the last blog post, where he asked if it was possible to change the fence to the other side, I had decided that I could try to make a new set of rods that would allow me to do just that.
The engineer apprentice on board will soon attend his exam, and he needed a bit more routine in using a lathe. So I made a drawing of some rods that would work, even if we didn't have the correct tap and die for making the same thread as what is originally in the plane.
He made two parts, and I made the remaining two, so I could use the plane tonight.
It is not a 100% elegant solution to use the plane the other way, but it works, and the is the most important thing.

So after making the extra set of rods, I planed the rabbet that would have been against the grain, but now wasn't anymore. It worked brilliantly.

Again I made a dry assembly, this time incorporating the two panels. One of the panels needed to have one side trimmed with a single swipe of a plane, to make it slide easier in the groove.

The edges between the rabbets and the top were rounded to soften the look.

Glued up box.

Shooting the ends.
 
Workholding for chopping out dovetails.

Record No 50 with fence on the "wrong" side

View from underneath. The wooden fence was needed so I could plane with less than the full width of the iron. The depth stop is a fence (I can't remember for what use) that has been flipped 180 degree

Dry assembly of the box.


Wednesday, May 9, 2018

Smith & Wesson 629 presentation case 2, getting groovy

The build continued today with a bit of work on the sides and and ends of the presentation case.

First I straightened one side of all pieces, and then I marked out for the final height of the box.
I ripped the pieces slightly over sized, so I could plane them to the final dimension. I made sure to keep an eye out for grain orientation which helped a lot.

I marked the individual pieces with some carpenter's triangles, and again I made sure to keep an eye out for grain direction , since I had to make some grooves on the inside of all the pieces.

After looking at the top and bottom, I decided to use the 1/4" grooving iron. It was the same one that I had sharpened last time I was on board, so I knew that it would work.
The iron was installed in the combination plane, and I made a few test swipes on a piece of scrap, to check if was adjusted OK. It might have been sheer luck, or it could be that I I am slowly getting better at setting up the plane - but anyhow the plane took a nice crisp shaving right from the start.

For the first grooves the workholding wasn't a big deal. I clamped a large piece of wood in the vise, and used some clamps to hold the pieces onto that large stick.

The challenge came when I had to make the set of grooves destined to receive the bottom of the case.
I couldn't turn the pieces around and plane from the other end unless I wanted to effectively ruin it all with tear out.
So after a few experiments I made some sort of a sticker board, and planed the bottom grooves from the same side.
I managed to make some really nice and crisp grooves on all pieces, and there was practically no tear out. It is nice to see that a little forward thinking on grain direction actually can help.

The next step will be to cut the sides and ends to their final length and shoot the ends of those pieces, when that is done I am going to lay out some dovetails.

Planing all pieces to the same height.

Workholding for the bottom grooves.

Sides and ends with grooves.

Tuesday, May 8, 2018

Smith & Wesson 629 presentation case 1, stock preparations and ideas

One of my colleagues has got a S&W 629. He is Norwegian, and apparently it is a bit easier to be a gun collector and user in Norway compared to Denmark.

When I built the pilot ladder cabinet, it once again stuck me that I like building boxes of different types, so I had decided that this time the project had to be a box of some sort.

Most of the time out here I just build something and never really bother about if it is needed or wanted by anybody, but I eyed an opportunity, to make something that would fill a need and be appreciated at the same time, so I asked if he would be interested in me making a presentation case for his revolver.

He was thrilled that I would do that, and I was equally thrilled to have a goal to work towards.

He told me a bit about the gun and had some of his acquaintances take some pictures of a similar model, so I could get a couple of overall measurements.
He would like if possible, that there was room for some ammunition in the box as well, so I have tried to plan ahead for that as well.

He has been on this particular ship for a long period, so he has a special relationship to it. I decided that to honor that, I would use the remaining parts of the pilot ladder as material.

The overall dimensions of the presentation case will be approximately  16" x 8" and 3" tall.
That should give the interior space that I am looking for.

I plan to dovetail the box together, and install floating panels as top and bottom at the same time. Then after the glue has dried I am going to saw the box apart to form the lid and the base. That way I should be fairly sure that the parts will fit together, and the grain will be matching.

The inside will have some sort of partition to define where the revolver will be placed, and it will be lined with felt to make it look nice.

Stock preparation is (as usual out here) a matter of re sawing some old pilot ladder steps, gluing up a couple of panels and planing the boards and panels.

Re sawing a step from the old pilot ladder.

Boards and panels ready.

Thursday, May 2, 2013

Exotic wood, glass and steel.

I needed to make some retaining strips for the glass for the display case. This was clearly a job for my new rabbet plane.
Since the strips were designed to be only 11 x 11 mm (7/16" square), I had to make some sort of improvised work holding.
I found a piece of plywood that was lying in the workshop. I attached a thin board to the top of it, by clamping both to the workbench. I mounted a small screw to act as a planning stop. I double checked, to make sure that I wouldn't hit it with the iron of the plane.

Making the rabbets all by hands was a bit more work compared to making them on the table saw, but there was no burning and they looked nice and crisp.

After the rabbets were made I made a chamfer on the opposite corner of the rabbet, where the screws would go.

I had cut the glass yesterday, and I cleaned it thoroughly. After I cut glass, I normally remove the sharp edges by using a fairly coarse old grinding stone. Just a couple of strokes, and there is no risk of cutting the fingers on the edges.

I drilled clearance holes in the glass retaining strips and pilot holes in the frame itself. I had found some old brassed steels screws that were perfect for the project. Having a bras screw breaking in such a delicate frame as this one is not funny. So the harder steel screws were most welcome.

I tried my new Dictum wood wax as a finish, and it was easy to apply after a minute in the microwave oven. I settled after two coats.

I finally installed the steam engine on the base, and put on the top part of the display case. Now I just need to find somewhere to put it in the house where it will look good.
Personally I like the way the different materials compliment each other. glass and exotic wood enhance the steel of the steam engine in a way that is hard to do otherwise.

The work holding for rabbeting the glass retaining strips.

Close up of the planning stop screw

One rabbet down, eleven to go.
 

The finished result.