I have brought it back and forth in my bag/suitcase every time I
signed on and signed off.
So I feel that I am able to give an honest review of this type of
tool chest if anyone feel the need to make a small chest to accompany them on
their travels.
My tool chest measures 16" x 9.5" x 8.25" (length x
width x height), so it will not fit very large tool inside.
The corner reinforcements were made out of some old sheet metal that
we had lying around. They have succeeded in keeping the chest free from damage
despite it being thrown around by baggage handlers in various airports. In
addition to that, I also think they look good.
The bottom is the weakest link in the tool chest. I wanted a clean
look of the outside of the chest, so the bottom was simply nailed on inside a
rebate. I never added any nails from the outside, but so far I have only
noticed one or two nails starting to creep out, but a light tap of a hammer
brought them back in. So unless i load it with lead ingots, I suppose it will
be fine.
I really like the two tills that sit in the top of the chest. The
smaller one was originally intended for a pencil, but it has been filled with
hinges, screws, nails and locks instead.
The larger till is sufficiently large to accommodate my three
chisels plus stuff like my oil stone and the marking gauge.
The shooting board doesn't see much use, but that is because I
have taken a fancy in making stuff with sloping corners and other shapes. But
when I need a shooting board it is nice to have.
The lower part of the chest which is the main room has got just
enough space for my plane and the two irons for it. A mallet, a small dozuki, a
grooving plane and a moving filister plane. Until a week ago there was also a
small jar of glue that had survived almost two years of travelling before
finally giving up.
I have discussed the tools inside previously, and the only addition since then is a moving filister.
As it can be seen, there are no lifts on the chest. I really don't
think they are necessary given the small size of the chest itself. It is so
easy to just wrap an arm around the chest and carry it around. I think that
while lifts can look fine they would distract from the clean look on this
chest. they would also add some weight which is not a good thing for airline
travel.
Totally I think the chest including contents weighs something like
26 Lbs.
For a travelling tool chest that needs to handle all the tools you
really need, you would probably have to make it a wee bit larger. That would be
to accommodate a larger saw and a hammer. Those tools I normally borrow from
the ships workshop, so I don't really need to bring them myself.
A solution to the saw could be a frame saw that can be taken
apart, and having one crosscut blade and one ripping blade.
I haven't been stopped by custom officers yet and had to explain
the tool chest to them, but I suppose it should be OK.
If you travel between countries that have strict regulations concerning
bringing items made out of wood across the border, it might be best to tick off
that box on the declaration board and avoid getting into trouble for forgetting
it.
The little I know about wood products crossing borders, is that
they tend to be mostly concerned if the bark is still on the wood. Or if the
wood is attacked by insects.
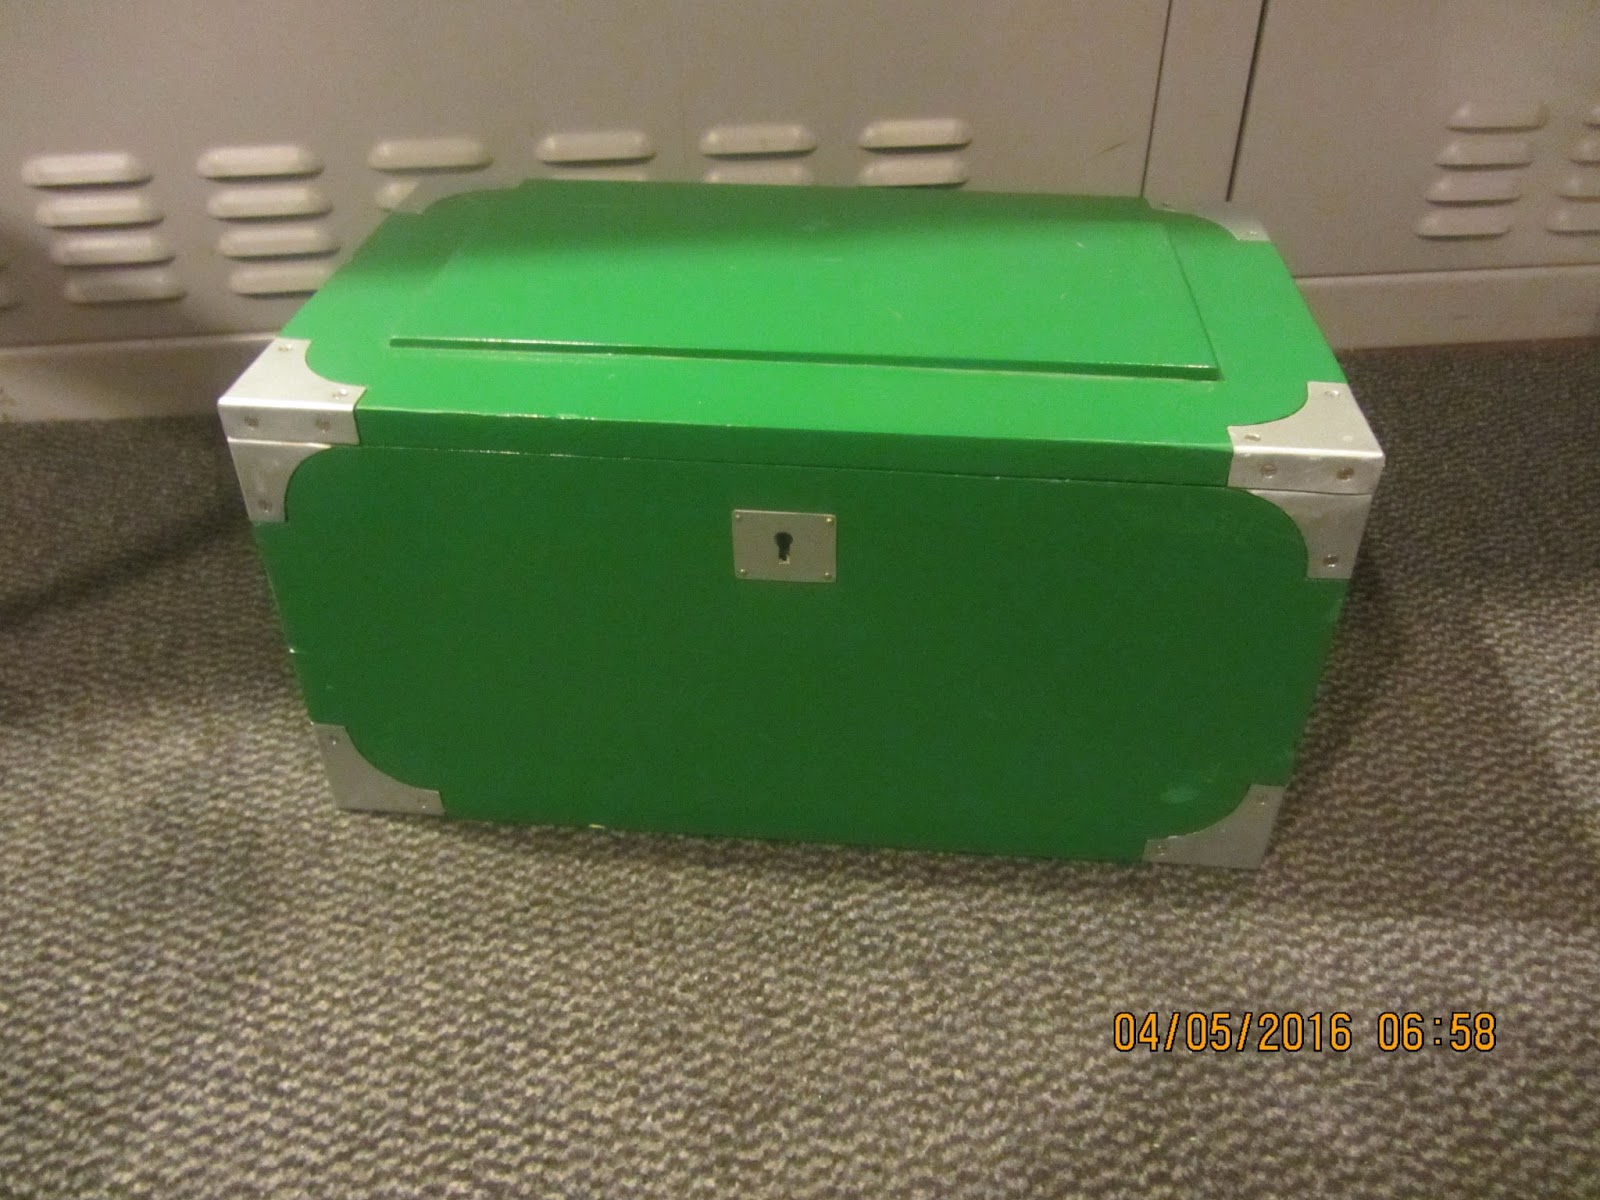
Green travelling tool chest.

Lid open.
Jonas,
ReplyDeleteI just finished a "traveling" tool chest but sized it to hold my biggest rip saw. Bottom line it ain't no traveling tool chest. A second one is coming sized somewhere between yours and the one I just finished. My guess it will require changing planed projects as well.
Thanks for the report,
ken
Hi Ken
ReplyDeleteGlad you could use the report.
I forgot to say that my projects are usually smaller ones. So if you plan on traveling and building log cabins or chippendale highboys, you might need to adjust the size a bit.
My first attempt was more flattish, and thinner in the material, but it didn't hold up to the knocks it received while in transit.
If I had the ability to upgrade a bit, I think I would change the plane to a jack plane. But I would still keep the system with two different irons. It is just that for jointing boards the smoothing plane is a bit on the short side.
Have fun traveling and woodworking.
Brgds
Jonas
This has been one of my favorite projects of yours. I can't imagine you could improve upon it much for what you are asking it to do.
ReplyDeleteWhen I was a field electrician I always carried my hand tools in open totes, and that is how I would likely carry my woodworking tools if I had to travel with them. In your case, however, you need a lid etc as you are often checking it in as baggage.
So if my opinion means anything, I think that you did a great job!
Bill
Hi Bill
ReplyDeleteThanks for your very nice comment.
I agree that it is one of my better projects, and I find that every time I look at it I am pleased with the proportions and the look. Normally my eyes would be drawn to some odd small fault, but there isn't really any of those on the outside of the chest.
I have once in a while considered making a copy of it just for the fun of it.
Brgds
Jonas
So you managed to get all the glue mess sorted? I hope so!
ReplyDeleteJohann
Hi Johann
DeleteI did manage to get the glue mess sorted out, but there are still traces of it. I have decided that it will add to a well worn look of a traveling chest.
The airline didn't accept my complaint because I hadn't telephoned it in..
So no compensation for the regular bag for my part.
Thanks for commenting
Brgds
Jonas