Sunday, February 22, 2015

Portable wooden tack box

Before leaving for the sea last time, Gustav started making a tack box for his grooming supplies for the horse.
He wanted to try his hands out on dovetailing, so the design is like a small dovetailed chest with a skirt and there will be a hinged lid.

We wanted to keep the weight as low as possible, so I found some of boards I made out of Sitka spruce a some years ago. I had a single 12" board left, so we used that for the sides.
The bottom is made out of ship-lapped larch boards, since larch is harder and more rot resistant than spruce. I figured that since the box will sit on the floor in a stable for most of the time, this was a sensible choice.

I showed Gustav how to make the dovetails, and the sides were made with tails first, and a small rabbet on the inside.
It was nice to see him being so serious about it, and he quickly became used to using the dovetail saw and a chisel.

Today we helped each other making the skirt, but due to the temperature in the workshop we moved it inside for the glue up.

Gustav still has to decide on the design of the interior of the box. he has talked about some tills for the smaller stuff, so that will probably be the way we go.

boards for the sides and ends.

Concentration.

Chopping out waste.

More chopping. 

End view.

Tack box before mounting the skirt.

Sawing a part for the skirt to the correct length.

Tuesday, February 17, 2015

New tool chest for the sea 10, the interior and thoughts regarding the build.

The interior of the chest:
11 cm (4.5") above the bottom of the chest there are two small strips of wood running the entire length.
These strips hold the shooting board, so it acts a a divider between the lower part of the chest where I keep the planes, and the upper part where I have two tills.
To facilitate removal of the shooting board, I drilled a couple of 30 mm (1.25") holes in it. That way I can poke my fingers through the holes and lift it out of the chest.

Above the shooting board rests two shallow tills.
The height of the tills corresponds to the distance between the shooting board and the dust seal of the lid, when the lid is closed. I think that if I pace a thin piece of cardboard, I could probably turn the chest upside down without anything falling out of the tills.
The large till was designed to hold chisels and the marking gauge etc, and the smaller till holds my hardware stock.

The space inside the dust seal is just right for my sand paper. I also have a dvd (The joiner and cabinetmaker) in that space. 

I need to find some plane socks for the grooving plane and for the moving fillister. As for now, they are just wrapped in some rags.
But a proper bag or sock would look better I think.


Thoughts about the build:
I wanted to prepare all the stock prior to starting the actual joinery on this project. It is the least fun part of a project in my opinion, but I am glad I stuck with that plan. 
Having all the boards ready at the beginning made my work so much more efficient compared to those builds where I have made each new board up as I went along.
I wanted to avoid glueing up panels, so my design is also based on the width of boards I had on board. But that is my standard practise, so I knew that would work.

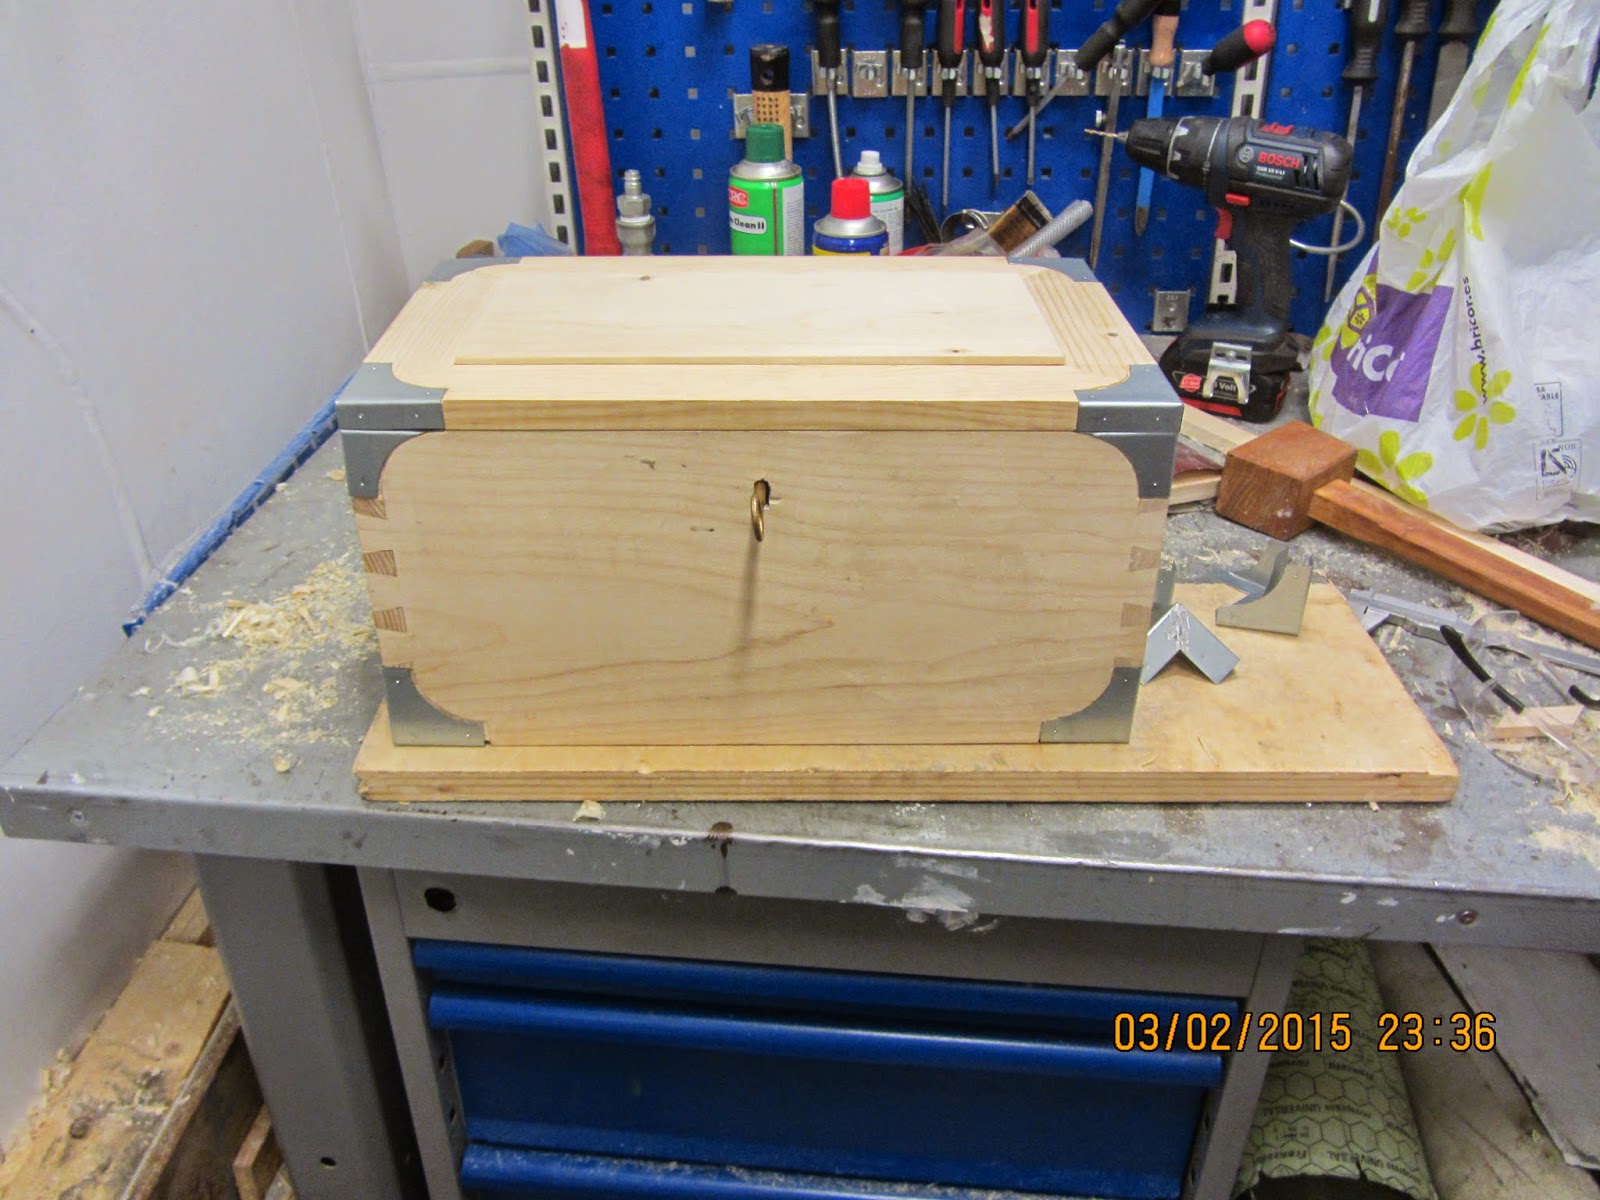
The corner reinforcements were easy to make, and they look a lot better than I had anticipated. I would have preferred if they were made out of brass, but galvanized steel plate is also OK. The only drawback was that we didn't have any acid pickle otherwise I could have soldered the corners.

The lid stays were a fine idea, but they looked wrong and got in the way of the intended tills, but removing them added a couple of extra holes to the inside. I'll just have to live with that.

The lock is of the full mortise type. While it looks nice from the inside and the outside it is not a perfect lock when the stock is thin. This is because the mortise leaves a fairly thin wall for mounting the escutcheon. The keyhole was positioned near the side of the lock, so two of the small brass nails held OK since they were outside the mortise. The other two were cut to a length of 1/8", so go figure if they have a lot of holding power!
To help with the fastening of the escutcheon, I added a small dab of paint on the back of it, and also on the two short nails. 
Still my guess is that the escutcheon will be the first part to fail on this chest.

The tills were made using some stock I had prepared for drawer bottoms for the "Gerstner inspired tool chest". The stock is about 1/4", so it is fairly delicate. For bottoms I just nailed on the old plywood bottom from the original tool chest. That way I could recycle and save myself some work.

My old suede plane iron protectors were not fit for the job any more. The irons had cut their way out of the suede, so the sharp edge was in danger of getting nicks and other wise be dulled.
I still had some 1/4" stock left over from making the tills, so I made two plane iron protectors that are a lot more sturdy than the earlier duct taped suede models. 

I guess the colour is a matter of taste, but the layer ended up being a bit fat. I sincerely think that I could have made a better job using a brush, but in hindsight everything is 20-20. 
I also made the mistake of not painting the upper part of the sides and ends of the chest, as well as the underside of the lid.
My fear was that the paint would cause the lid to stick, but instead I got a light coloured streak all around the chest where the colour of the wood can be seen through the gap between the chest and the lid.
Maybe I'll paint this area black, or wait till I am back on the ship again, and then give it some green.


All in all it was a fine project without any real difficulties. 
But the true test of the tool chest will be to see how it fares over the next year. 

Thanks for following and commenting the build as it went along.


Top layer of the chest showing the 2 tills. 
The sandpaper is inside the dust seal.

Large till removed, note the lifting holes in the 
shooting board which is placed upside down.

Lower layer of the chest. Shooting board next to the chest.
 
Lower layer with the old cardboard box from the 
Stanley 248 grooving plane removed. The mallet 
had to be disassembled to fit in the chest. 

The new iron protectors.


Tuesday, February 10, 2015

New tool chest for the sea 9, the completed chest.

After letting the paint dry for two days, I decided to use Sunday evening to mount the hardware on the outside of the chest.

At first I removed the masking tape from the jointing edges of the led and the carcase.
I had tried to place the tape so there should be a very small green line all the way around this edge, but it didn't quite look very good. I don't know if it is standard procedure to paint this part of a chest, but as it is now it doesn't look too good.
Seen from the outside, you can get a glimpse of wood that is unpainted, and when the chest is open, you can see the remnants of a bit of green on the edge.
I have considered if painting this part black would look good, maybe I'll do it at some point at home.

To protect the paint a bit from dings and scratches, I places it on a piece of cardboard on our workbench. I started by mounting the lid corner reinforcements. Then moved on to the top corners for the carcase, and finally I turned the chest upside down and even placed a piece of rag between the top and the cardboard to protect the show side of the chest while working on it.

All reinforcements were installed in the same way: I positioned the bracket in the recess, and then made a pilot hole for two of the screws using one leg of a divider. (We don't have an awl out here).
A screw was mounted in each hole and they were clocked.
Now with the bracket in place, I made the other pilot holes and mounted the rest of the screws.

Finally I used a file to ease off a few of the edges that were protruding a bit into the chest.

The escutcheon was mounted using a few drops of paint on the backside as glue, and then some small brass nails held it in place.


I then found all the tools and tried to load them in the chest.
There was just enough room for my old tools and the "new" moving fillister plane. Although I had to take out the grooving plane from the original cardboard box, to be able to shoehorn it into the box.
I'll tell my daughter that I would like to get some small sewn bags to but my planes in. Kind of like plane socks. She has rediscovered the joy of using a sewing machine, so that should be a fine project for her.

I didn't take any pictures of the loaded chest, but I managed to put the shooting board in there as well.
The empty weight of the chest is 3.2 kg (6 Lbs), and the curb weight is 11 kg (22 Lbs). So I am still able to bring clothes with me to the ship without breaking the maximum weight limit for my bag.

The finished tool chest.

Friday, February 6, 2015

New tool chest for the sea 8, green paint and tills

Yesterday one of the able bodied seamen found the missing green paint, so I immediately started humming the old song by "The Everly brothers": Dream dream dream. (Instead I used the word green)

I found some cardboard that I could place the chest upon while painting, and attached 4 screws underneath the chest to give some clearance so that I could paint the bottom first and then place it on the screws and paint the rest of the chest at the same time.

Before applying the paint, I sanded the surface using grit 120 and 240. I also added some masking tape on the hinges and on the mating surfaces where the lock meets the carcase.

First I painted the recessed corners where the reinforcements will go with a brush. After that I used a paint roll to apply paint to the surfaces of the chest.

The colour is used on the deck of the ship for identifying systems used for pumping drill water.
In the engine room it is also used as a code for sea water  systems.
And now it will also be internationally recognized as a colour code for tool chests for the sea.

While the paint started drying, I proceeded with some tills for the tool chest.

The materials for the tills were some boards that I planed for the Gerstner inspired tool chest as far as I remember. So I was glad to be able to use them for something and not having to prepare any additional stock.

The tills won't be sliding tills, because I would like the contents of the chest to be as stable as possible during the handling of my bag.
I decided that I could use the 6 mm birch ply from the bottom of the old sea chest, as bottoms for those two tills. Again saving myself from preparing stock, and using the old chest for something sensible instead of just throwing it away.

The sides of the tills were dovetailed with regular through dovetails. They had a nice tight fit so I didn't use clams on any of them, but just measured the diagonals to check that they were square. Then they were placed on a transformer and left to dry.

Today I attached the bottom and planed the sides a bit before lightly sanding the surface.

I also lightly sanded the painted chest, and added a second coat.

The next big thing is to decide what the escutcheon should look like..


Green chest, 2nd coat of paint still wet


Tills for the tool chest.


Wednesday, February 4, 2015

New tool chest for the sea 7, lid stay or dust seal?

I had installed a newly purchased lid stay on the chest. At first I thought that it was cool. then after looking a bit at it I found that it looked cheap and out of place. It worked as it should, but there was something about the fake too shiny brass surface that was bugging me. I knew the stay was made out of some plated iron, but I had decided to install it because I figured that it would be a novel thing compared to my usual leather strap or chain.

After considering the case for a few days, I had been able to pinpoint 3 things that I disliked about the lid stays: 
The appearance or colour just didn't look good to me.
The way it folded into the chest would interfere with the planned tills.
I wasn't able to fit an interior dust seal.

Now that I had found enough reasons to not like the lid stays, it was so much easier to convince myself that I should dismount it and instead add an interior dust seal.

The dust seal is just screwed in place, because I wanted to make sure that I could adjust it if the lid should start to bind when wood movement sets in.

In an attempt to make the tool chest really sturdy, I have fabricated some corner reinforcements out of galvanized steel plate. It is 0.75 mm thick or approx. 1/32".
The idea is to screw these reinforcements on all corners of the chest once it is painted. Hopefully it will make it harder for the luggage handlers to break it.

The reinforcements are pretty easy to make, I would have liked to make them out of brass or zinc. We do have some brass on board, but it is too thin, and we don't have zinc. So there really wasn't much of a choice. 
Such thin plate is easily cut using some metal scissors. We only had some straight ones, so I nibbled away the curved part and finished it with a file.
I tried to soft solder some of the pieces, but I had to give it up because we didn't have solder flux (grease) We also didn't have any hydro chloride acid that I could have used for making a flux with. I tried using sulphuric acid, but it didn't work. Maybe I'll try to solder them again when I get home.

After making the 12 reinforcements I marked their outline one by one and chiseled out a recess so they would be as close to flush with the surrounding wood as I could get them.

My plan was to paint the chest before attaching the corner brackets, that way I wouldn't have to worry about getting paint on the metal.
A trip to the paint locker today revealed that we didn't have any green paint after all. So I have postponed the paint job until I get home. That way I can also get a chance of trying out my milk paint.


The lid stay (left side)

Chest with reinforcement corners temporarily mounted.

Interior dust seal and recess' for corners.

Monday, February 2, 2015

New tool chest for the sea 6, the lock

The other day I went for a walk in the city of Las Palmas on the Canary Islands. I didn't just wander aimlessly about, no – I was searching for an old fashioned hardware store.
I managed to find one and after waiting a couple of hours - the siesta ended, and I could try my luck if they had a chest type lock.

I did take some Spanish while I was in high school, but I have to admit that it was never my favourite subject. Therefore I never studied hard in those classes.
Despite my lack of engagement in the class all those years ago, I managed to explain in Spanish what I was looking for. It greatly helps that my older brother had texted me the Spanish words for screw (tornillo), chest (baúl) and lock (cerradura).
The clerk in the store was really helpful and I ended up with two chest locks, two escutcheons and two small packages of straight slotted screws. One box of steel screws and one box of nickel plated brass screws. The price totalled at 21Euro and 45 cent so around 30$. Compared to Danish prices it was practically a give-away.

With the bottom firmly nailed in place, I decided to try fitting the newly purchased lock.

A classic rule is that the keyhole should be in the middle of the side. Therefore the position of the lock revolves around this point. I marked the outline with a pencil and transferred those marks to the top of the chest to lay out the mortise.

Since the boards of the chest are only 15 mm thick, I wanted to put the lock as far from the font as possible. Otherwise it is really difficult to attach an escutcheon, because the nails or screws need a little bit of wood to bite in to work properly.  The position of the upper plate of the lock ended up being flush with the inside of the front board of the chest.

This in turn meant that the back wall of the mortise had to be made only 2 mm thick (5/64”). To avoid bursting through with a chisel, I clamped some scrap wood on each side of the mortise to stiffen things up a bit.


I haven’t got a mortise chisel out here, but a thin bevel edge chisel can easily be used for making a mortise as long as you go slow and don’t lever out too much waste. 
After making the central mortise, I tested if the lock could fit in, and then I simply traced the outline of the top plate of the lock. A little work with a chisel and my home made router plane took care of that job.

Before attaching the locking plate in the lid, I made recess' for the hinges on the chest itself, and made the recess' for them in the lid as well, but I didn't mount the screws yet.
I aligned the lid as it would be once the hinges were screwed in place, and then I marked the position of the locking plate.

This may seem like an odd way of doing it, but I chose that way to avoid mortising in the lid with the hinges taking some of the beating.

I placed the locking plate according to my layout marks, and basically did the same as for the lock itself, chiselled out the mortise and used the router plane to make the plate flush with the surface.

The lock showing the mechanism and the locking plate.

The lock as it looks with the chest unlocked.

Blocks clamped to the side to help stiffen things up a bit.