Wednesday, March 25, 2015

Carved name sign for Bernie

I found a piece of wood from an old pilot ladder that was broken, and since the name of the horse is of an appropriate length, the piece of wood was just the right size.

At first I ripped the plank to the desired width, then it was re sawed to a thickness of around 5/8"

I flattened the stock with my plane and squared the edges.

As usual, I taped on a print out of the name to be carved, and I also taped on two logos for the Danish Warmblood horse.

Transferring the outline of the letters to the wood is done by following the outline with a hobby knife. Just a bit more pressure than what is needed to cut through the paper results in a thin line on the wood that I use while carving.

The carving was done in my normal way i.e. with a hobby knife. For the rounded parts of the B and the R, I used a small scalpel like carving tool intended for carving linoleum. It was a bit easier for me to make the rounding look nice with the smaller tool.

The logos were also carved by means of the small scalpel.

When I get home, I plan on painting the name sign. It will be red background with white letters and white logos.


The carved name sign.

The broken step from a pilot ladder.

Layout of the name sign.


Sunday, March 22, 2015

Cover for a lapping plate

Despite my plans of starting a name sign for the horse, I quickly changed direction to make a useful object for the ship's workshop.

A little more than a year ago, we purchased a lapping plate for the engine workshop of the ship. So far it has been sitting under the lathe, covered with grease and wrapped in plastic. But we have been trying to rearrange the workshop a bit to make it easier to clean, and we then decided that it looked like crap having a plastic foil wrapped lapping plate standing in an disorderly fashion.

The 2nd engineer asked if I could perhaps make some sort of wooden lid for it. I decided it was a worthwhile project and started it.

The sensible thing would have been to take a couple of boards and a piece of plywood, or even more sensible, make some boards out of plywood and screw the cover together with a plywood top.

But being sensible is not one of my virtues, so I decided for a dovetailed cover with 3 inset floating panels made out of solid wood.

At first I had considered 4 floating panels but I decided that it was maybe overstepping the line.

I found a piece of wood and started by ripping it to my desired width. Next was re-sawing of 24". That would be enough for the sides of the cover.

The boards were planed plat and I also planed a groove for the floating panels.
I crosscut the boards to the desired length and laid out the dovetails by eyeballing.
Dovetailing was a walk in the park given that I have brought some E.A. Berg chisels with me to replace the Crown chisels that I was fed up with.

Next I made two intermediate stiles for the lid, and planed some grooves in those as well.

3 thin panels were re-sawed and flattened afterwards. I made a broad chamfer again eyeballing the progress. Part of the challenge was to see if I could build something with out going too fuzzy over details.

Finally I made a dry assembly and called it a day.

Today I glued up the cover and after the glue had dried, I cleaned up the corners and the edges with the plane.

I can honestly say that it is the first dovetailed lapping plate cover I have seen so far in my career at sea. And I actually think it looks OK.


The wood used (surfaced 1.5 x 4" spruce).

Grooved sides before cutting to length.

Re-sawing stock for the floating panels.


The lapping plate (8x12")

The finished cover.

Friday, March 20, 2015

Yet another name sign for a horse.

We have had the newest horse for almost three quarter of a year now, and I have to admit that I have never taken the time to make a decent name sign for him. He too deserves a nice sign to hang outside his box in the stable, so visitors can see that he is a cherished member of our family on line with the other horses.

I will use my standard method of a hobby knife aided by my cheap linoleum cutting gouges.
His full name is Forum's Bernie, but I'll just make a sign saying Bernie.

He is not a pure bred horse, but something called: Danish Warmblood. It is a breeding federation where all kinds of horses and breeds are accepted, as long as they are warm blooded horses. So you can mix other warmblooded horses that you might like, and get the foal listed in this register. The main idea is to make a ride-able horse with fine qualities in various situations (as far as I have understood)

As far as I remember, some of his pedigree is Hannoveran and Trakehner, but there is also some Danish Warmblood in the lines too.
It is a very popular breed of horses in Denmark, and they are doing all right in various International competitions, with dressage as the main focus as far as I have been able to tell.

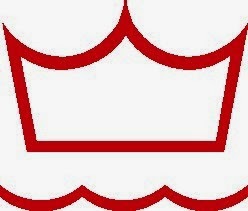
Danish Warmblood has got their own logo which is pretty simple to carve. It is a crown with a wavy line beneath it.

All I have to do now is to pull myself together and start the project by finding a suitable piece of wood and plane it flat. Well, maybe tomorrow will be the starting day for that.


Logo of Danish Warmblood horses

Saturday, March 14, 2015

Has anyone thought about building a boat, or perhaps done it?

Like the title says, Have you ever considered building a boat, or perhaps even done so?

I have often thought about making a small rowing boat. Maybe like a dinghy that used to be hung at the rear of a larger vessel in the davits. Nothing large, actually an 8 or 10 feet boat is kind of what I had in mind.

I don't like sailing much though (I get enough sailing from my work), but building a boat has always had a strange attraction. I like the looks of traditional small boats, and I think that it will be a challenge to build one. The problem would be what I should do with it once I eventually finished it?

If I start a project like that, it deserves to get full attention, so I couldn't just rush it to end up with a boat shaped object.
Off course there are the usual obstacles like other projects that would be fun to make, some horses and a dog that needs to be tended to etc.
But that shouldn't stop anyone from dreaming about future projects.

The "dream boat" will be made out of larch on an oak frame.
Probably planked, but I have also been tempted at times to dream about making one with a smooth outside, all the boards are pressed together edge to edge, and tarred fibres are pressed in between.
In Danish this building method is called "kravel" I don't know the English term for that.


Sunday, March 8, 2015

My parents' old sycamore tree

As long as I can remember, My parents have had a large sycamore tree in the front yard.
They have talked about having it downed, and about a week ago they had someone to do the actual felling of it.

I had told them that I would like to have the trunk and one of the main branches (it was a Y shaped tree). My plan is to convert the tree into a table, and thereby still having preserved some of it for the future. It will probably yield material for several tables, but that is also OK with me.

Last Monday, I drove down to my parents to pick up part of the tree. It is so heavy that I could only take the Y shaped 6 feet trunk in my trailer. Any more would have caused me to drive with overload which is something the police in Denmark takes pretty seriously.
My dad, their neighbour and I managed to get the trunk onto the trailer by means of a chain block, and a bit of ingenuity.

I guess the weight of the trunk is around 800 kg, because my front loader on he tractor is just too weak to lift it. Luckily there is a well functioning non return valve in the hydraulic system, so I could use a chain block in connection with the front loader and get it lifted of the trailer.

A bit more (a lot actually) of fiddling and the thing was positioned in place on the wagon of the mulesaw.

I have sawed a couple of 5/4" boards and for the entire width I have made one which is 2.25" thick. Right now I am having problems because the width is so great that the blade can not eject the sawdust from each stroke, so the blade gets hot and tends to jam up. The sawing of something this wide (32"+) takes an incredible amount of time. I think my mean speed at the moment is 3/8" per minute.
It is a good thing that I don't have to make a living out of it. If the width is reduced to approx. 24", I can go with a speed of 4-6" per minute depending on how hard the wood is to saw.

Gustav and the trunk.

The trunk will just pass the frame of the mulesaw.

As a service to wives of readers from Pennsylvania, here is a picture of me after a visit to the hairdresser and also with a recent shave :-)  

Friday, March 6, 2015

Sawing whitebeam logs with the mulesaw (now with pictures).

I got so eager with all the sawing, that I forgot to have a video taken during the process.
Instead Gustav took some pictures of the planks.

The width of the upper planks are around 25", the thickness is 2.25"

Until now I have processed two logs. I still have three more to go, but I think I'll save those for my next home period.

After a bit more research yesterday, I found a place where it was stated that whitebeam was not very prone to cupping and twisting etc. during the drying of the planks. I hope it is true, because that would make a nice change compared to elm.


Trailer loaded with whitebeam planks.

The 2 planks on the left side of the stack is from the upper log too.

Thursday, March 5, 2015

Sawing whitebeam logs with the mulesaw.

As usual, I have been fairly busy during my time at home, and I haven't had the time in the workshop that I had hoped and expected.
Instead I have been busy sawing larch logs into planks to be used for our porch project some time in the future.

A friend of mine had downed some whitebeam trees on his property, and asked if I could saw them into planks on the mulesaw.

I have been sawing yesterday and today, and the wood looks really nice.

The interesting thing is that I can't find the species mentioned on the wooddatabase.

In Danish it is called: seljerøn, the Latin name is Sorbus Intermedia.

As far as I have been able to find out, it is mostly used for wood turning and carving, At a German Internet page I could see that it had been used for making pins for the German version of bowling (Kegeln).
 Previously it was used for cogs on gear wheels in wind mills. So it must be fairly hard.

If anyone knows of any other uses it would be interesting to hear about them.

I'll see if I can get Gustav to shoot a video of me sawing them tomorrow.