Tuesday, February 28, 2017

A small barn for the summer house 8, windows

Last time I was home I managed to make the window frames for the total five windows that I planned for.
The three larger windows will be at the ground floor, and the two smaller windows will be for the attic. One in each gable.

For once this was a project that could benefit from my shaper. That thing is a beast when it comes to making large rabbets and long pieces of mouldings.
Traditionally frames are made with mouldings on the stiles and none on the rails. But I wanted to have mouldings all the way around.
I dovetailed the frames together, and in order for the moulding to flow around the corner I used a mitered dovetail for the outermost part of the frame.
The technique isn't terribly hard to learn or do, so it went together fairly well. My biggest challenges were that the stock was thick, but a bit of concentration during sawing helps a lot.

During the last couple of days I have been trying to make the window casements. There will be a total of 8 casements, so in order to make some progress, I am making it mainly as a power tool build.

The stock for the window casements are larch that I milled two years ago. It was originally intended to become a fence around the porch, but in the end we decided that a fence wasn't needed, so I could use them for this project instead.
I again used the shaper for making the rabbets and the mouldings. And this time I have tried to use it for making the bridle joints as well.
There is a special iron that is suitable for making tenons and the open mortises for the bridle joints. I have never used it before, because quite frankly it scares me a bit. The combination of the shaper and that blade is something that will eat a hand or an arm in an instant.
It is a interesting to note that when I have to make multiples, the machines are really fast despite the setting up can be a bit time consuming. A thing that is also interesting to note is the sometimes terrible amount of tear out left behind.
To be fair I think most of it can be traced to the wood. Larch is rather stiff, but it tears out easily.

The first window casement was assembled by means of drawbored dowels. The next one was just pegged after the glue had set. That route allowed me to put a clamp on the bridle joint which I think results in a better joint overall.
A project like this that requires a lot of pegs/dowels, is just what I have been longing for, because it gives me an opportunity to use my BLUM dowel plates. They are nothing short of impressive.

Mitered dovetail joint on window frame.
 
The spindle shaper with the scary Z blade.

Frames for the large windows.
 
Blum dowel plate.


Saturday, February 18, 2017

Making a small barrel 4, completion

After discovering that the stock was not quite as good as it ought to be, I sort of lost interest in the project. So I guess it is a reminder that once in a while decent stock is a prerequisite for a success.

I tried to weigh the pros and cons of continuing or abandoning the project altogether. In the end I decided that instead of making a barrel for rum or brandy, I could make it for dog treats. Since they are not liquid, the barrel will work for that.

I had made a couple of ends/bottoms for the barrel out of spruce, and these were made into octagonals to fit the inside.
The hoops are made out of a piece of copper tube that was split down the middle using a hacksaw. After splitting , it was flattened on an anvil by means of a hammer. The hoop was riveted together using small pieces of copper wire from an old electrical cable as rivets.
Each hoop received a total of six rivets. five to hold the hoop together and one rivet for holding the eye that will allow the barrel to be attached to the collar of Bertha.

I had measured each hoop directly from the barrel, in such a way that it was a bit too small so I could rely on it to be stretched a bit and gain a good tight fit.
The hoop was first negotiated into place by tapping with a hammer on top of a piece of wood. Once it was level with the edge of the barrel, I switched to a drift wedge. A regular piece of flat bar would have worked equally well, but this was just at hand and had a perfect size for the job.

Normally I think the hoops are expected to stay put without any fixations, but I didn't want to take that risk with this project. I made four small rivets and attached each hoop with two of them.

Finally I sawed of the ends of the barrel down to the edge of the hoops and sanded the outside flush.
I didn't drill a hole for the dog treats yet, because I think a Forstner bit will be better than a regular metal drill bit like those we have out here. So I'll do that once I get home.

The barrel ended up being 6" high and 3 3/8" in diameter at the middle.

The barrel next to a standard can of mineral water.

Material for the hoops.

Coarse work with the riveting.

Setting the hoop.

Tool used for further setting the hoop.
The hose clamp is removed to go further.

Rivet head made on 1.5 mm electrical cable strand

Finished barrel.


Wednesday, February 8, 2017

Making a small barrel 3, regrouping.

My barrel wasn't completely symmetrical, and I suspected the reason to be that the individual staves were not equally flexible.
I spent some time to get them all a bit more uniform in thickness and then tried to reassemble the barrel.
It still wasn't as I wanted it. After some time fumbling with the hose clamps, it suddenly detonated between my hands.

None of the pieces were damaged, but I could see two staves that had significantly more of a bend than the rest of them. I decided that it was time to regroup the project by only using 8 staves instead of the original 10. This will mean that the volume of the barrel will be smaller, so I'll probably have to either make it a short walk with the dog, or just walk the dog myself without any company.

Regrouping meant that I had to alter the angle on the staves, but that was a quick job. I had a bit of  a problem getting the barrel raised using the blue masking tape due to its unwillingness to stick to anything, so I upgraded to some duct tape.
I am fairly sure it isn't a traditional way of doing it, but it sure works great.

A hose clamp was mounted on each end, and the barrel looked OK.
I decided that I should make the barrel shorter due to its smaller diameter in order for it to look good.
I got the idea that if I kept the hose clamps on while I completed the work on the barrel, I could round and sand it also where the hoops would be attached. In the end I will saw off the part where the hose clamp has been.

The barrel was rounded and sanded. I measured the outside diameter of one end with a piece of copper wire, and used that to calculate the size of the corresponding bottom.
The oak has got a lot of cracks, so I was a bit uncertain if it would make an OK bottom. I sawed out a piece and marked a circle on it. Immediately after sawing the bottom out it broke in two.
More regrouping..
Spruce might not be the classic choice for coopering, but on the other hand, a Newfoundland isn't a classic barrel bearing dog, so a swift decision was made to use spruce.

After filing the disc round, I used a chisel to chamfer the edges so it could eventually fit into the groove that I was going to make.

I tried to use my router plane instead of a croze, but it didn't work very well, so I guess I'll have to do a bit of tool making to proceed.


Sanded barrel with a spruce bottom and the router plane.

Set up for sanding.

Broken oak bottom.


Sunday, February 5, 2017

Making a small barrel 2, getting by using standard tools.

It seems natural that since coopering is a trade of its own, there are some special tools that goes along with that trade.
I haven't got any of those tools. But I have a lot of different tools and spare parts that can be used on board a ship. Some of those can often be used for other things.
Today I tried to use hose clamps for holding the barrel together before making the hoops.

Before I got to that part, I had made the last staves, and they were planed on the outside.
I planed the edges to an 18 degrees angle, so I would end up having 10 staves each with a total angle of 36 degrees.

This is where the challenges started.
At first I tried to hold the staves by hand inserting them in a ring that I had made from some old copper strands from an old electrical cable.
That didn't work.

The next attempt I tried to hold each stave in place using blue masking tape attached to the middle of the staves but with sufficient space between each so they could touch in the ends.
That wasn't a success.

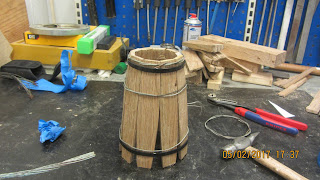
Third attempt was to lay the staves closely together, so they touched at one end. Each stave was taped to its neighbour and finally put on an end and the last piece of tape held the stack together.
This seemed like the way to go.
I attached the copper wire ring, and made another one a bit smaller.

The assembly was rather flimsy, so I added another copper ring on the middle. That made it a bit more solid.
I found a couple of plastic cable tied and added those too. Then I removed the masking tape.

Getting the other end of the barrel closer together wasn't that easy. I was afraid to break the copper wire, and the cable ties weren't easy to tighten either.
That is when I decided to find some hose clamps.

At first I attached the hose clamps on the ends and tightened them up a bit. Then cam a larger model for the fat part of the barrel.
It started to look more like a barrel and less like a bunch of sticks held together with masking tape.

A thing that I noticed was that the individual staves didn't bend the same. I knew what the problem was, so there was no point in continuing with the hose clamps before I had fixed it.
The staves are not the same thickness.
I had gambled a bit that it probably wouldn't matter, but apparently it does matter.
Now I just have to find a way to make them a bit more uniform in thickness and then I can continue with the hose clamps.

The end result of the experiments so far.

Staves and copper wire.

This didn't work.

This helped.

Success is just around the corner.

Clamping using copper wire.

Moving into the plastic age using cable ties.

Hose clamps work great for this.


Saturday, February 4, 2017

Making a small barrel.

The other day we received some stores for our main engines. The stores were delivered on a single use pallet.
On this pallet the two lower stretchers were made out of oak. The top of the pallet was some other type of hardwood that I haven't been able to identify yet.

Not surprisingly, I disassembled the pallet to save the wood.
The problem with the oak is that the nails had penetrated rather deeply into the wood.
There was something like 8" between the nail holes, so I tried to think of a small thing that could be made out of short pieces of oak.
There are of course many things that would fit in this category, but I decided that a small barrel similar to those depicted around the neck of a saint Bernard dog would be interesting to make.
Bertha will end up having the same size as a saint Bernard, so I see no reason why she shouldn't be able to have a small barrel of brandy fixed to her collar for taking a photo.

I have never tried my hands out on coopering, so this will be a journey into the unknown in that respect.
The diameter of the barrel will be such that I can make the ends from the oak as well, I am able to make a circular piece of 2.75"" in diameter. The barrel will be 7.25" in length and probably end up having a diameter on the middle of 3.75" That is if everything goes as planned.

I have read somewhere that if you split the wood for the staves, you can reduce the risk of the barrel starting to leak. This makes sense if you use some sort of ring porous wood. I think that oak is ring porous, so I am going to try to follow that advice.

After sawing my piece of oak into the lengths between the nail holes, I split the pieces using an axe.

After splitting I used my plane to flatten the individual staves a bit on the outside.
My first idea was to make them exactly the same thickness from the start, but I changed the approach and only flattened the outside and then I marked out the shape and used a hack saw to make the curved shape.

Once all the staves are done I'll try to plane them all to the same thickness.

So far I have experienced that splitting stock is not a guarantee for a flat piece of wood.
It might have something to do with the fact that the grain isn't the straightest on the wood that I have at hand.
Some of the staves that I had split also had cracks running the entire length down the middle, so far from all my staves could be used.
I am also beginning to suspect that there might be a reason for coopers to use special tools for their job, cause a regular smoothing plane with a scrub iron doesn't seem to be the most efficient tool so far for this project. (Not that such a thing has ever held me back)


Split staves before sorting.

Flattish and shaped staves.

The selection of stock.


Friday, February 3, 2017

Vegans and woodworking.

My daughter has been a vegetarian for some time, to see what it is like. She is not fanatical in any way at all, so she eat meat when she is home, but at her boarding school they have a special vegetarians menu that she likes.

During the finishing of the travelling bookcases, she watched me apply some shellac. 

I have a hard time understanding vegans, but that might just be because I am not smart enough.
Laura knows more about that way of life than I do, so we ended up talking about that while I proceeded with the shellac.

Apparently vegans shouldn't eat or use anything that is made by an animal unless it is not supposed to be used by the animal itself.
I only thought that they weren't supposed to eat stuff, but Laura said that it was harder than that. 
So it made me wonder if vegans can use shellac as a finish at all?

If the beetle produce the shellac for a purpose, it means that they can't use that finish.
If the shellac in the other hand is a waste product that the beetle doesn't use for anything, it should be OK.

I guess bees wax as a finish is also ruled out if you are a vegan.

Technically it doesn't mean a lot to me, since I am not a vegan, but I found the subject a bit interesting.
A bit akin to imposing a 100% hand tool use on yourself, or Only to use domestic woods etc.

So does anyone know a vegan woodworker and perhaps through this know if they can use shellac and bees wax?


Thursday, February 2, 2017

WSBO, vote for your favourite shelf.

All the entries for the WSBO are now listed.

Please take a look at the many different and great looking shelves that the participants made, and please vote for your 3 personal favourites.

I guess the more people that will vote and show their interest in the build, the likelier it is that Chris Wong will arrange another build off in the future.