Friday, June 28, 2024

Stuff our company makes

2 years ago, Gustav and I started a small company called Hest & Hus ApS.

Our primary plan was to buy and renovate a small house that is to be rented out. We are nearing the completion of the renovation, and it has been a thorough round with new electric wiring, new plumbing, insulation, new floors, new kitchen etc. 

But in addition to the house renovation, I have been able to actually make money in my workshop! 

The biggest customer group we have is horse people, and since a lot of the stuff associated with horses is quite expensive, it is worth to repair. 
In the shop I have 2 leather sewing machines. A Singer patcher and a Singer class 7 (saddlemakers sewing machine). The patcher is used for repairing stable rugs (horse blankets), and other small articles such as girths etc. Once in a while something will be made out of such heavy fabric or heavy leather that I use the Singer class 7 for the repair job. 

Repairing things appeals a lot to me, and there is a need for people who can do repairs on horse rugs at a reasonable price and within a reasonable time. It isn't the most exciting thing to do, but it is honest work and it generates a pretty steady income.

Once in a while I also get some jobs repairing saddles. It is mostly the girth straps that need to be replaced, and that on the other hand is a task that I find really interesting and challenging. It is almost completely handwork to do these repairs. On the odd occasion, I can use the class 7 to stitch something at the bottom of a saddle flap, but mostly hand sewing is needed.

We make something called "event inventory" (directly translated from the Danish stævneinventar). It is stuff that you can bring with you to a horse event and use it for holding your equipment like saddles, saddle blankets, headstalls and halters etc. 
We also make these things for tack rooms, where the customers decide on the size they want. Those things are all made out of pine that is stained and varnished. The saddle blanket holders and the headstall holders are made with leather straps that are used to fix the items to the front of a horses box in an event stable. 

Saddle blanket holders in the workshop.

Headstall holders and saddle blanket holders in an eventing stable.

Close up of a headstall holder.

Headstall holder. The wooden hooks are made with splines for strength.

Headstall holder with 4 hooks.

Headstall holder with 3 hooks (plus a curious horse)

Saddle holder for 3 saddles for a tack room.

Bit holder for a tack room

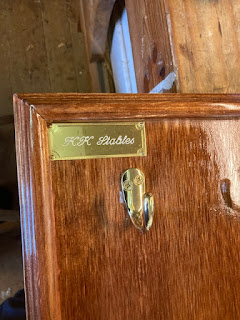
I bought an engraving machine to make name tags.

Logo on the bit plate.


Wednesday, June 26, 2024

Installing a new sawmill

 My old sawmill, which I installed in 2007 has always had a little bit of problems with the feed mechanism. I fixed it so that it was able to go in reverse something that it was unable to when I bought it, but the change of forward speed never worked really well. It was technically worn out, and I didn't want to invest the time in rebuilding it completely when it worked OK for my use.

About two years ago, my old friend Gert (who had sold me the sawmill) called me and told me that he had bought himself a Woodmizer, since he was getting a bit older he felt that he wanted something that could automatically wrestle the logs instead of having to do it manually on the circular sawmill. 

So he wanted to ask me if I wanted to buy his circular sawmill that he had bought back when he sold me the old one.

I immediately confirmed that I would love to buy it, and we agreed that I should find a time to come and test it and see it in action. 
That new saw was somewhat bigger than the old sawmill, and it has got a different feed mechanism that works flawless. 
My wife got diagnosed with breast cancer (she is all well now) so I told him that I couldn't come and get it as quickly as I had hoped for, but he was completely cool with that, and last autumn I found the time to go down and dismount the sawmill and transport it home. I think it took about 5 trips with the car and the boogie trailer, but I was able to get it all home on my own. Luckily the saw could be divided into manageable sections, and that was a huge bonus compared to my old sawmill.

The sawmill sat in the machinery shed for the winter and the spring, and at a point Asger our youngest son asked me if he should help me sell the old saw on Facebook marketplace. 
I doubted that anyone would want to buy it, but it wouldn't cost much energy to try and sell it. Within the first week, we had 4 potential buyers, and one of them even offered more than the asking price and was willing to come and get it fairly quickly. So suddenly the sawmill was dismantled and out of the barn.

After a weeks hard labour removing the old concrete pillars, we started mounting the new sawmill. Asger suggested that we painted it as soon as we installed it, since he reasoned that I would never get around to doing it later on. 
So I settled on a nice blue colour, and the entire thing received a coat.

The individual sections were moved into the barn and lined up, after which I dug out underneath the mounting frames and cast some concrete with threaded rod to hold it to the floor. The reason for digging out after moving it into the barn was so that I could use some pieces of pie as rollers to move the sections on the concrete floor, something which would have been much more difficult if there were a lot of holes in the floor.

The new sawmill utilizes the electric motor as a flywheel, and since I don't have enough amperage to run the electric motor (it needs 60 A fuses on a 400 V 3 phase grid), I am going to do the same as with the old sawmill which is to run it off the PTO of the tractor. 
I just need to make an adapter so I can mount a PTO spline shaft on the rear end of the electric motor where the cooling fan normally sits. This is something I still need to do.

 So the sawmill isn't fully operational at the moment, but it is close. So next time I get home I might be able to fix the spline shaft adapter, the extraction fan and join the two table parts. That's all that needs to be done for me to have a functioning sawmill again.

Beginning the installation, 3 section out of 5 are in the barn at this point.

The first 4 sections are assembled and roughly aligned.

The electric motor is installed and painted. The blade is a 40" blade, so it is a bit bigger than the blade of the old saw (36"). That coupled with a lower table means that there it much more of the blade above the table so I can split bigger logs now :-)