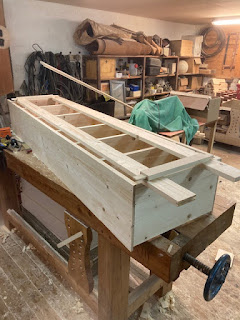
Back in January 2023 I built a chimney cupboard again. Like last time (2017) I used the plans from Bob Rozaieski, as they were published in Popular Woodworking. I built the cabinet with the intention of having it on display to show potential customers what we could make for their tack rooms.
The cabinet I built previously has been a great source of storage space in our own tack room, and I still like the look of it a lot. It is such a classic shape in my opinion.
All of our other products are made out of high grade pine, but since I didn't have a customer, I didn't want to spend more money than needed to get some really nice wood, so I made this one out of spruce boards. Admittedly I regretted it as soon as I had to stain it. Pine stains nice and evenly. Spruce doesn't..
I can't remember how long time it took me to build it, but it is a reasonably fast build. It might have been around 14 hours or so, I forgot to write it down at that point. Since it was intended to be for sale I wanted to make it as fast as I could, and while the cabinet can easily be made purely by hand tools, some operations like making dadoes for the shelves are fast if done using a router. Also the raised panels for the doors I usually make on the table saw.
Another thing I normally do is to install the raised panels in a rabbet instead of in a groove. that way I can assemble the door frames first, then make a rabbet all along the inner edges and install the panels using some small strips of wood and some brads.
I didn't sell the cabinet, so after at bit of time I decided that I might as well start putting it to good use. So I filled it with a lot of the remedies that I use for repairing stable rugs.
The cabinet would probably look better if it was painted compared to stained and varnished, but it is easy to wipe over with a damp cloth when it is varnished, and if it was installed in a tack room that would be appreciated.
I can't praise the cabinet highly enough regarding storage space based on footprint. There is just so much useful space inside the cabinet, and the simple yet elegant lines still makes it a favourite of mine.
It is without a doubt one of the most rewarding builds that I can think of. It is easy to accommodate in a small space like a flat or a small shop, and it easy and fun to make. Most people that sees it like it instantly, just like a hanging Shaker cabinet appeals to most people.


That's a very good design, lovely and looks very practical functionally. I suspect that a painted version, maybe even one with a flat panel might sell better since the simple form benefits from uniform grain etc. as noted with finishing spruce.
ReplyDelete
DeleteHi Jeremy, thanks for the nice comment.
The design is really good (I'm sorry that I can't claim that I designed it). The footprint is something like 10" x 14" as far as I remember.
The old one I made I painted Lexington green, and I really like the look of that. But a lot of horse people like the look of varnished darkened wood, so that's why I wanted to try and finish this cupboard like the rest of our products.
The problem with the stain and varnish is that the grain looks so unruly that it takes all the focus away form the raised panel. So I guess that it I made another one to be varnished, I'd might try a flat panel instead. But if I was to paint another one, I'd definitely go with the raised panel.
Technically I think it looks better in the unfinished wood than it does finished. But I wouldn't have known it if I hadn't tried :-)
Brgds Jonas
The stained spruce is a little wild, but I can see people liking that in a more rustic setting. Agreed that the extra effort raising the panels is unnecessary. Good design and proportions, it's always a good idea to follow Bob Rozaieski.
ReplyDeleteIs the joinery all simply glued or are there some nails in there, aside from the strips holding the panels?
Or the back, that looks like it would be nailed on.
DeleteHi Jeff
DeleteThe original that Bob Rozaieski made also had raised panels. Only difference is the construction where he makes it as an inserted panel in a groove, and I just rout a rabbet all way around the inside of the door and then fix the panel with small strips of wood along the edges.
The close up makes the grain and cupboard look "wilder" than it really is. The light in my shop has never been good for pictures, and also the pictures are not "enhanced" in any way :-)
The shelves are all glued and nailed, so is the front frame and the back. The construction is really strong since the back is attached to the sides and also to each of the shelves. The front frame is a mortise and tenon job, and that also stiffens up the cupboard.
The backboards are tongue and groove boards that have just been given a small chamfer.
I have made some cabinets before where there is a little more decoration on the front of the backboards. https://mulesaw.blogspot.com/2018/09/small-display-cabinets-for-asger.html
I think that moulding the inside of the backboards mostly makes sense if it is a display cabinet with a glass door in it and maybe some china or small antiques inside. When the doors are wood and the cabinet is filled to the brim it is a bit overkill.
Brgds Jonas