Friday, June 20, 2014

A small shelf and a small passenger

Despite my lack of energy concerning woodworking this trip, I made a small project yesterday.
We have had the need for a small shelf for as long as I can remember, but we didn't have any wood that wood look just remotely OK. I am not a fan of making shelves out of plywood when it is something that is intended to be in a public space. In a workshop it is fine, but after all this is not just our working place, it is also our home for half the time, so it shouldn't look too bad.

Yesterday the electrician came in and said that he had found an extra table top in a stores room. Apparently it was designated for a table that was never built anyway, so we immediately decided to use it for the shelf.

The job itself was done by reducing the size of the plate by means of a handheld circular saw, one that I didn't know that we had on board.

After making the top of the correct size, I attached some mounting sticks below it and finally screwed onto the wall.
So no we have a tea drinkers shelf complete with a kettle and some tea. Before we had to share the space with a coffee machine and some coffee.

The small feathered passenger looks like a pigeon. It has got a ring on one of the legs, so maybe it should actually be on its way to somewhere. I have no idea if it has lost its way or just needed a break, but it landed on our deck this afternoon, so we have been feeding it with some bread and have given it a cup of water to drink from.
It seems fairly tame, since it doesn't panic when we go to the deck. Anyway, as long as it behaves it is welcome to get a free ride.

Have a nice weekend

Our passenger.

The tea shelf.

The tea shelf from the underside.

Wednesday, June 11, 2014

I can't decide what to build for my next project.

I have been a little low on the energy and inspiration side when it comes to finding a suitable project this time.
After chatting with Brian Eve from Toolerable, I was eager to try to build a Rorkhee chair. It seemed like an appropriate challenge that didn't require too much wood, and the thing could be brought home in the airplane as well.
I tried to see if I could find some wood that would be fitting for this project, but sadly I don't have any thing that will make a good chair. I have a few small thin boards of some oak (from a pallet), but the only wood of a larger dimension on board are some construction grade spruce boards.
My thoughts are, that making a chair out of that will be a waste of time and energy, and I will be angry when the project fails due to some wood that is not strong enough. So I guess that I need to find some other thing to build. I'can always make a Rorkhee at home some time.

A folding camp stool would be a nice thing to make, but the same problems concerning the source of wood applies to that project. Maybe I will make a triangle bolt or two to bring with me home, that way I can have a head start when I decide to build a stool in the future. My idea is to make a triangle bolt by hard soldering 3 bolts together, so the legs of the camp stool can get very close to one another.
Chris Schwarz once blogged about a Roubo stool that looked like that.
Maybe it could be a fun project to make with the children?

Asger (our youngest son) has developed a keen interest in steam engines. That could open up for some interesting projects.
I have considered building a split demonstration model of a steam engine to better explain the working principles to him. That doesn't require a lot of wood, and it shouldn't be too hard. After all, the various parts doesn't have to be steam tight.

Yet another possible project is to build some sort of machine or contraption that can be driven by his steam engine at home.
E.g. a conveyor belt, a small crane or something along those lines.

But so far I haven't advanced past the sketch and dream phase of any of the above mentioned projects.

Do you ever find yourself in a similar situation?


Tuesday, June 3, 2014

Tumblehome sea chest, the completion

Yesterday, I made a lower skirt for the tumblehome sea chest.
I like to change the orientation of the dovetails for the lower skirt, so it can better resist the outward thrust of the bottom, if it should expand at some time.

A great advantage of fitting skirts to a canted chest is that the further down you press the skirt, the tighter the fit will be.
I took a critical look at the surface of the chest itself, and it doesn't look very good. The spruce I have used was definitely not furniture grade, so I am convinced that I will paint the chest once it is done.

While waiting for the skirt to dry, I glued up a panel for the lid.
I figured that a small experiment wouldn't hurt, since the chest isn't designed for anything special. So Instead of my usual floating panel type lid, I decided to go for a flat panel with nailed on battens to prevent it from warping.
I dovetailed two battens to a piece of wood that will act as a front dust seal. After the glue had dried, I mounted the assembly on the lid.
I glued the front dust seal piece onto the lid, and then I reinforced it with some clenched nails just to keep on experimenting.
The two battens were attached with clenched nails, but no glue. My theory is that the front piece will stay put due to the glue and the nails, and the nails holding the battens will prevent the lid from warping, but still be flexible enough to accommodate seasonal movements.

The lid is secured with a leather strap which I took from an old bridle for the horses. I punched a couple of holes in it, and mounted it using some brass screws.

Before painting the chest, I decided where to put the lifts, and I made pilot holes using an awl.

I couldn't make myself use the milk paint which I bought two years ago in Germany. I haven't been able to locate a dealer in Denmark, and I didn't want to risk waste the paint on an experimental chest like this one made out of crappy wood.
I looked at my shelves and found some machine enamel in the RAL colour 6011 (Reseda green / Hannover Green). It is produced in Denmark by a company called Esbjerg Paints. and I figured that if it can stand up to agricultural machinery, then it will be OK for my chest.
The red colour is Swedish red wood protection from the same company. I used it for painting a door on the backside of the barn a year ago.

After letting the paint dry for a couple of hours I estimated the paint to be at least dry enough to allow for mounting of the lifts.
The mounting itself went suspiciously easy, so maybe I am having a lucky day.

All that is left is to present it to SWMBO and see if she would like it in the stable or inside the house.
I think it might end up in the stable, since we need a new box for curry combs, and this chest will be perfect for that. In addition it is very stable and can be used as a small platform for standing on, when the hair of the horses needs to be groomed and braided before going to a contest.


The finished chest.

View from the other end of the chest.

Clenched nails and holding strip.


Friday, May 30, 2014

Barnsley table finished

I think that this is the longest period without any activities on the blog. But as you probably all know, sometimes there are a lot of other things that needs to be taken care of, and this May had its share for me.

First our daughter had her confirmation at the church, we held the reception at home, so the house and garden needed to be groomed before that. Then I had a lot of work on the riding court and a clogged drain from the yard, so I have seen my part of shoveling for a long time. I did manage to get a bit of woodworking done, but I never found the time to blog about it until now.

I glued up the tabletop for the Barnsley hayrake table. I decided to make glue it all up at once which wasn't a very good idea. The result was more uneven than expected. I tried to flatten it by using a scrub plane, but larch has a tendency to produce some really ugly tear out even if the wood is traversed. Luckily I had started on the bottom of the tabletop, so I could change the strategy for the topside.
My solution was to purchase a belt sander and some grit 40 and 60 belts. That actually worked quite good. It was not as fast as planing, but there was no tear out.
After the belt sander, I used the random orbit sander with some 80 grit sand paper.

Instead of breadboard ends, I added cleats using a sliding dovetail. These were then secured with a single dowel in the center. That way any movement won't upset anything. The cleats were then secured to the top of the legs using some slightly wedge shaped pegs.

I called Charlotte who had asked me to build the table to come over and check the result. luckily she was very pleased with the result, so we helped each other load the table onto the trailer and we drove it to her place.

Charlotte wanted to do her own finishing, so that is why I have not described that part at all. I issued her with a lot of test boards out of larch, so she could test various methods before determining which one she would go for. I still don't know what finish she will chose.

The legs ended up looking a bit bulky and too close to the edges of the table. But that was because the stretcher and the legs were made first, and at that time the requested table size was 48" x 128". But I still think the table looks nice and sturdy even with the smaller top (40" x 98").

The table in the trailer.

The finished table.

Lower stretcher complete with Roman numerals.

End view of the table.

One of Charlottes' Kaare Klint Safari chairs ( Rorkhee chair).

Wednesday, April 30, 2014

Tumblehome sea chest 5, the bottom

We had some semi bad weather yesterday, so I was glad that I had decided to try tackling the bottom of the chest. That is a  little more coarse woodworking than dovetailing and making a complex glue up.

For those pallet wood builds, the following approach is working fine for me:

First; I'll flatten the boards on one flat side, and maybe touch up the sides as well if they need it. The back is left coarse, and the boards don't necessarily have the same thickness.

Second; is making either a rabbet for ship lapping or a tongue and groove. On this chest I made 2 tongues on the centre board and one groove in each of the other boards.
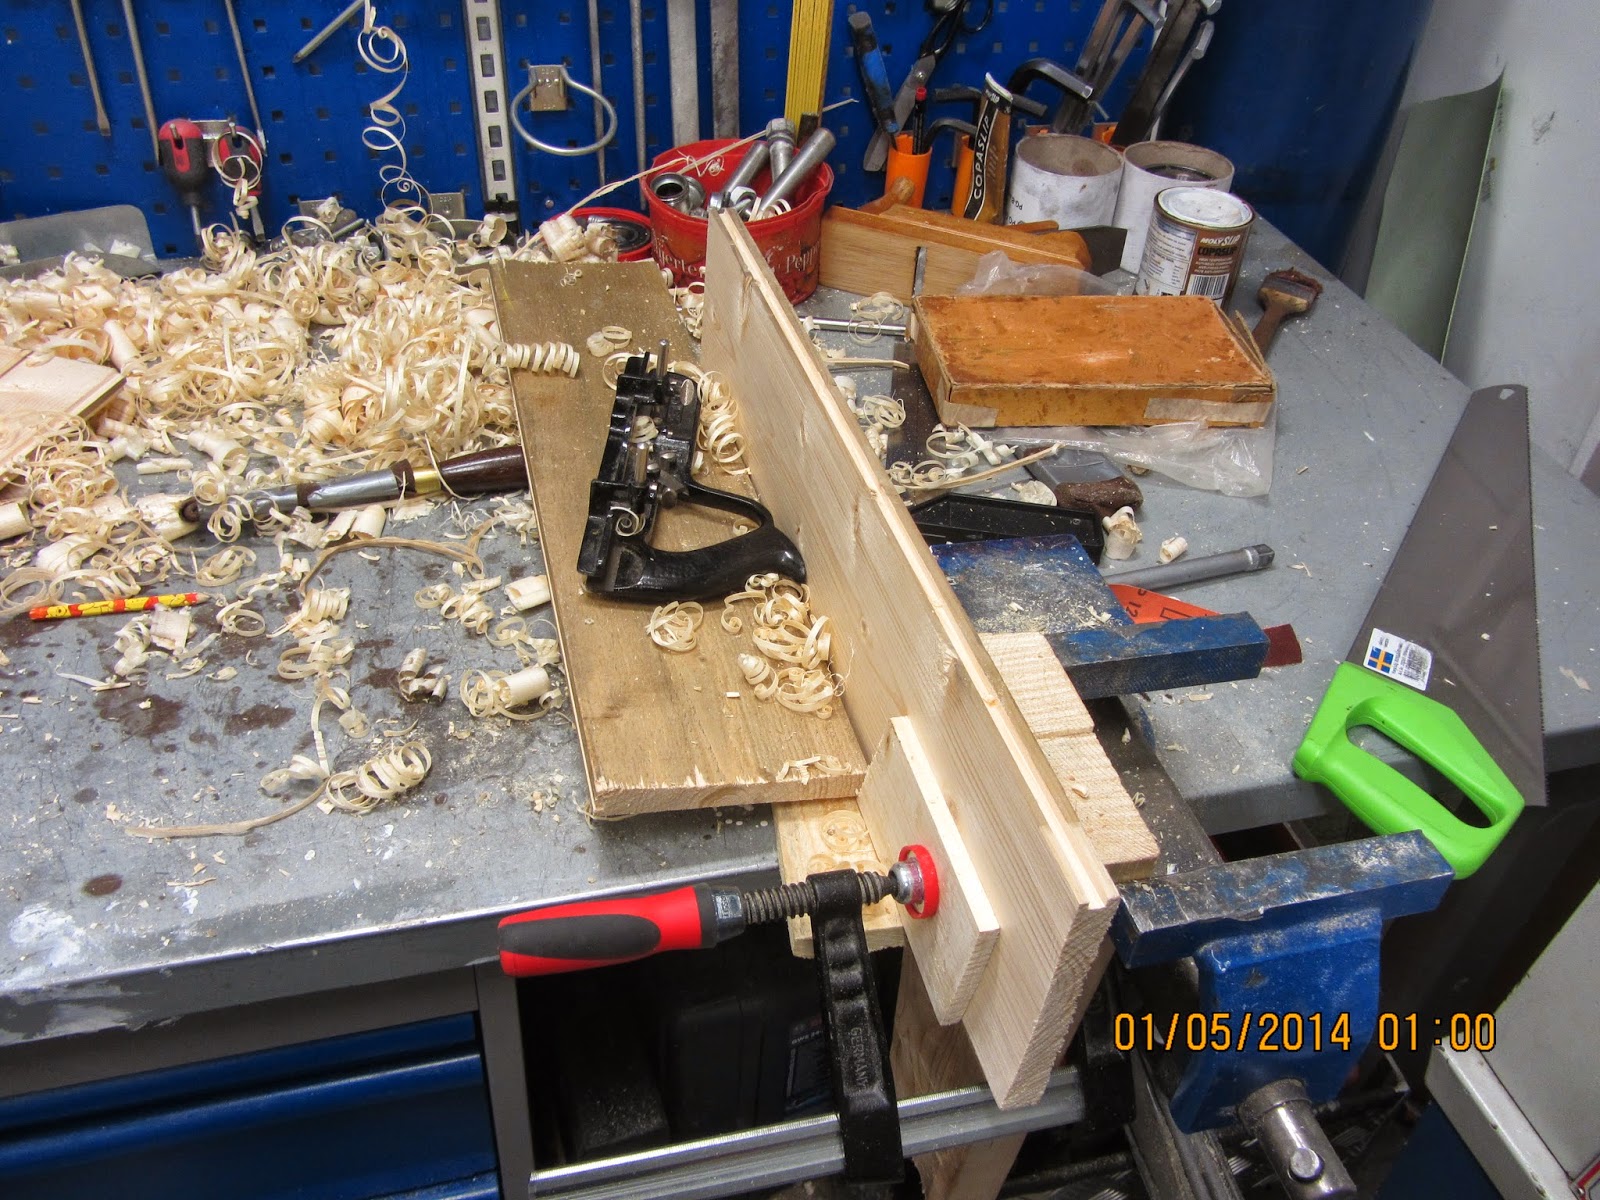
I use my Stanley grooving plane for making tongues and grooves (and rabbets if needed). It is surprisingly effective, When you have only got one flat side, this side will be the reference side to all work done. This is possible as long as you remember to start with the widest setting on the tool, that way there will still be some wood for the fence to touch when you need to make the groove closest to the reference side of the board.

For this particular chest, I just had enough wood left over from the initial board (6m in length) to make a complete bottom. 3 pieces covered the width and I had an additional 1 cm on each side.
Making the bottom a bit too large and then sawing of the excess is an easy way to do it with canted sides.

Third;  I attach the bottom to the chest. The bottom is mounted with the nice looking side (the reference side) on the inside of the chest. The rough side becomes the lower bottom of the chest.
I would prefer to use nails to stay a little classic, but we haven't got any on board, so I used some screws instead.
The wood is so soft that I didn't have any problems with setting the head of the screws about 1/8" below the surface. This low setting is crucial for the next step.

Fourth; with the bottom attached I use my scrub iron in the plane and level out the underside of the bottom. I usually work across the grain as it is easier to remove more material that way. Since the screws are set really deep in the wood, I can plane away without being afraid of nicking the iron.

Making a groove.

Bottom mounted.

Planing the bottom, note the cupping of the boards.


Monday, April 28, 2014

Tumblehome sea chest 4, glue up

After a fairly quiet day, I found myself in the workshop trying to get things ready for the glue up. The boards for the interior shelf and till were cross cut to length and each piece test fitted in the corresponding grooves.
The till and the "high edge" were glued and nailed together prior to installation, to minimize the number of loose boards that I had to incorporate in the glue up.

I had made some really nice dowel protrusions on the lid which I had positioned a little bit out of the way, so that I wouldn't accidentally knock it down while moving around with the rest of the parts, which is something that I have experienced on occasions. The board that falls down usually get some heavy bruising or break of some small delicate detail.
In that respect, putting the board to the side was a success.
What wasn't so successful - was that I managed to forget about it, and I therefore glued up the entire carcase without the lid..
The only good thing is that I had put it aside so early in the process, so I also forgot to drill the holes. Therefore if you don't know that the original design called for a lid, you won't know that it is missing.
Actually the lid wouldn't have fitted anyway, since I forgot to take into account that the sides were sloping, so the lid should be even narrower than I had made it.

Apart from the less than perfect lid business, the glue up went pretty smooth considering the canted sides.
I actually forgot to check if it was square, so I have just been down in the engine room again to check it. The diagonals are a bit off, but I can't do anything about it now anyway. It isn't a lot, so it will still be OK.

The wood that I have used for the carcase is far from perfect. It is flat sawn spruce that was a bit on the wet side when I started. The panels have started cupping quite a lot, and some of the ends have shrunk a bit too. This resulted in some cracks when I negotiated the pins and tails together. I still believe that the chest will end up looking OK, because the plan is to paint it once it is finished. The thing is that I have started to get the idea, that maybe once I should try to make a decent chest out of some wood that didn't come from a pallet or some other shipping aid.

The glue up

Interior view, till (without lid) and the "high edge".

Sunday, April 27, 2014

Tumblehome sea chest 3, Improved planing stop

For the interior parts of the chest, some 1 cm (3/8") thick boards were needed. I found some old pieces that could be sawn and planed to fit.
A total of 5 small boards are required for having a normal till with a lid, and the German narrow till (the "high edge").
For the "high edge" I was able to rip a board down the middle, and it gave me close to the dimensions that I had imagined while considering the build. The vertical part of it is 4 cm, and the horizontal part i.e. the bottom is 3 cm. This gives an interior of the "high edge" of 3 x 3 cm.

The front board of the normal till is 9 cm high, and the bottom board is 10.5 cm wide. The lid is 10 cm wide, and due to the canted ends, it protrudes approximately 1 cm over the vertical front. This is to make it easy to grip the lid with your fingers for opening.

The plan is to make two small dowel shaped protrusions on the back side of the lid, which shall fit into two corresponding holes in the sides of the chest. This way, the lid will be hinged by itself. I have seen this approach used on some old chests, and it is fairly simple to execute.

I have improved upon my planing stop. It used to be a loose piece of wood lying on the top of the workbench and touching the bulkhead. Occasionally it would fall down or move around which didn't make things easier.
I have tried to clamp the planing stop onto the bench, but then I risk hitting the clamp with either the plane or my hand. So I have moved away from this idea.
The latest fashion regarding planing stops is to tape them to the bench top and to the bulkhead. If you use yellow/black warning tape, you can give the whole set up a real quality look!
Look at the picture and judge for yourself, I am sure you will agree, that the same effect can not be had using blue masking tape or ordinary duct tape.
The next level will be to find a planing stop that is a little longer, to prevent my hand from hitting the bulkhead while planing. That would really take the set up to a higher level.

After planing all the boards needed, I tried to position them on one side of the chest, and it looked OK.
The next logical step is to cut the pieces to length and drill the holes for the hinged lid of the till. Then all should be ready for gluing up the carcase.

The improved (professional looking) planing stop.

Aerial view of the till and the "high edge"