I elegantly skipped blogging after the official DCBE part was over. There was just too much stuff to do - to be bothered with sitting in front of a computer.
As a side note, I didn't work full time in the nanny rocker every day after the DCBE, but I did try to put in a couple of hours whenever possible. I didn't keep track of the time used in the build, but I think I am well past 100 hours.
On the Friday (day 5), we had a visit from my dad, and
Mikkel from the blog Haandkraft also paid us a visit.
It was nice to meet Mikkel and talk with him about woodworking in general and also about the challenges of blogging about woodworking in Danish.
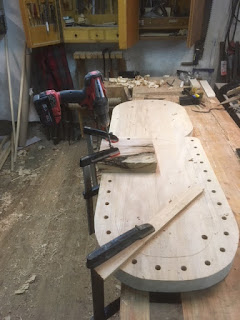
Using the whitebeam (Sorbus Intermediare) for seat material seemed like a great idea since it is dense, incredibly split resistant and sms to be not porous at all. The problem with the material was that it was incredibly hard to work. traversing the grain only helped during scrub planing. Traversing during the hollowing of the seat didn't do anything to help.
I ended up doing all the saddling with a gouge and a mallet and two and a half full days of work.
The armcrest was assembled after I had test mounted all the short spindles, so I could assess how long the piece should be.
When the time came to dry mount it, it was something like 1.5" too short, and besides the glued part broke. I had expected some sort of challenges along those lines, so I had milled more wood than I needed of the same dimensions, so I just took a piece of the spare wood and made a new insert for the straight back part, which was also where the piece had failed.
Large complicated glue ups are definitely not my favourite thing, and I am certain gluing on the armcrest is the biggest and most complicated glue up I have tried so far. 28 short spindles, 7 long spindles and two end spindles (with tapered holes) all had to go together at the same time. In addition there was a bit of spring back int he arm crest, so it was definitely a task for liquid hide glue.
Mounting the back piece was not much easier despite only needing to receive 7 spindles, and perforating the armcrest two places. There was a bit more spring action in that piece, and the risk of breaking it all was nerve wrecking.
Originally one side was supposed to come approximately 5/4" further down, but it started binding and I didn't want to risk anything, so I stopped and decided that I could fill the small gap with some sort of putty instead.
I reasoned that the seat had to be level at stand still, to be as comfortable as possible for the child in the crib part of the nanny rocker. This will make the chair part slightly less comfortable and relaxing compared to a reclining rocker. But the nanny rocker is not intended to be a slouching chair for the nanny, but a place for the nanny to sit up straight and knit while soothing a baby at the same time!
So I leveled out the top part of the seat and marked the correct seat height on the legs.
The legs were sawed to length, and I marked out for the positions of the rockers. Mortises were made in legs, and the ends of the legs were terminated by sawing at an angle.
Finally each joint was secured with a peg.
The plan is to paint the nanny rocker in a shiny dark green. But given that I completed the piece the day before going back to sea, I thought that it was a wise decision to wait until I got home next time before attempting to paint it. Instead of experimenting with homemade milk paint or linseed oil based paint, I have purchased a standard paint from Jotun.
Those people who have seen the chair so far seem to be appalled to learn that I wish to paint it, but I think that the many different grain patterns and the visual difference between the elm, whitebeam and ash is kind of disturbing to the eye.
Thoughts about the build:
To someone like me with a very limited experience in building Windsor/stick chairs, the sack back nanny rocker is a huge challenge.
I am so glad that
Ray Schwanenberger provided me with a set of plans, so I had the knowledge of building something that would actually work. That was a great comfort compared to building something of my own design that might not work or look good.
I haven't got much experience in steam bending, but so far I have learned that not rushing it - is a good thing.
There are a lot of individual parts that are not very difficult to make, but given that there are so many it still becomes a daunting task. I opted for uniformity rather than exact copies for all the spindles. My guess is that since there are so many of them, few people will never notice it they are not exactly the same, and even fewer people will care.
Assembling the individual pieces is just as intimidating as I remembered from the loop back settee I made four years ago. very step becomes more and more frightening because of the risk of messing up the accumulated hours of work.
Now I just have to wait for some grand children to emerge in the horizon... (Or lend out the nanny rocker to a friend who is a bit closer to becoming a grand parent).
Sack back nanny rocker.
Seat, turnings and rockers in whitebeam.
Backrest and spindles in ash.
Armcrest in elm.
Bertha inspecting the nanny rocker.


